Do it right: How to stretch the external rotators of the hip

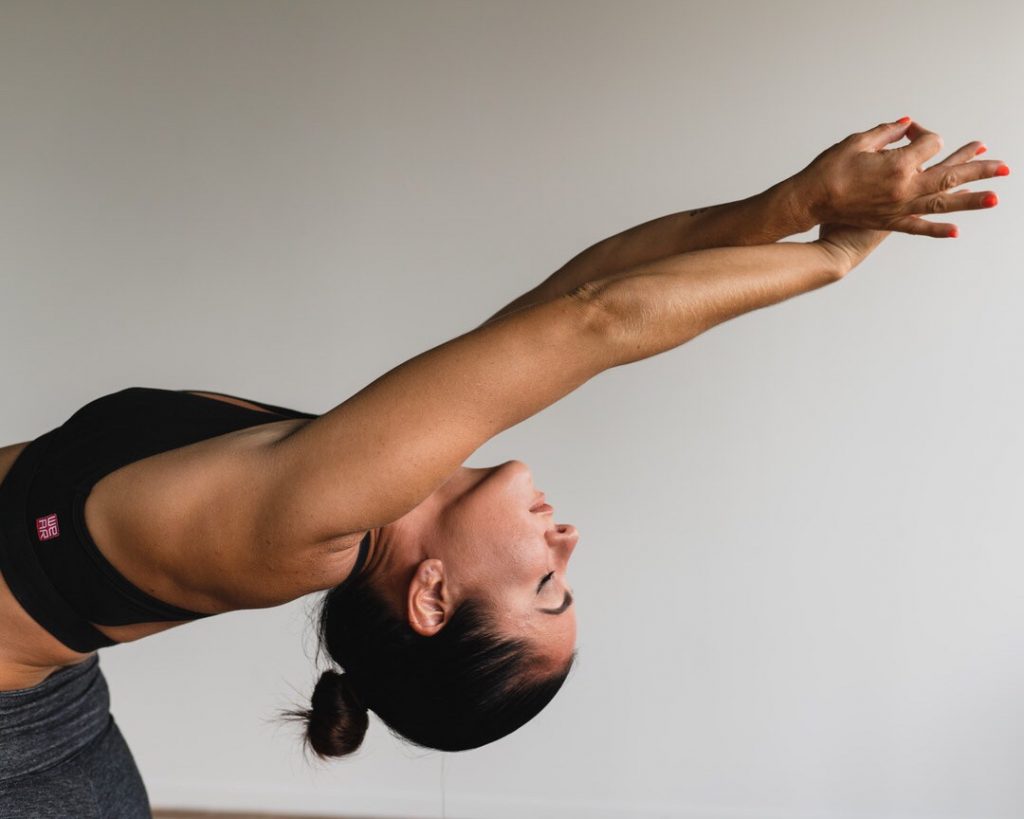
Hips move, as they are mobile joints just as your neck, shoulders and ankles are. All muscle helps us move and maintain our posture, especially the hip complex.

For many of us, we don’t stretch them enough and end up with tight hips, specifically the external rotators. If you do stretch regularly, you know that Pigeon Pose is an excellent hip and buttock stretch that can help you restore movement to these areas. But it can hurt sensitive knees, or be impeded by a current injury, as it requires the shinbone to be at a 45 degree angle beneath the front hipbone.

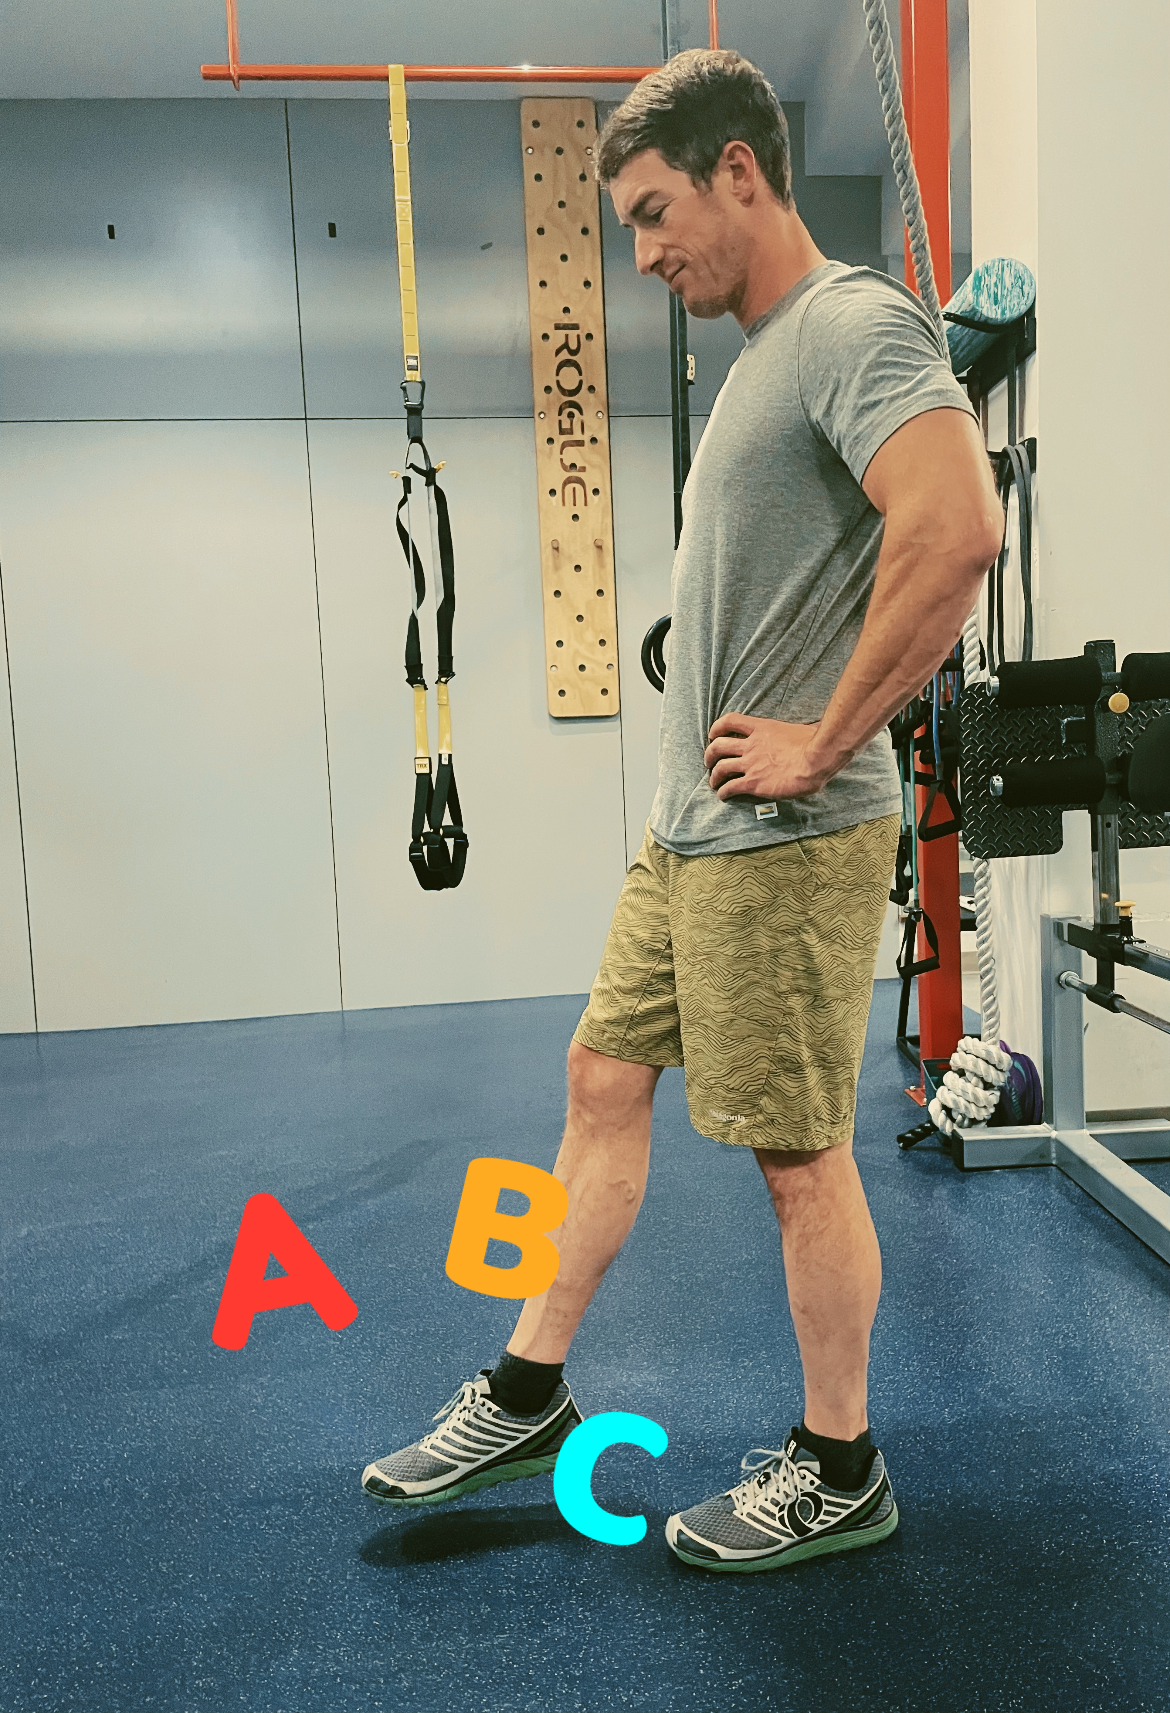
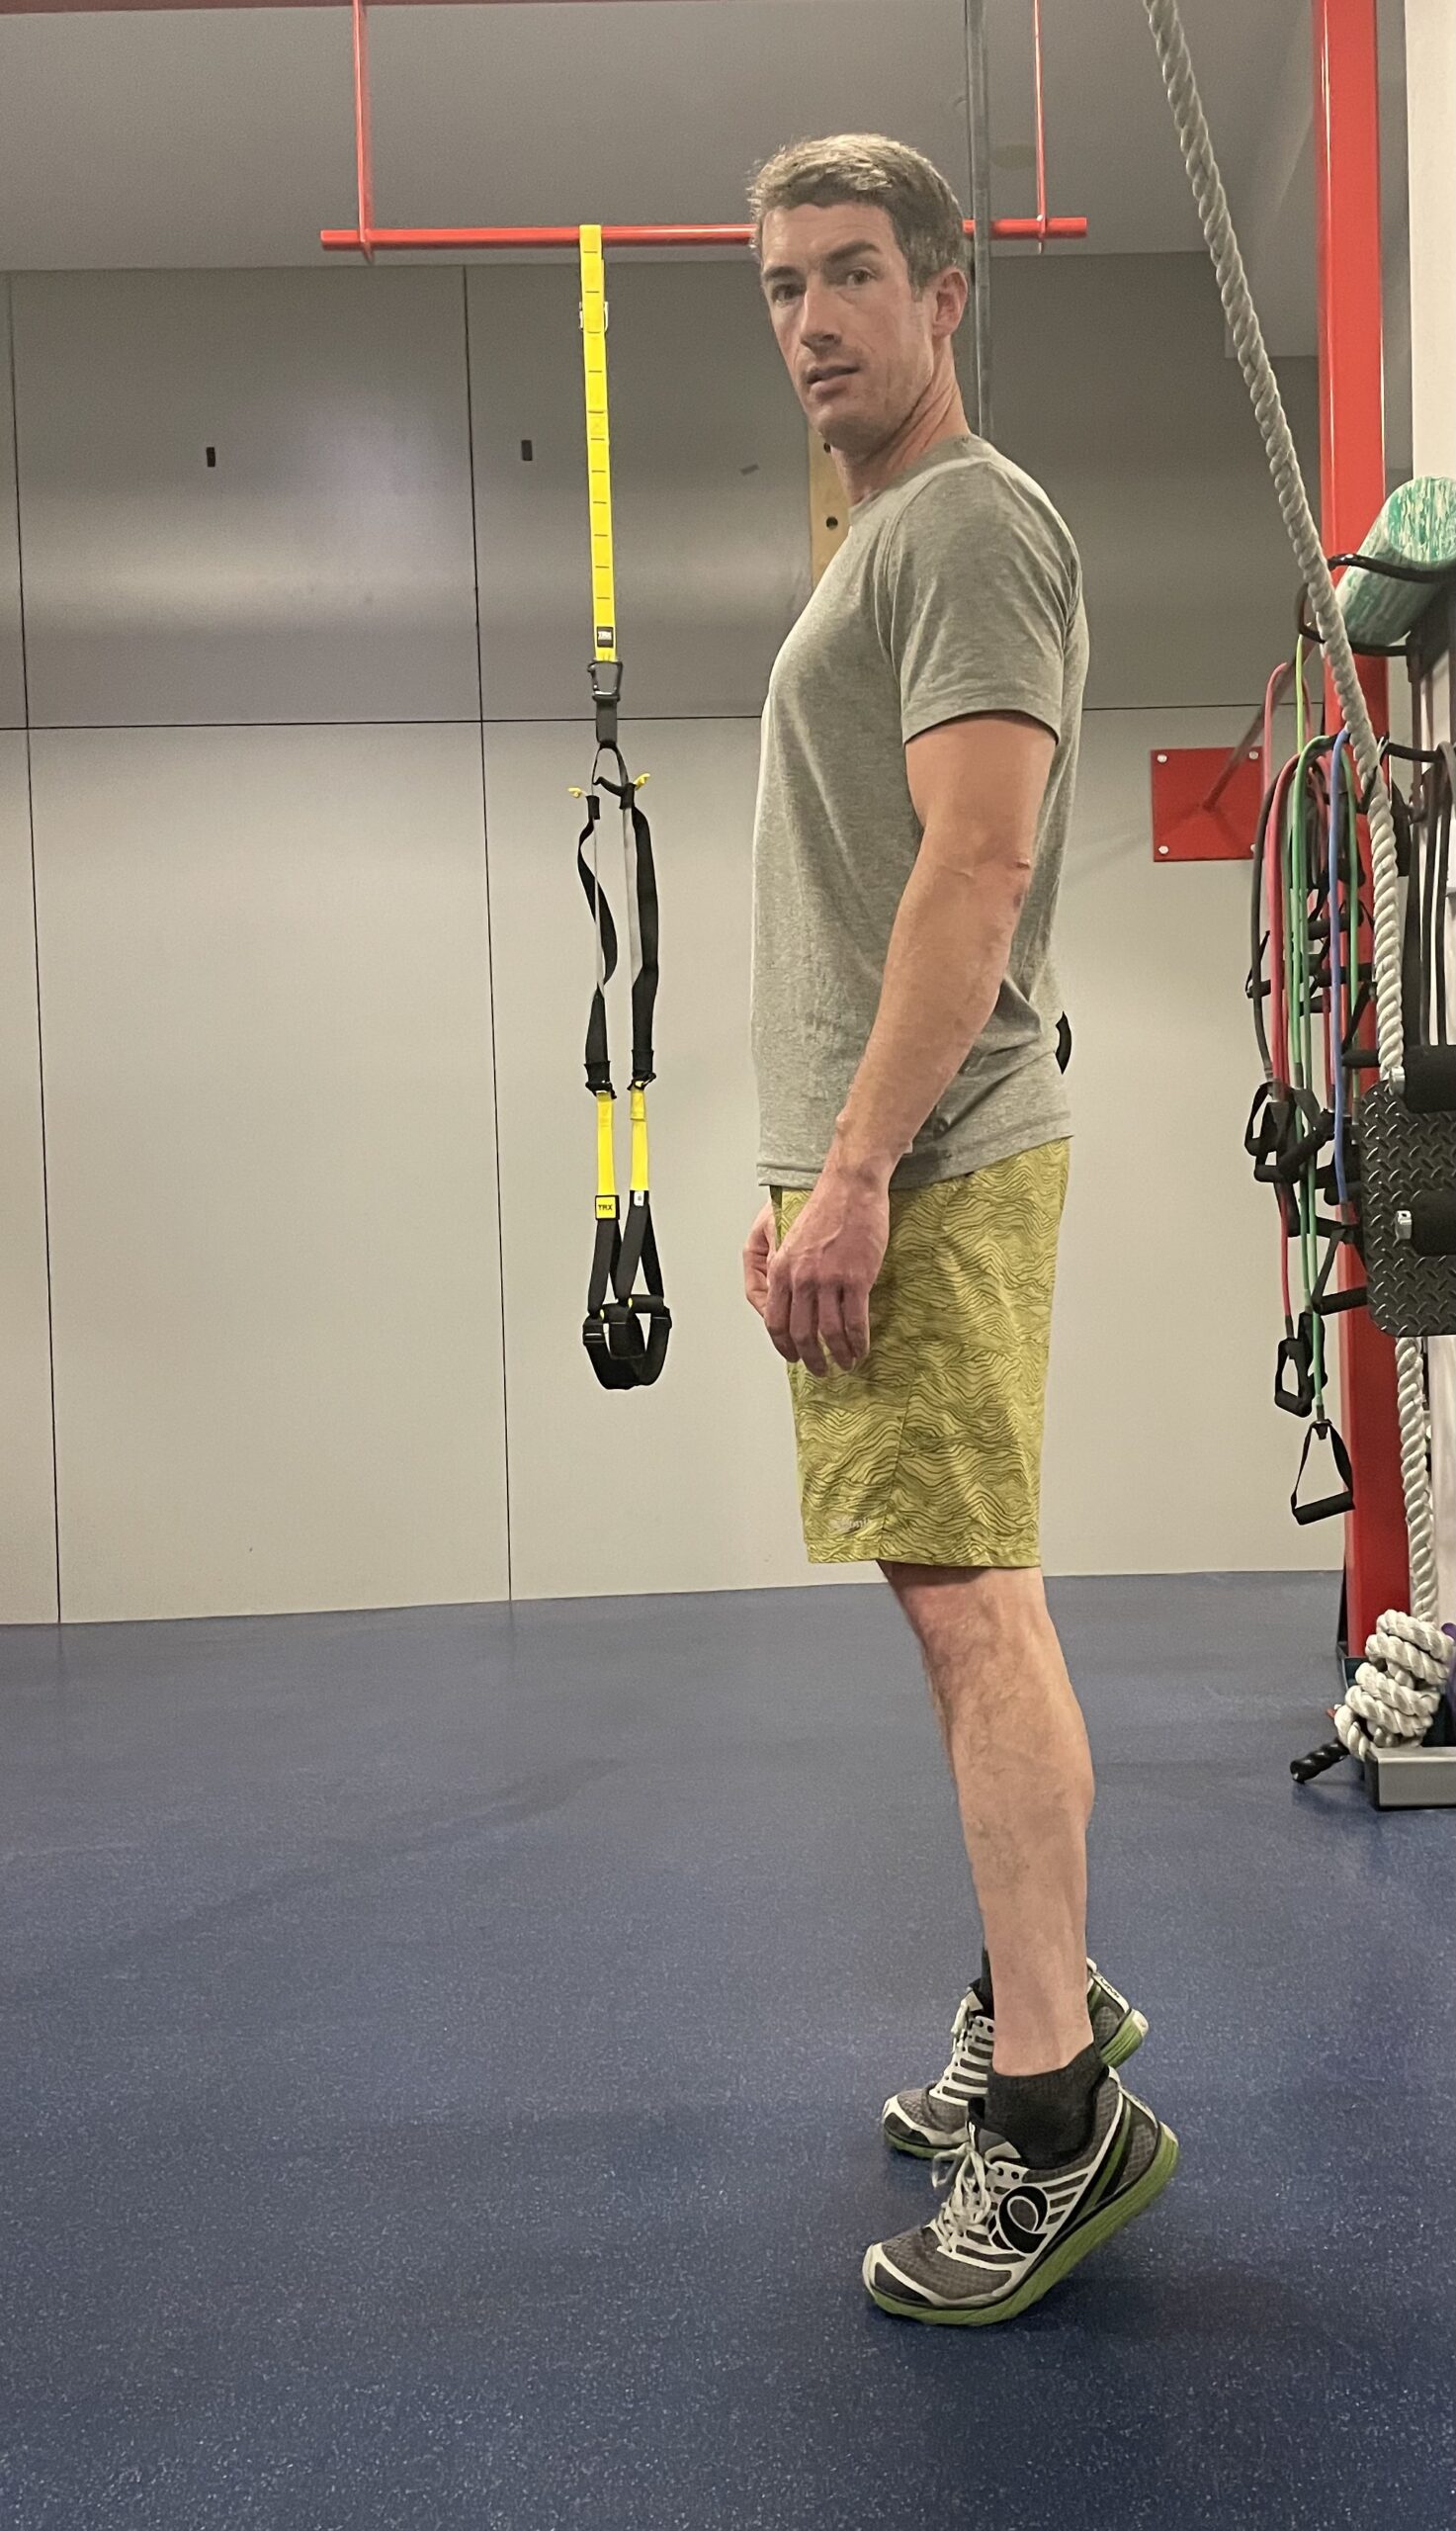
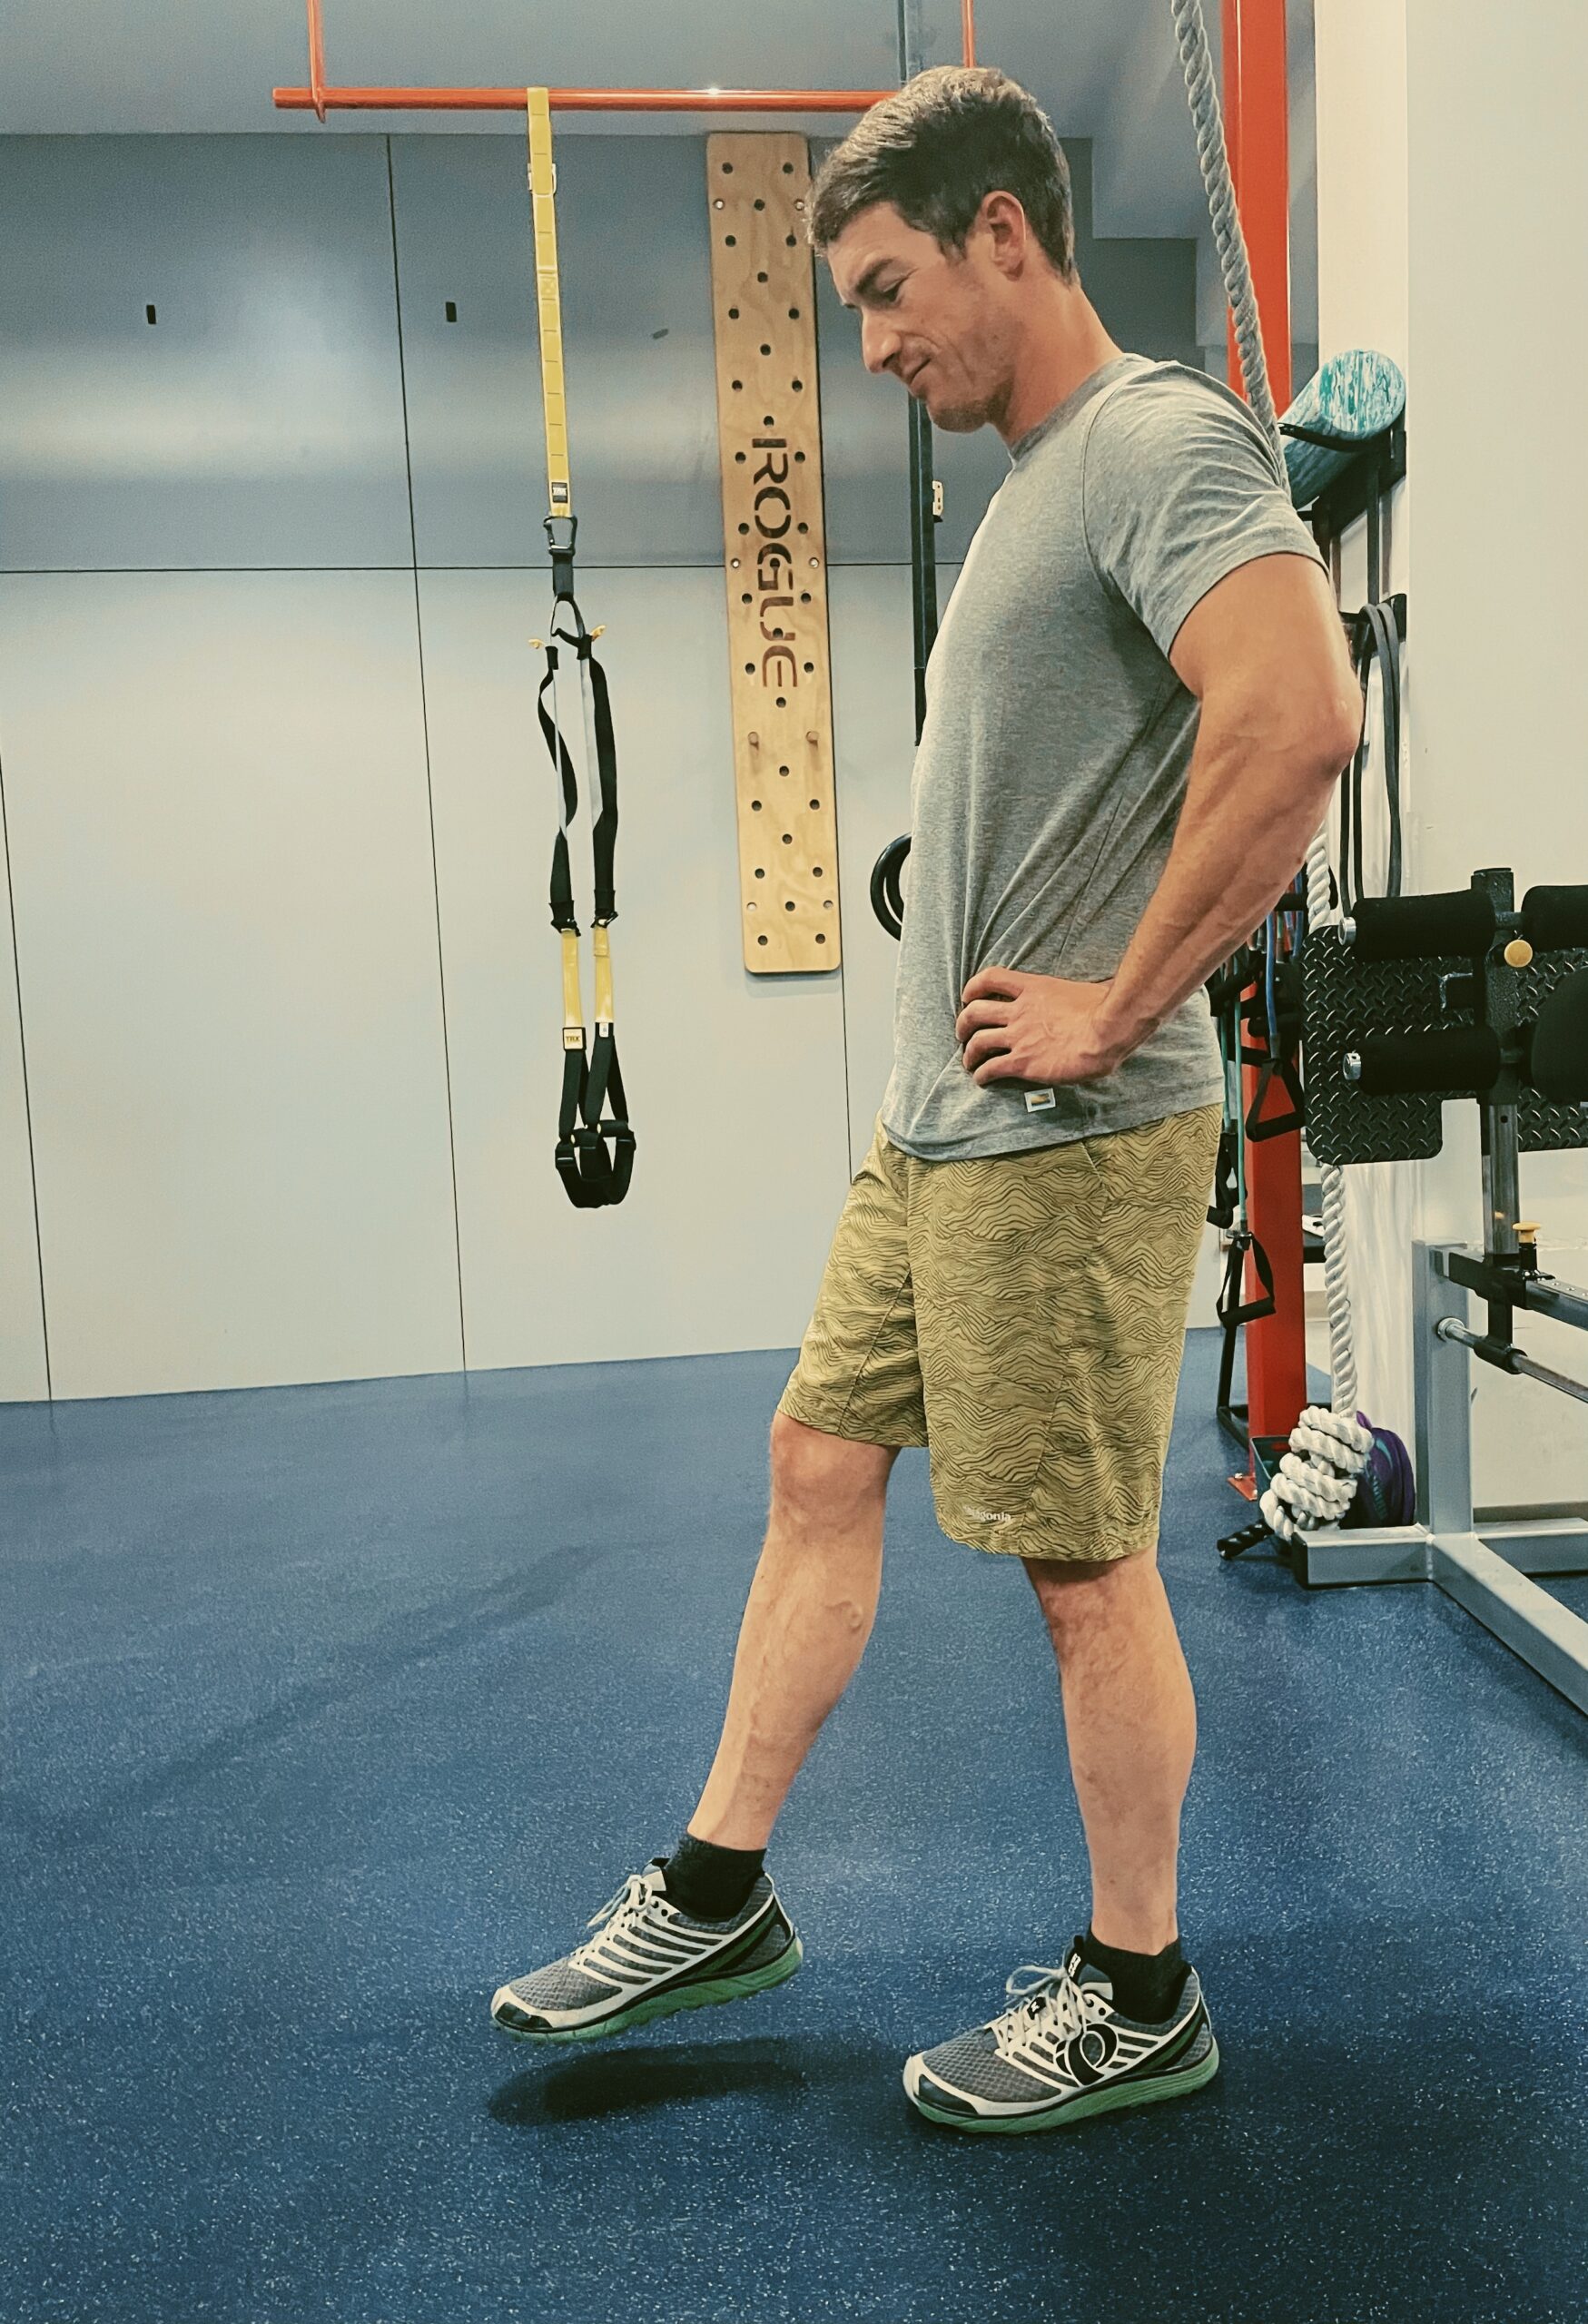
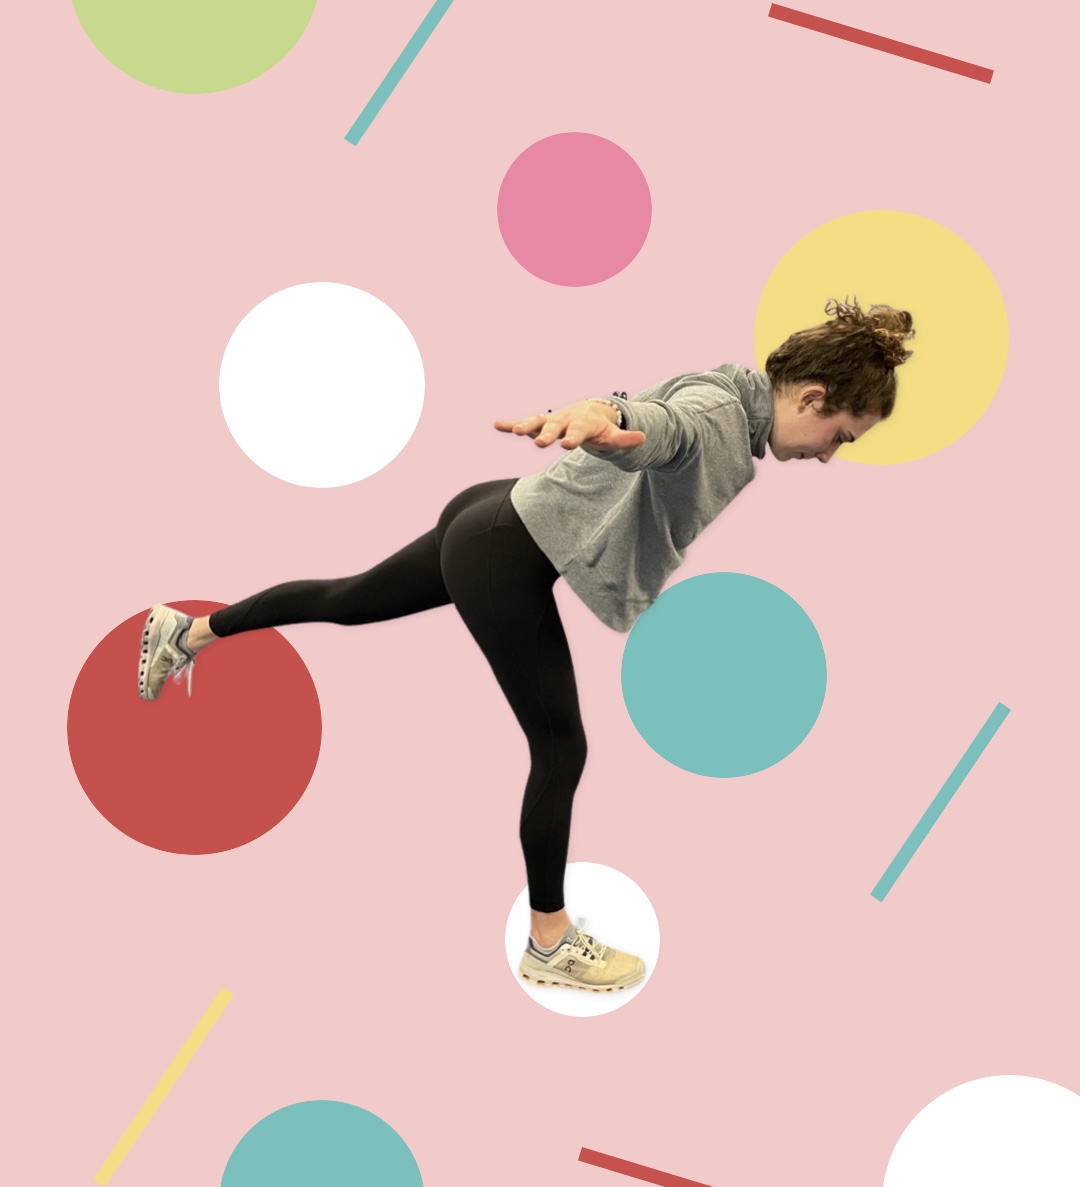
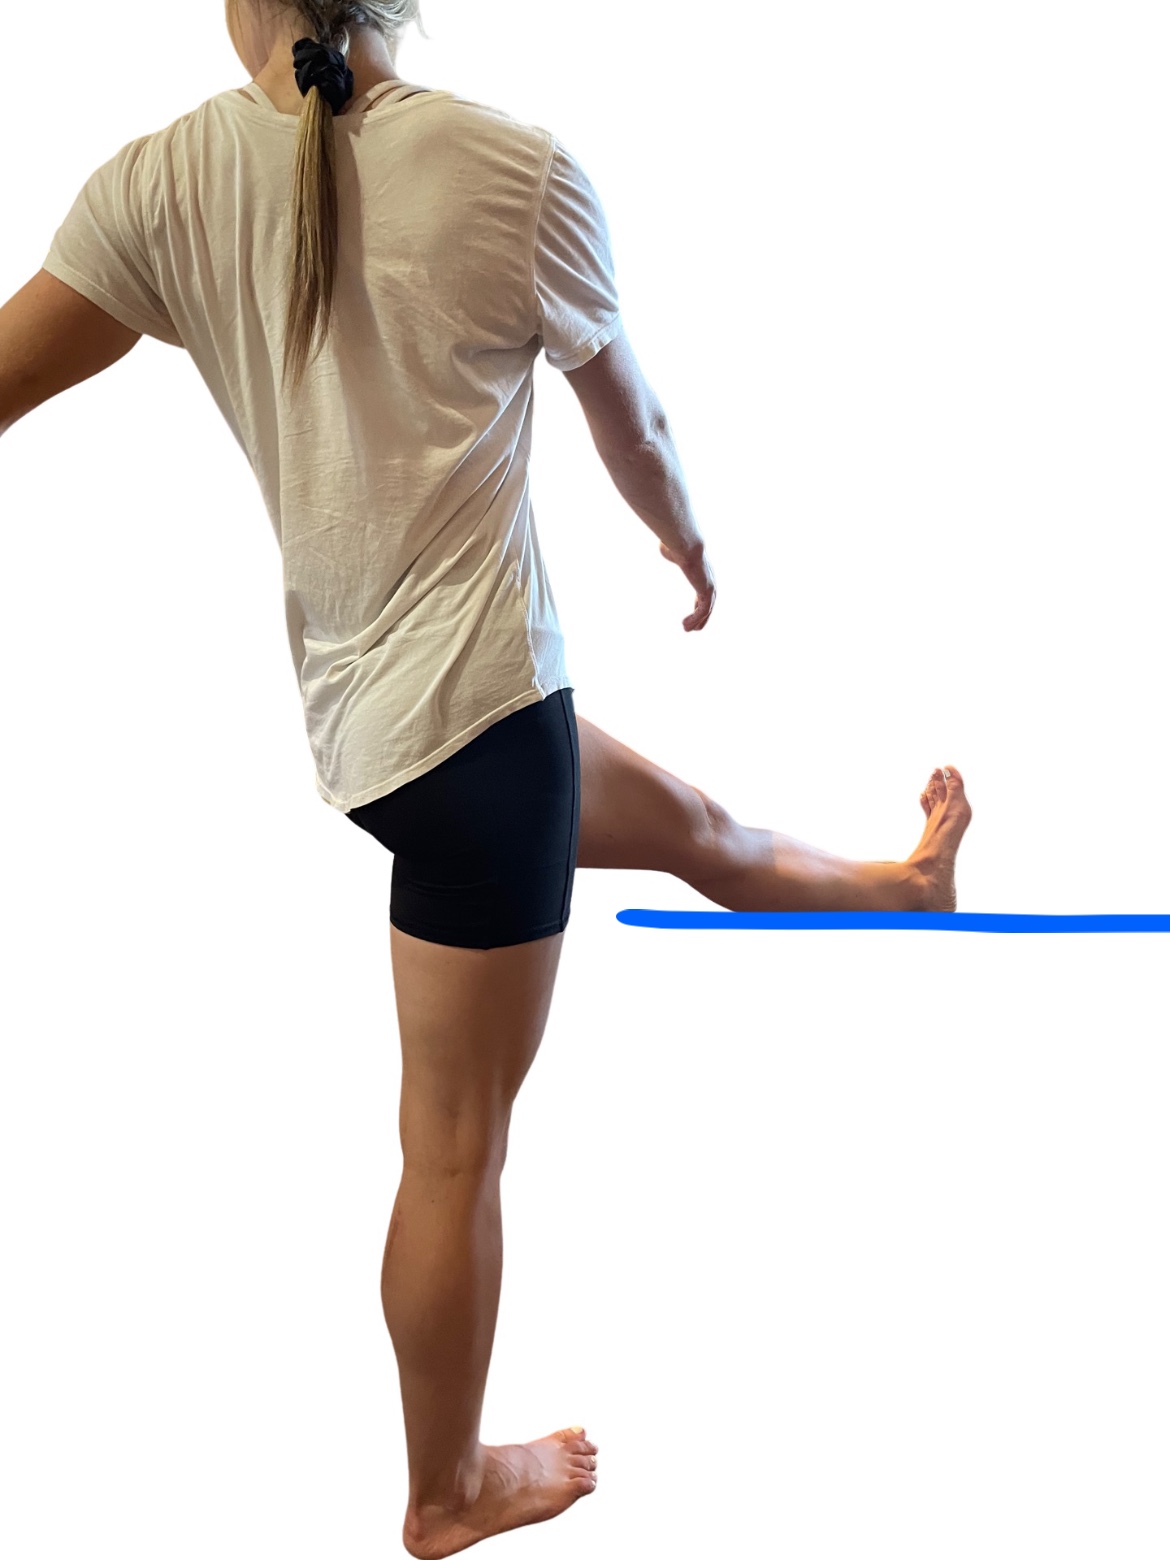
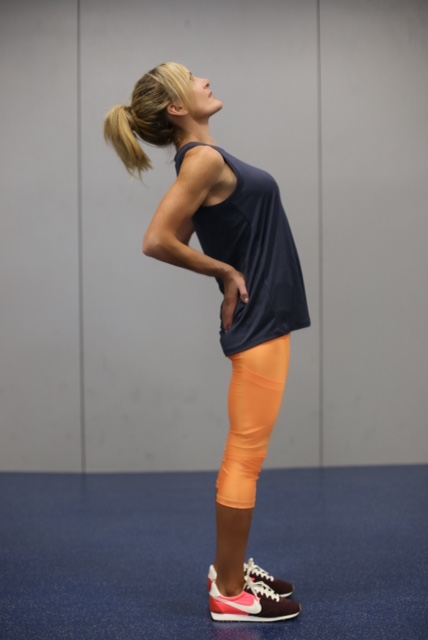
Hips need both good mobility and strength in every activity from walking to skiing. The main job of the external rotators of the hips is to stabilize the pelvis during the swing phase of walking. For example, when you step out on your right foot, as you transfer the weight into that foot, there is a moment in which you are standing on one leg.

As your foot and leg absorb your body weight, the hip internally rotates as you step. At the same time, the external rotators of the right hip tighten to keep the pelvis level to the ground as you swing your left foot through to step on it. This action slows down the knee as it moves toward the midline of the body, so your knees don’t collapse inward.

Good hip mobility and strength allow you to have better biomechanics from the hip down to the foot. Tight or weak hips affect not only a normal gait, but every activity that you enjoy doing.
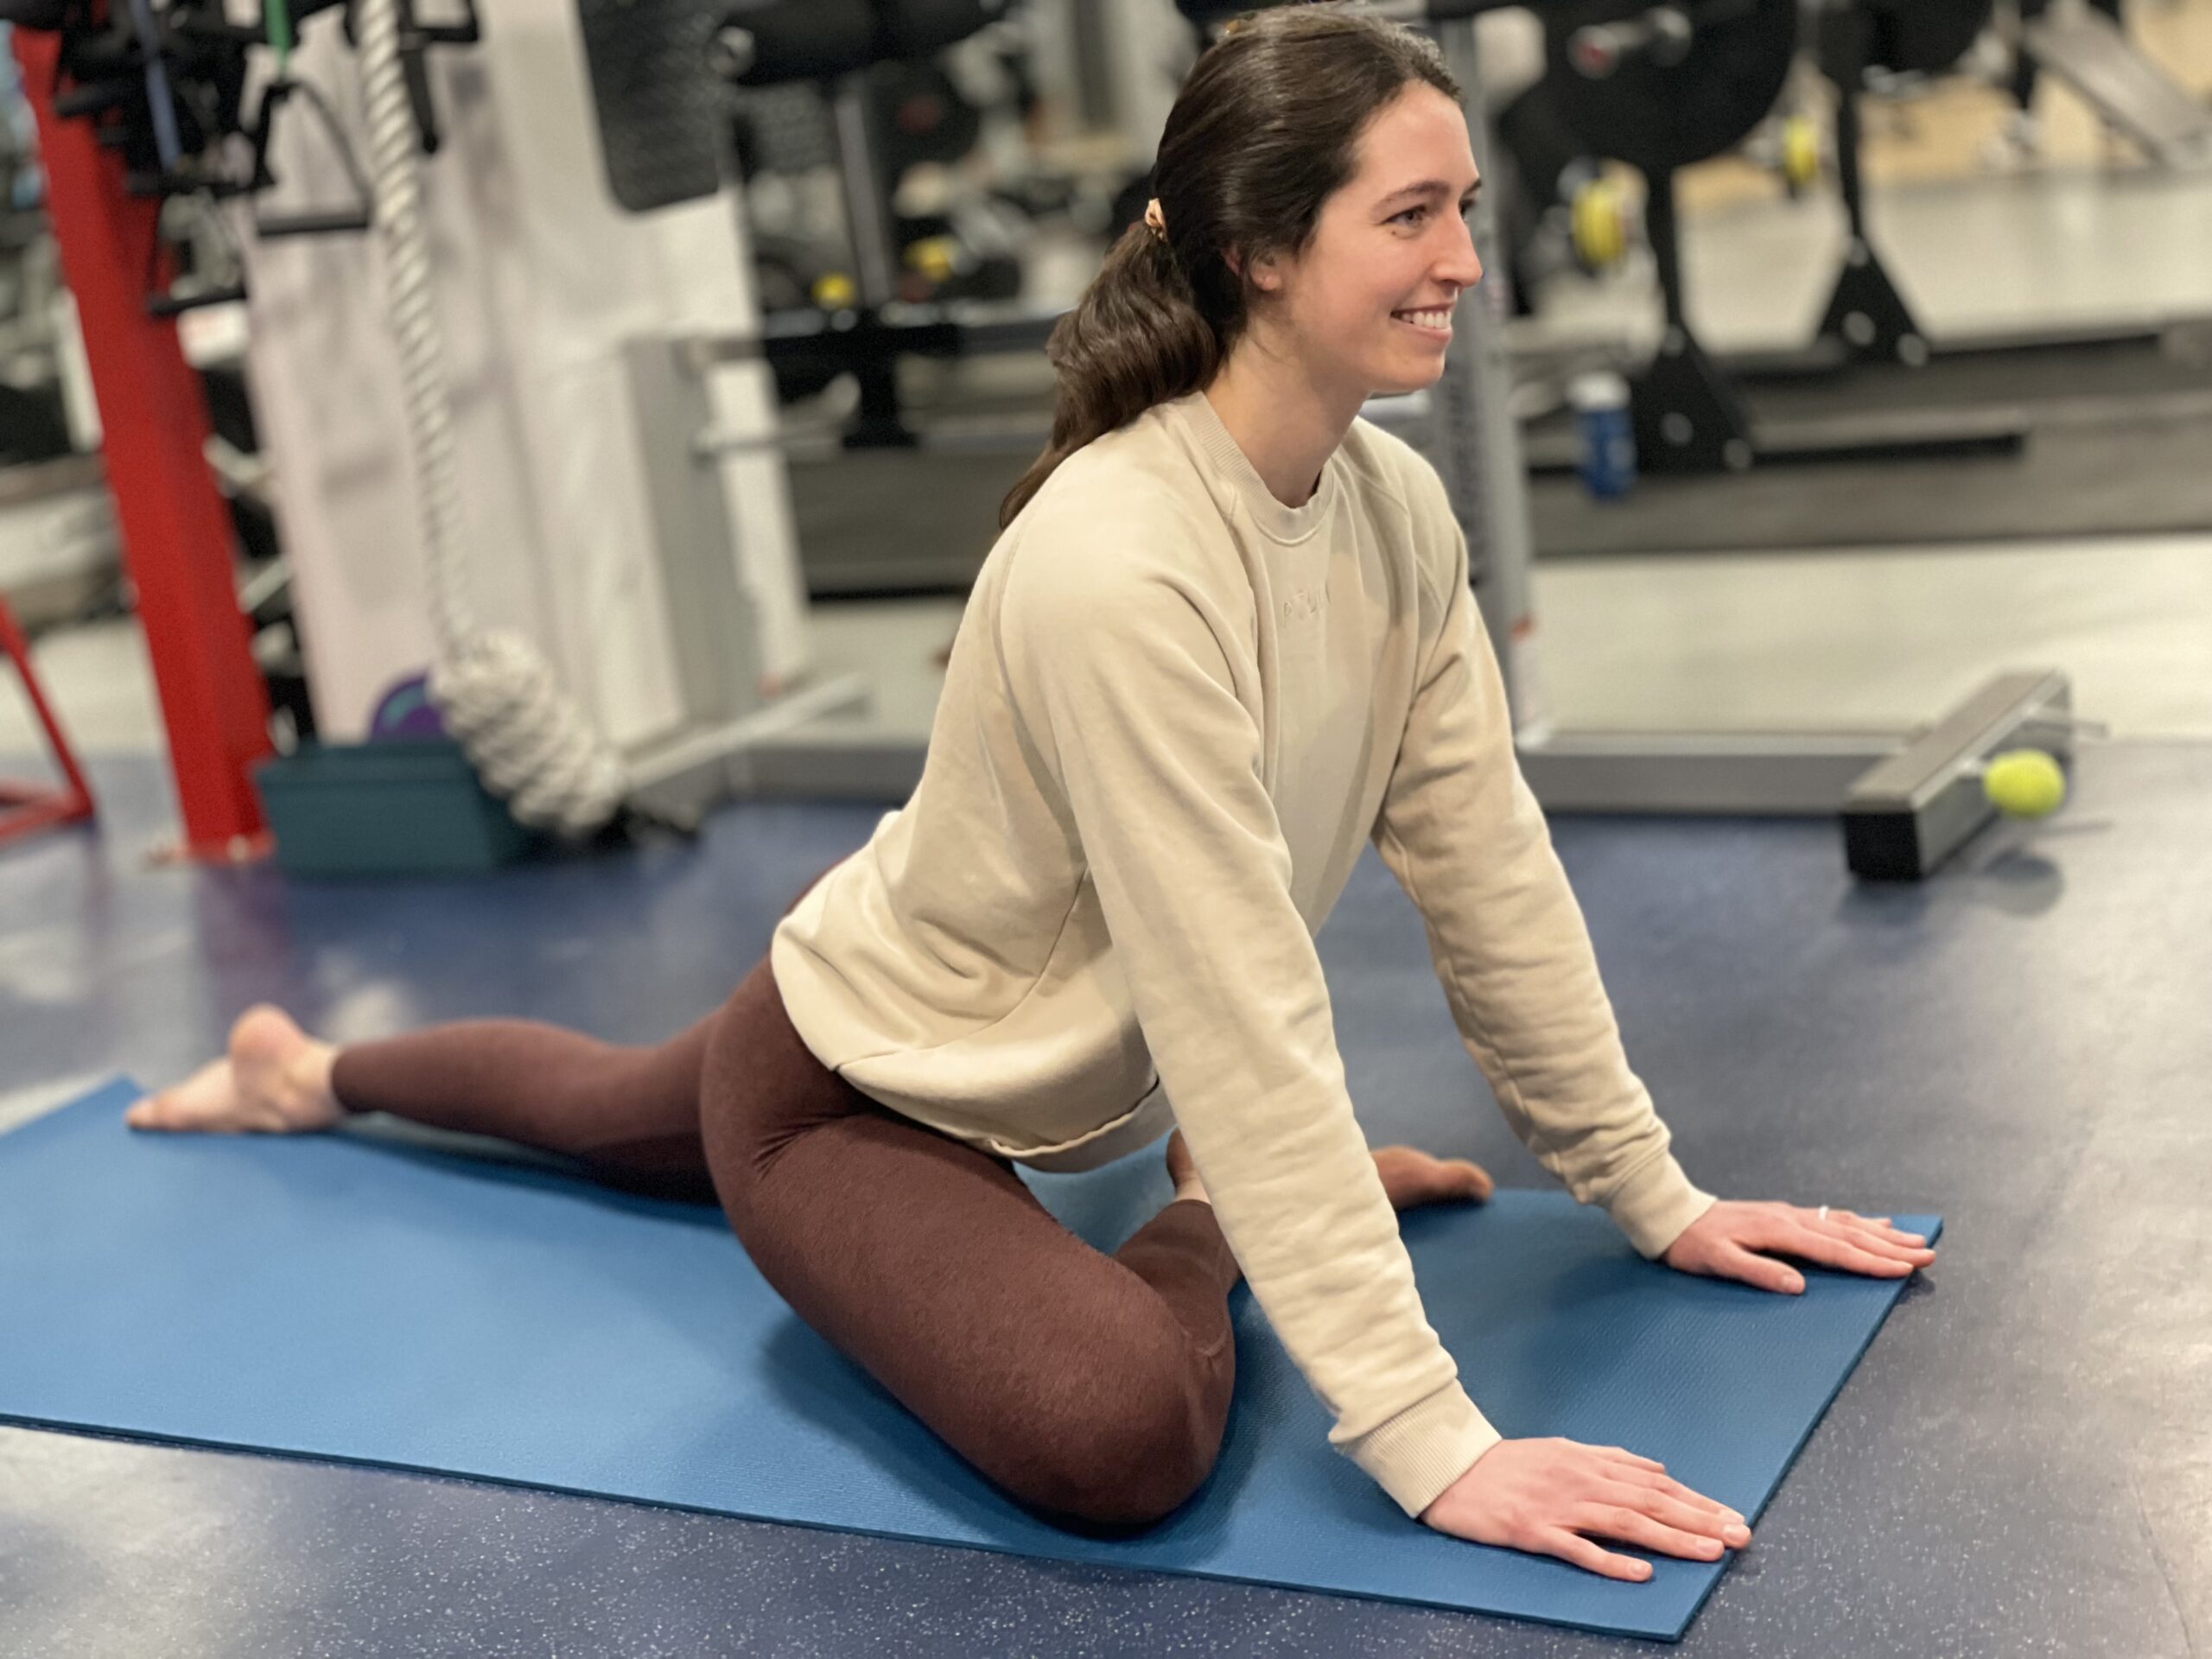
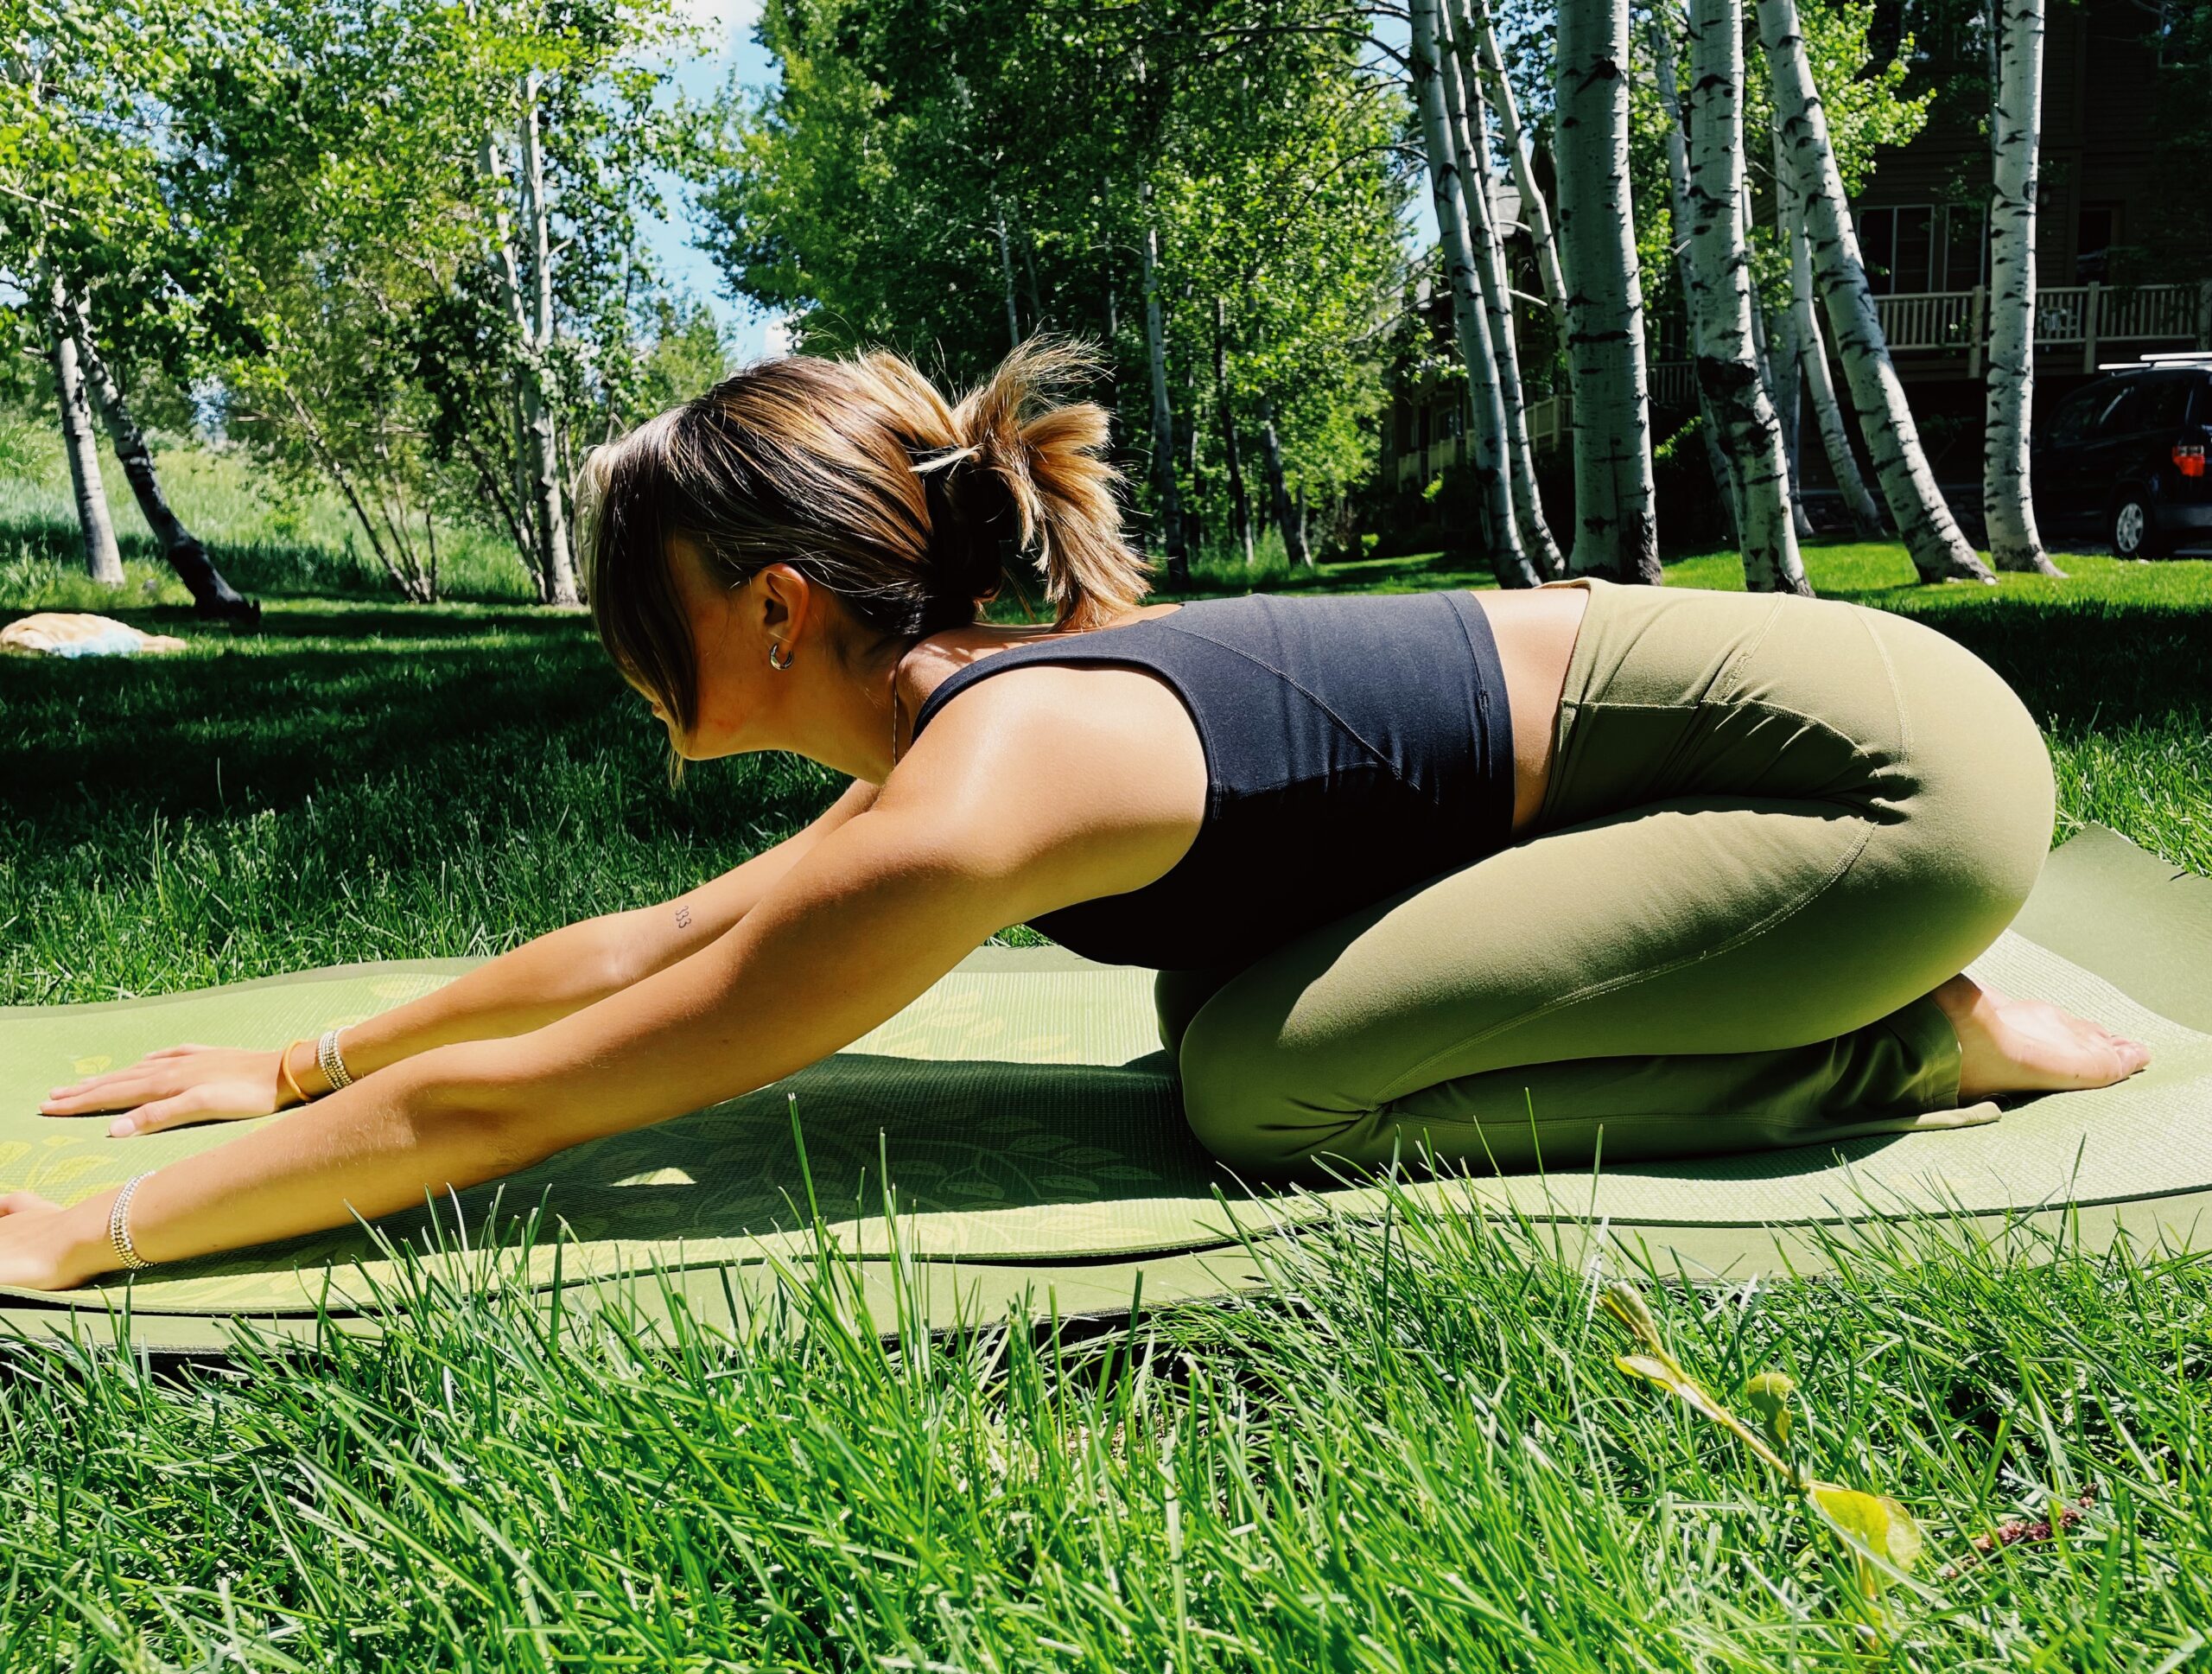
Pigeon Pose

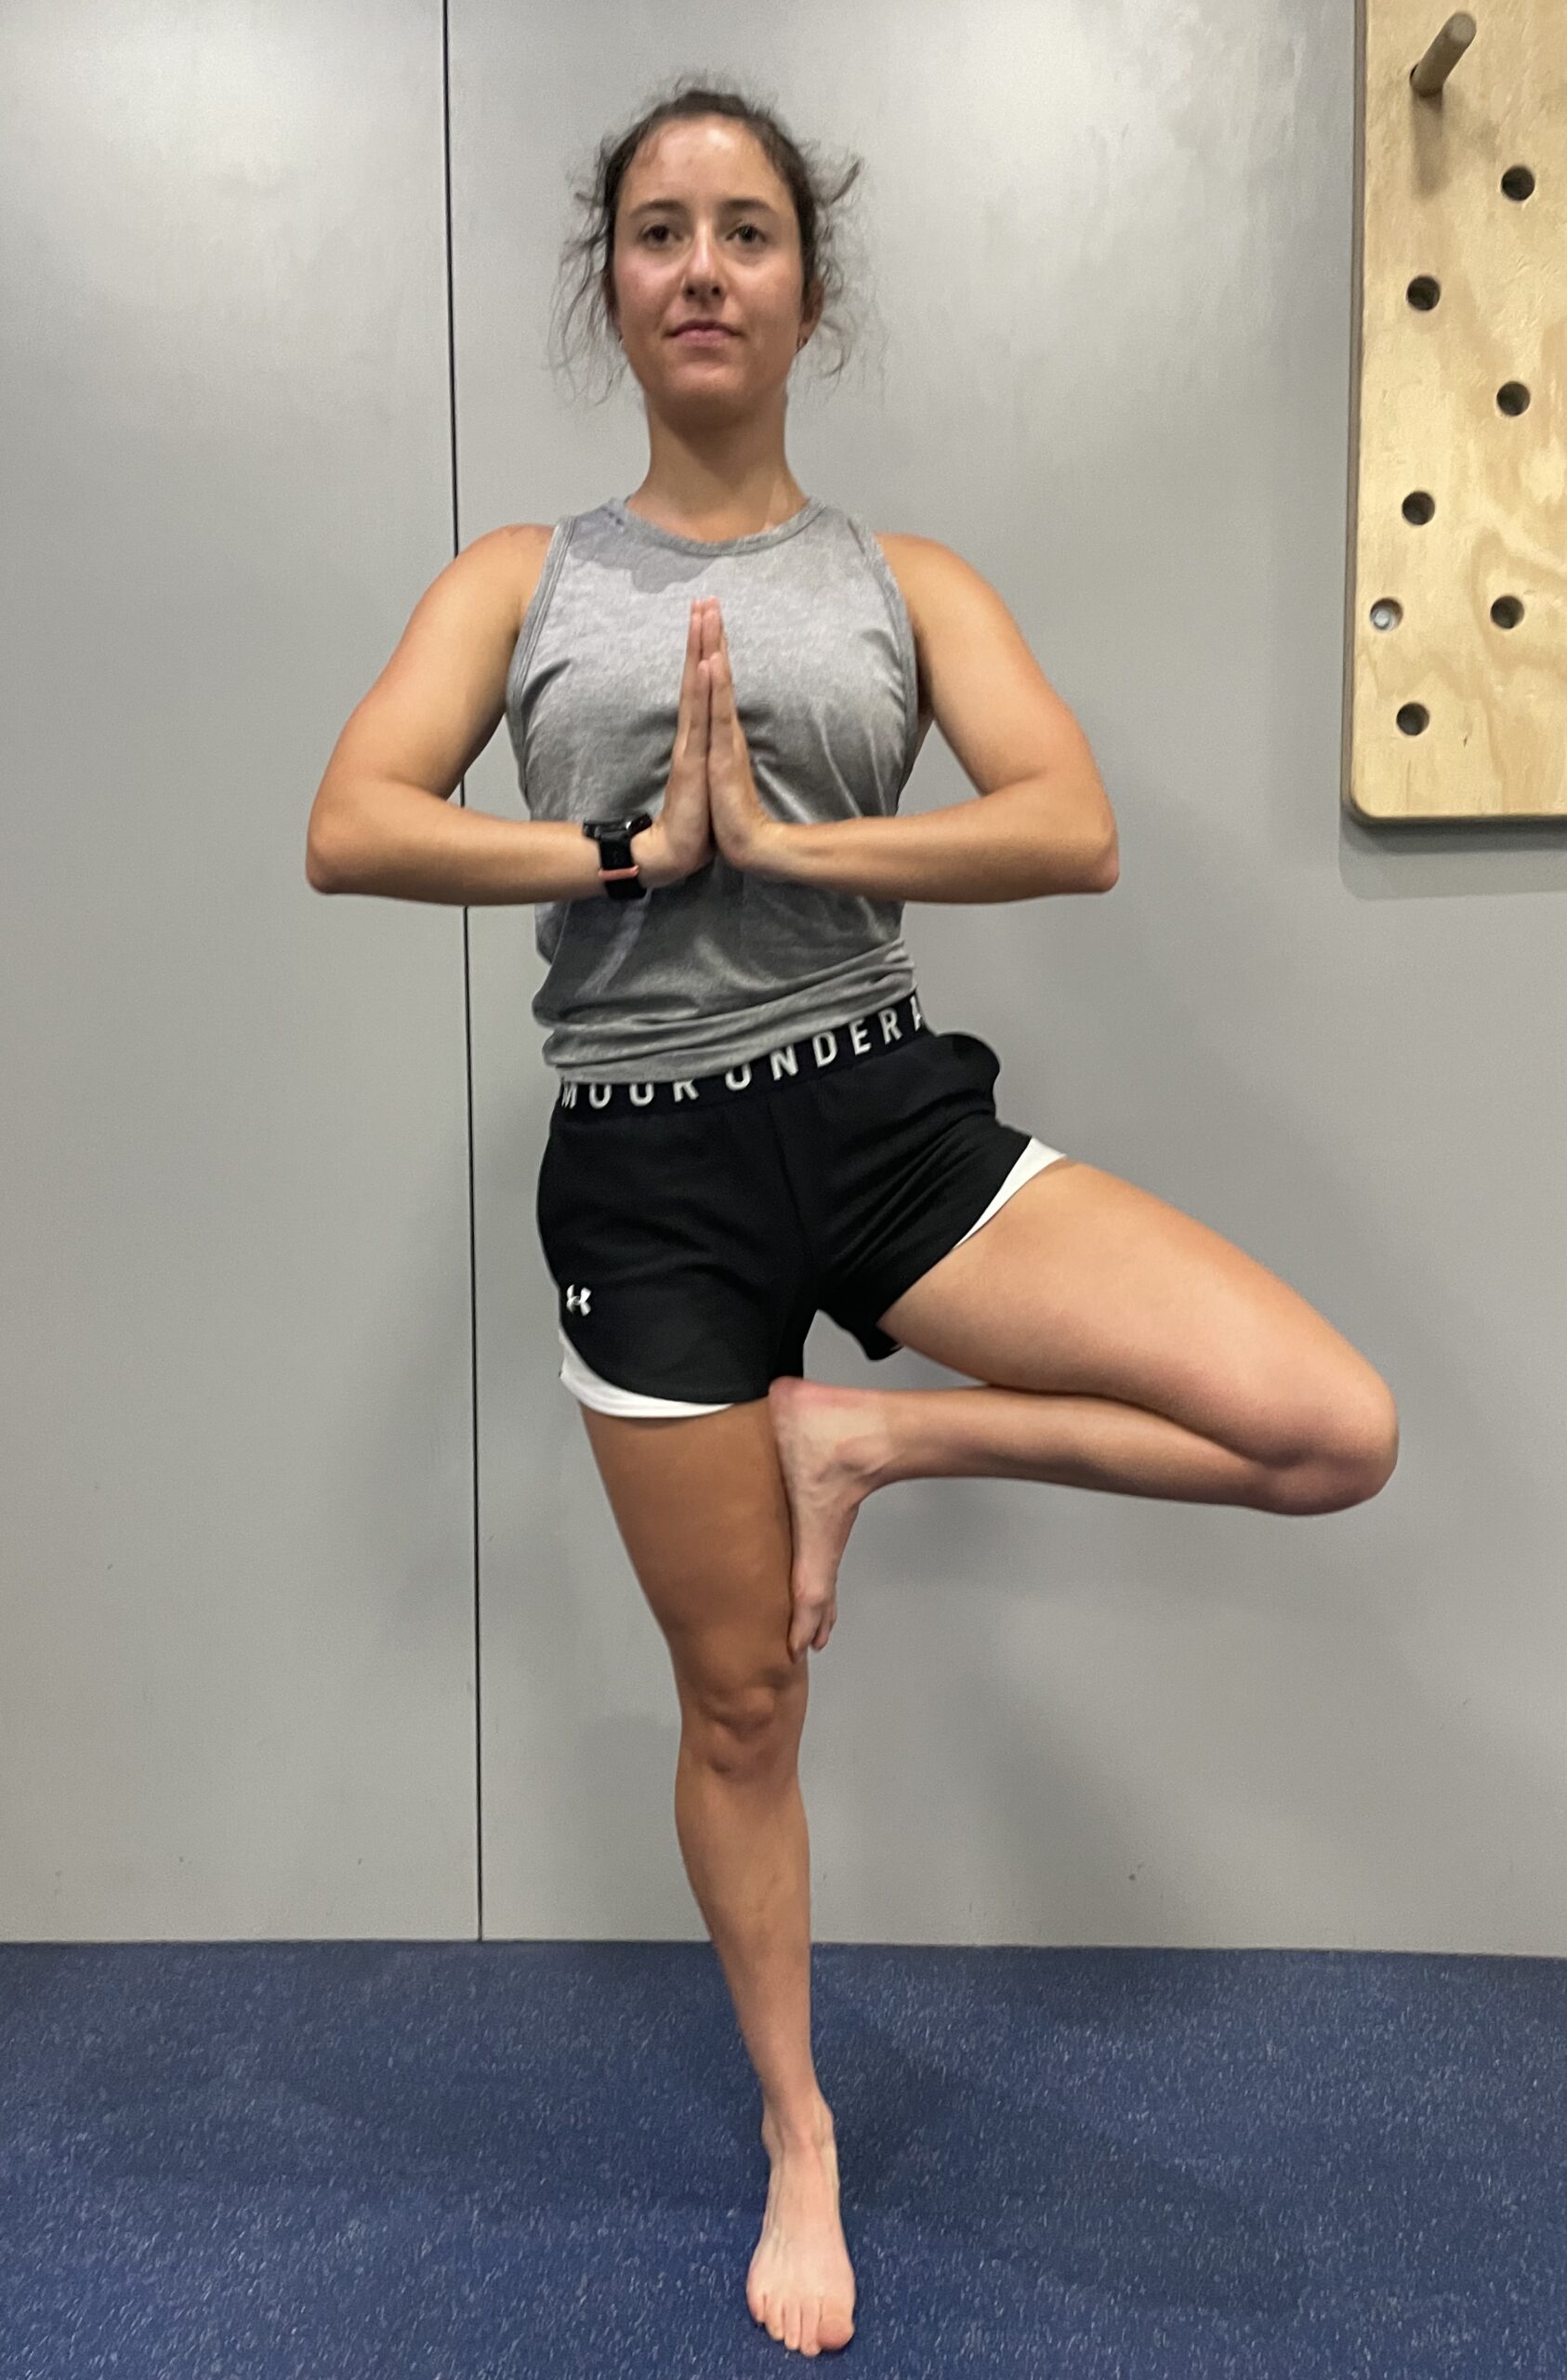
When your hips are too tight, you may feel crooked, sore, or admit to yourself that you really need to do some yoga. When your hips aren’t tight—particularly the posterior muscles of the rear—walking, getting out of the car, climbing stairs, or skiing can feel effortless.

Here are two variations to Pigeon Pose that you might like to add to your daily stretching routine.

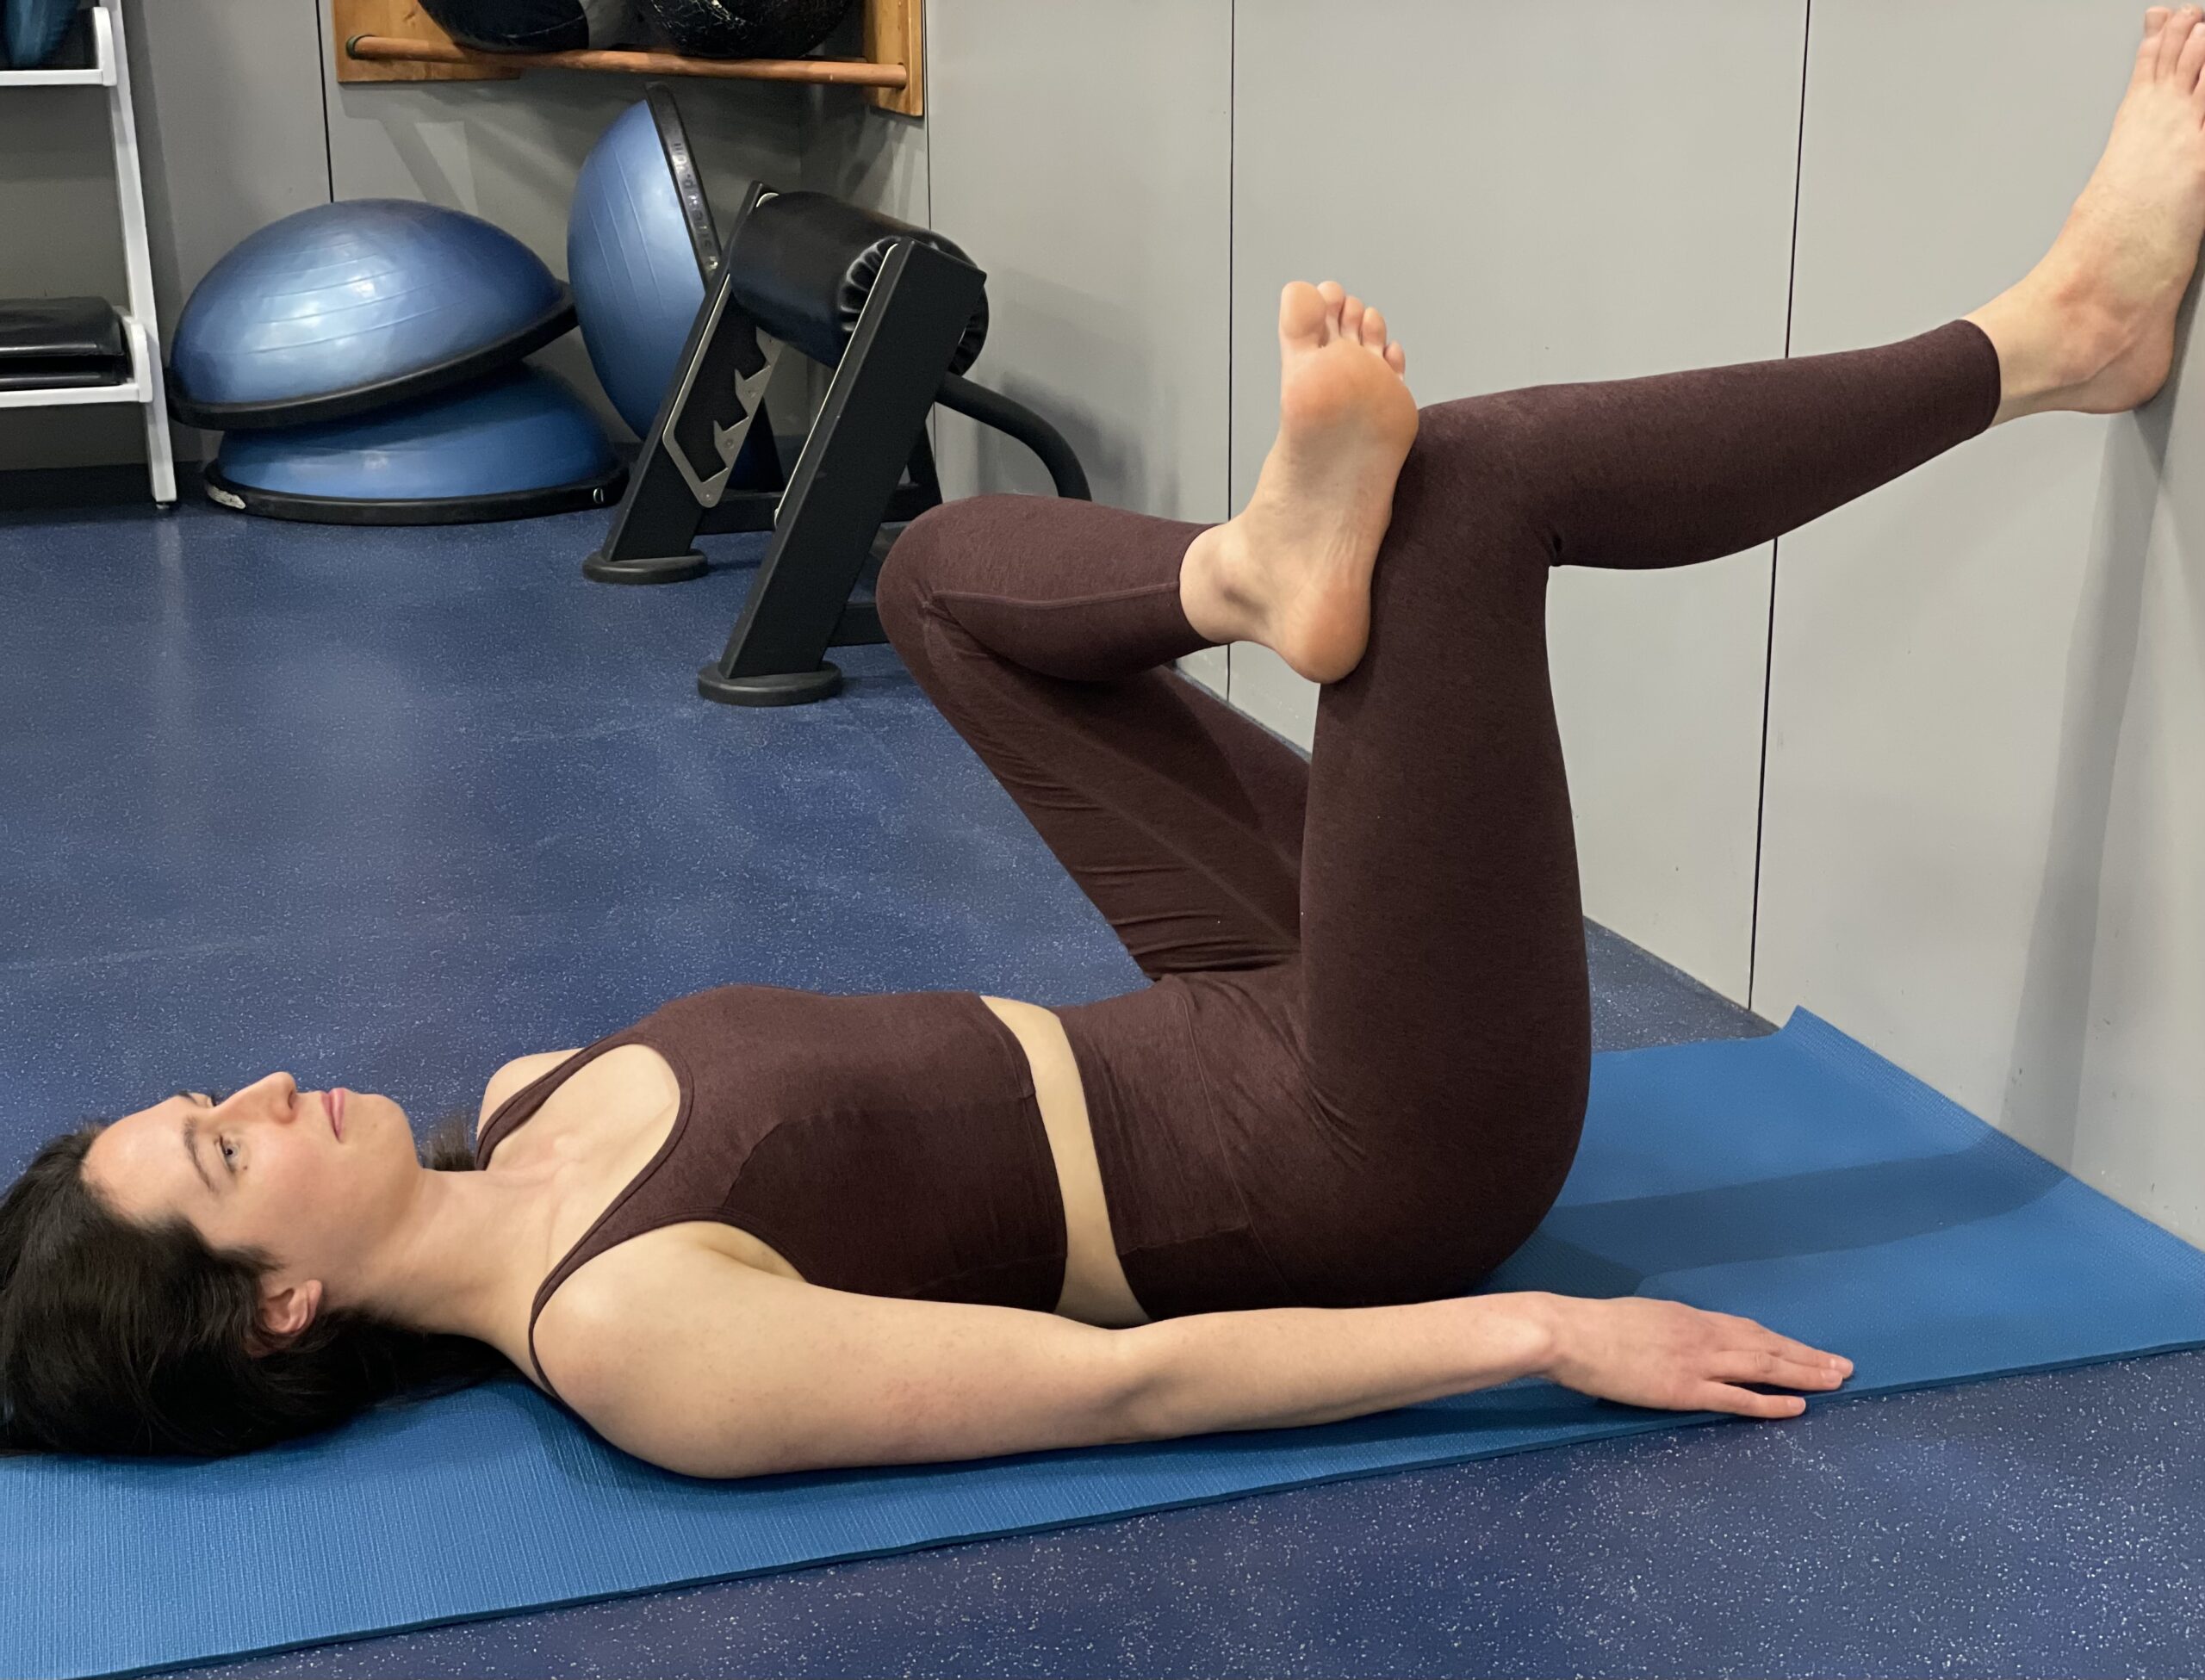
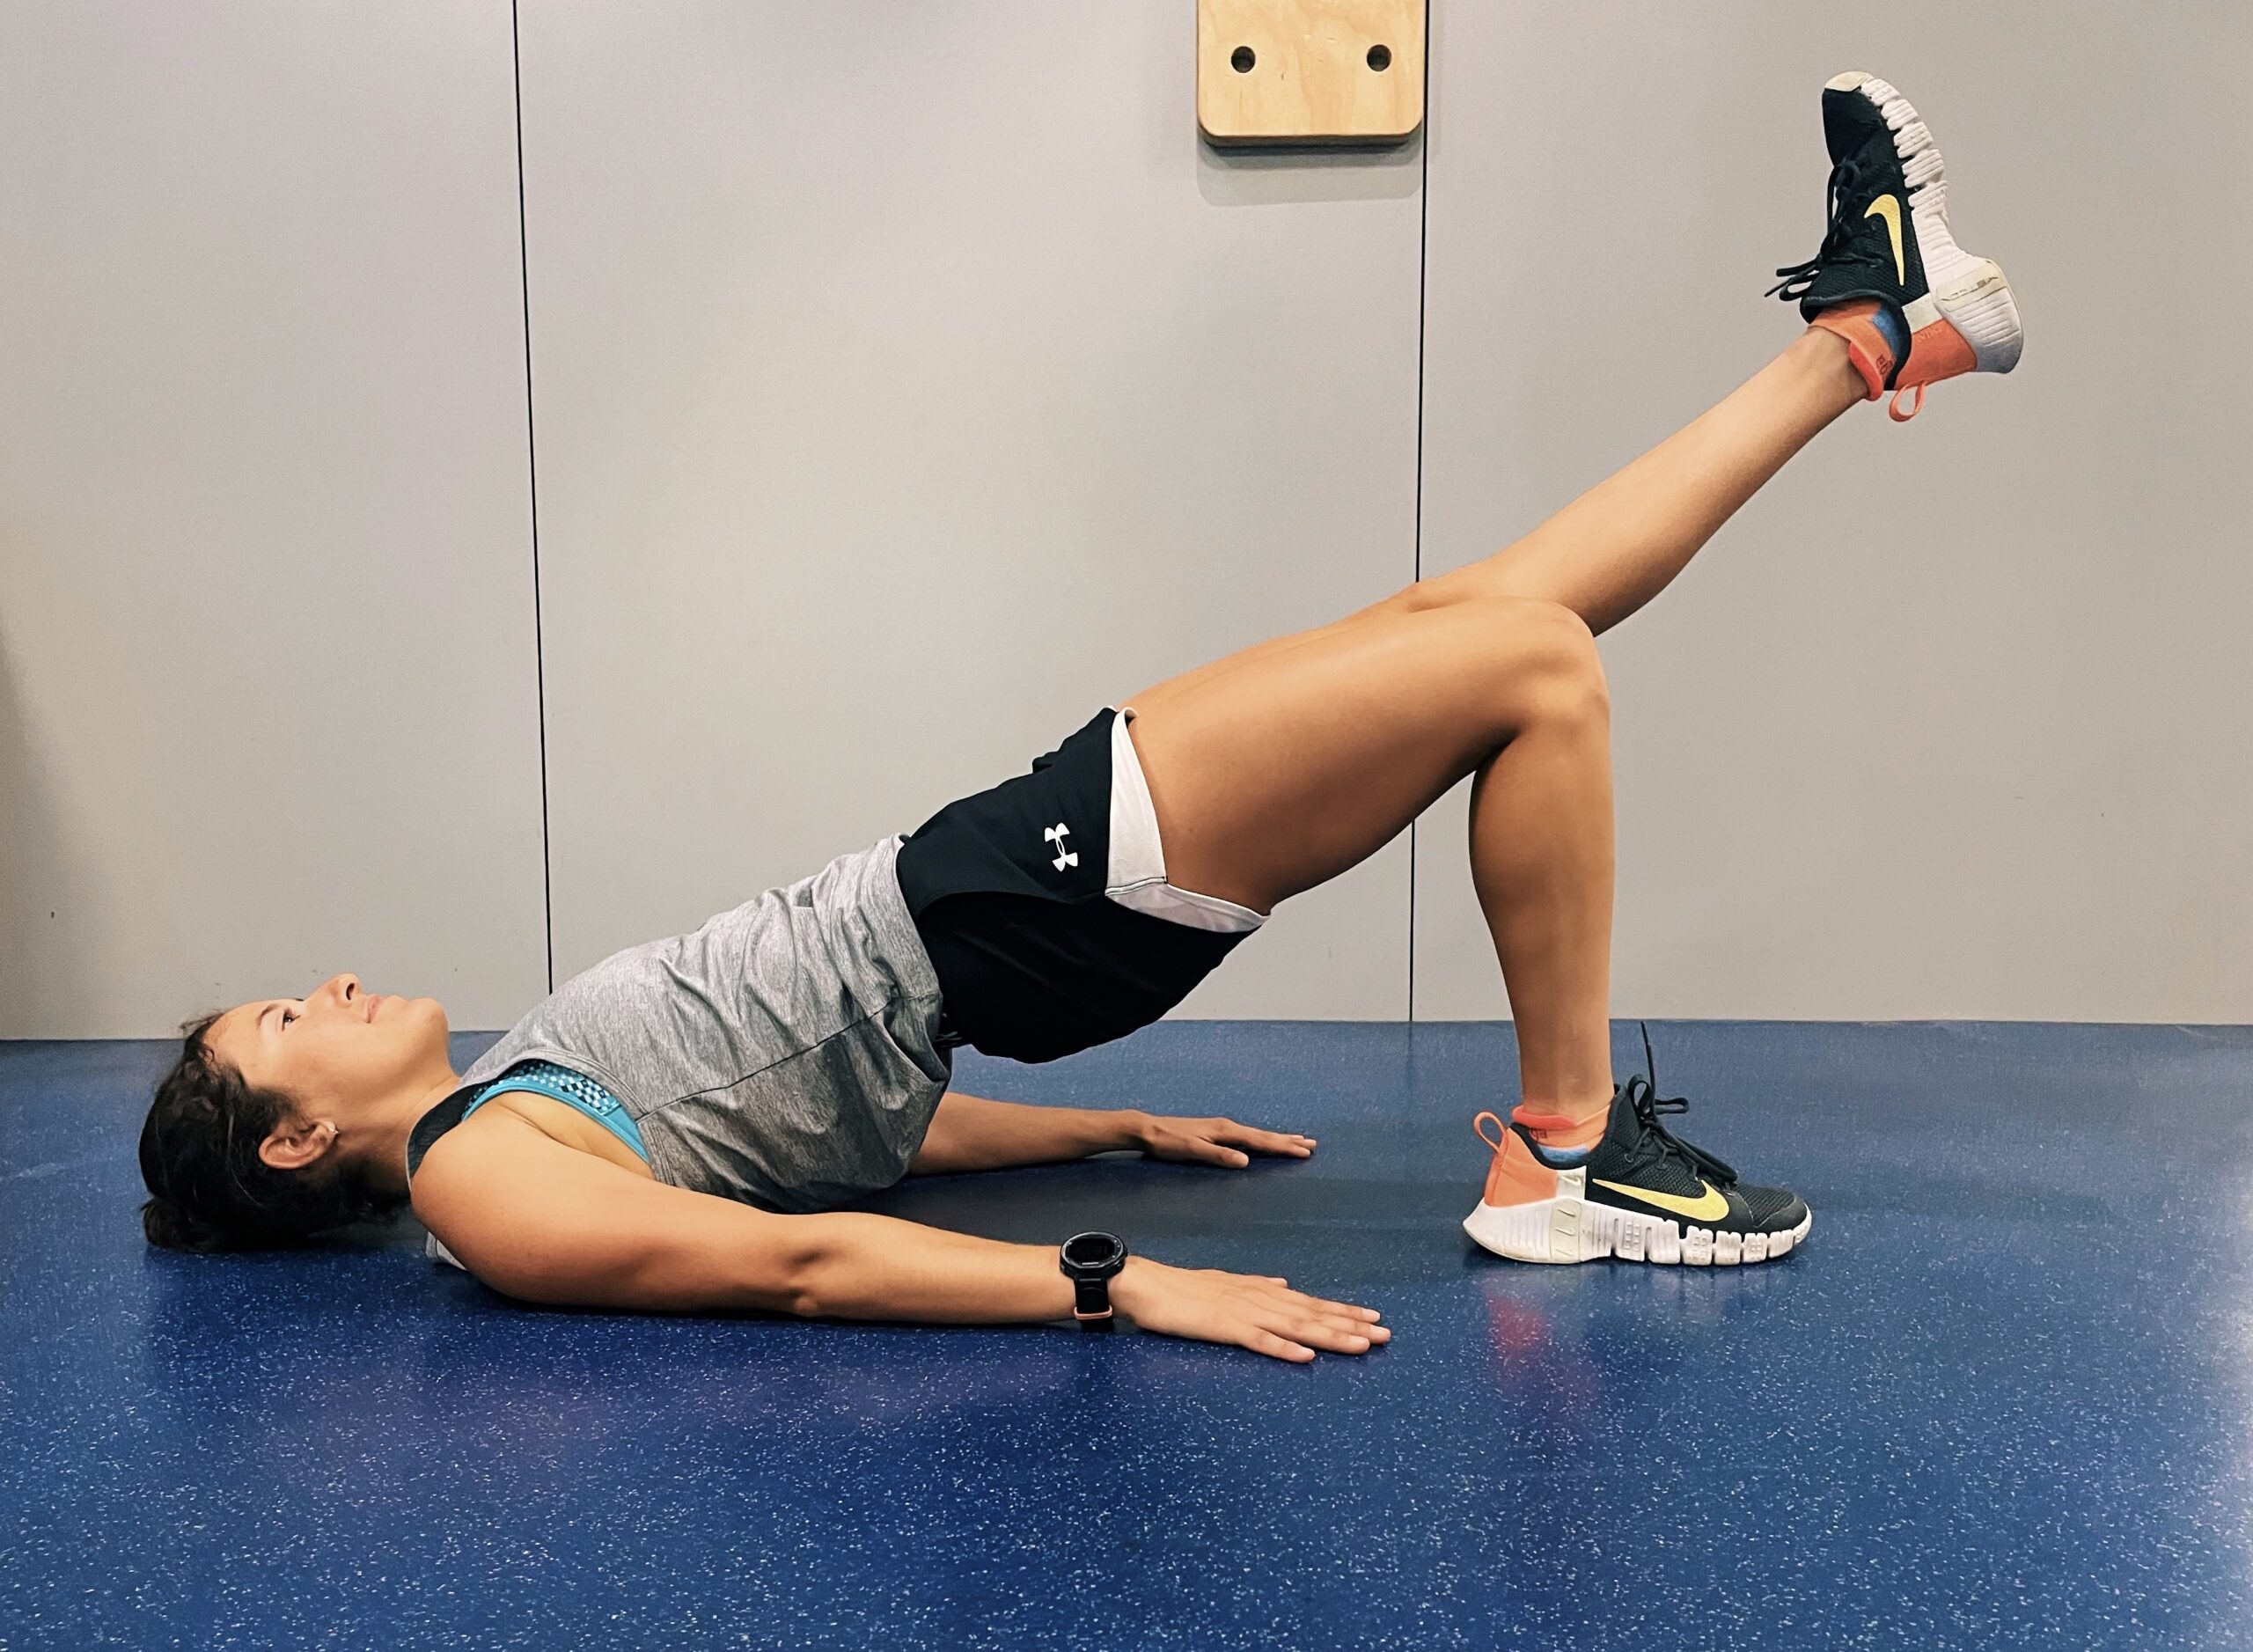
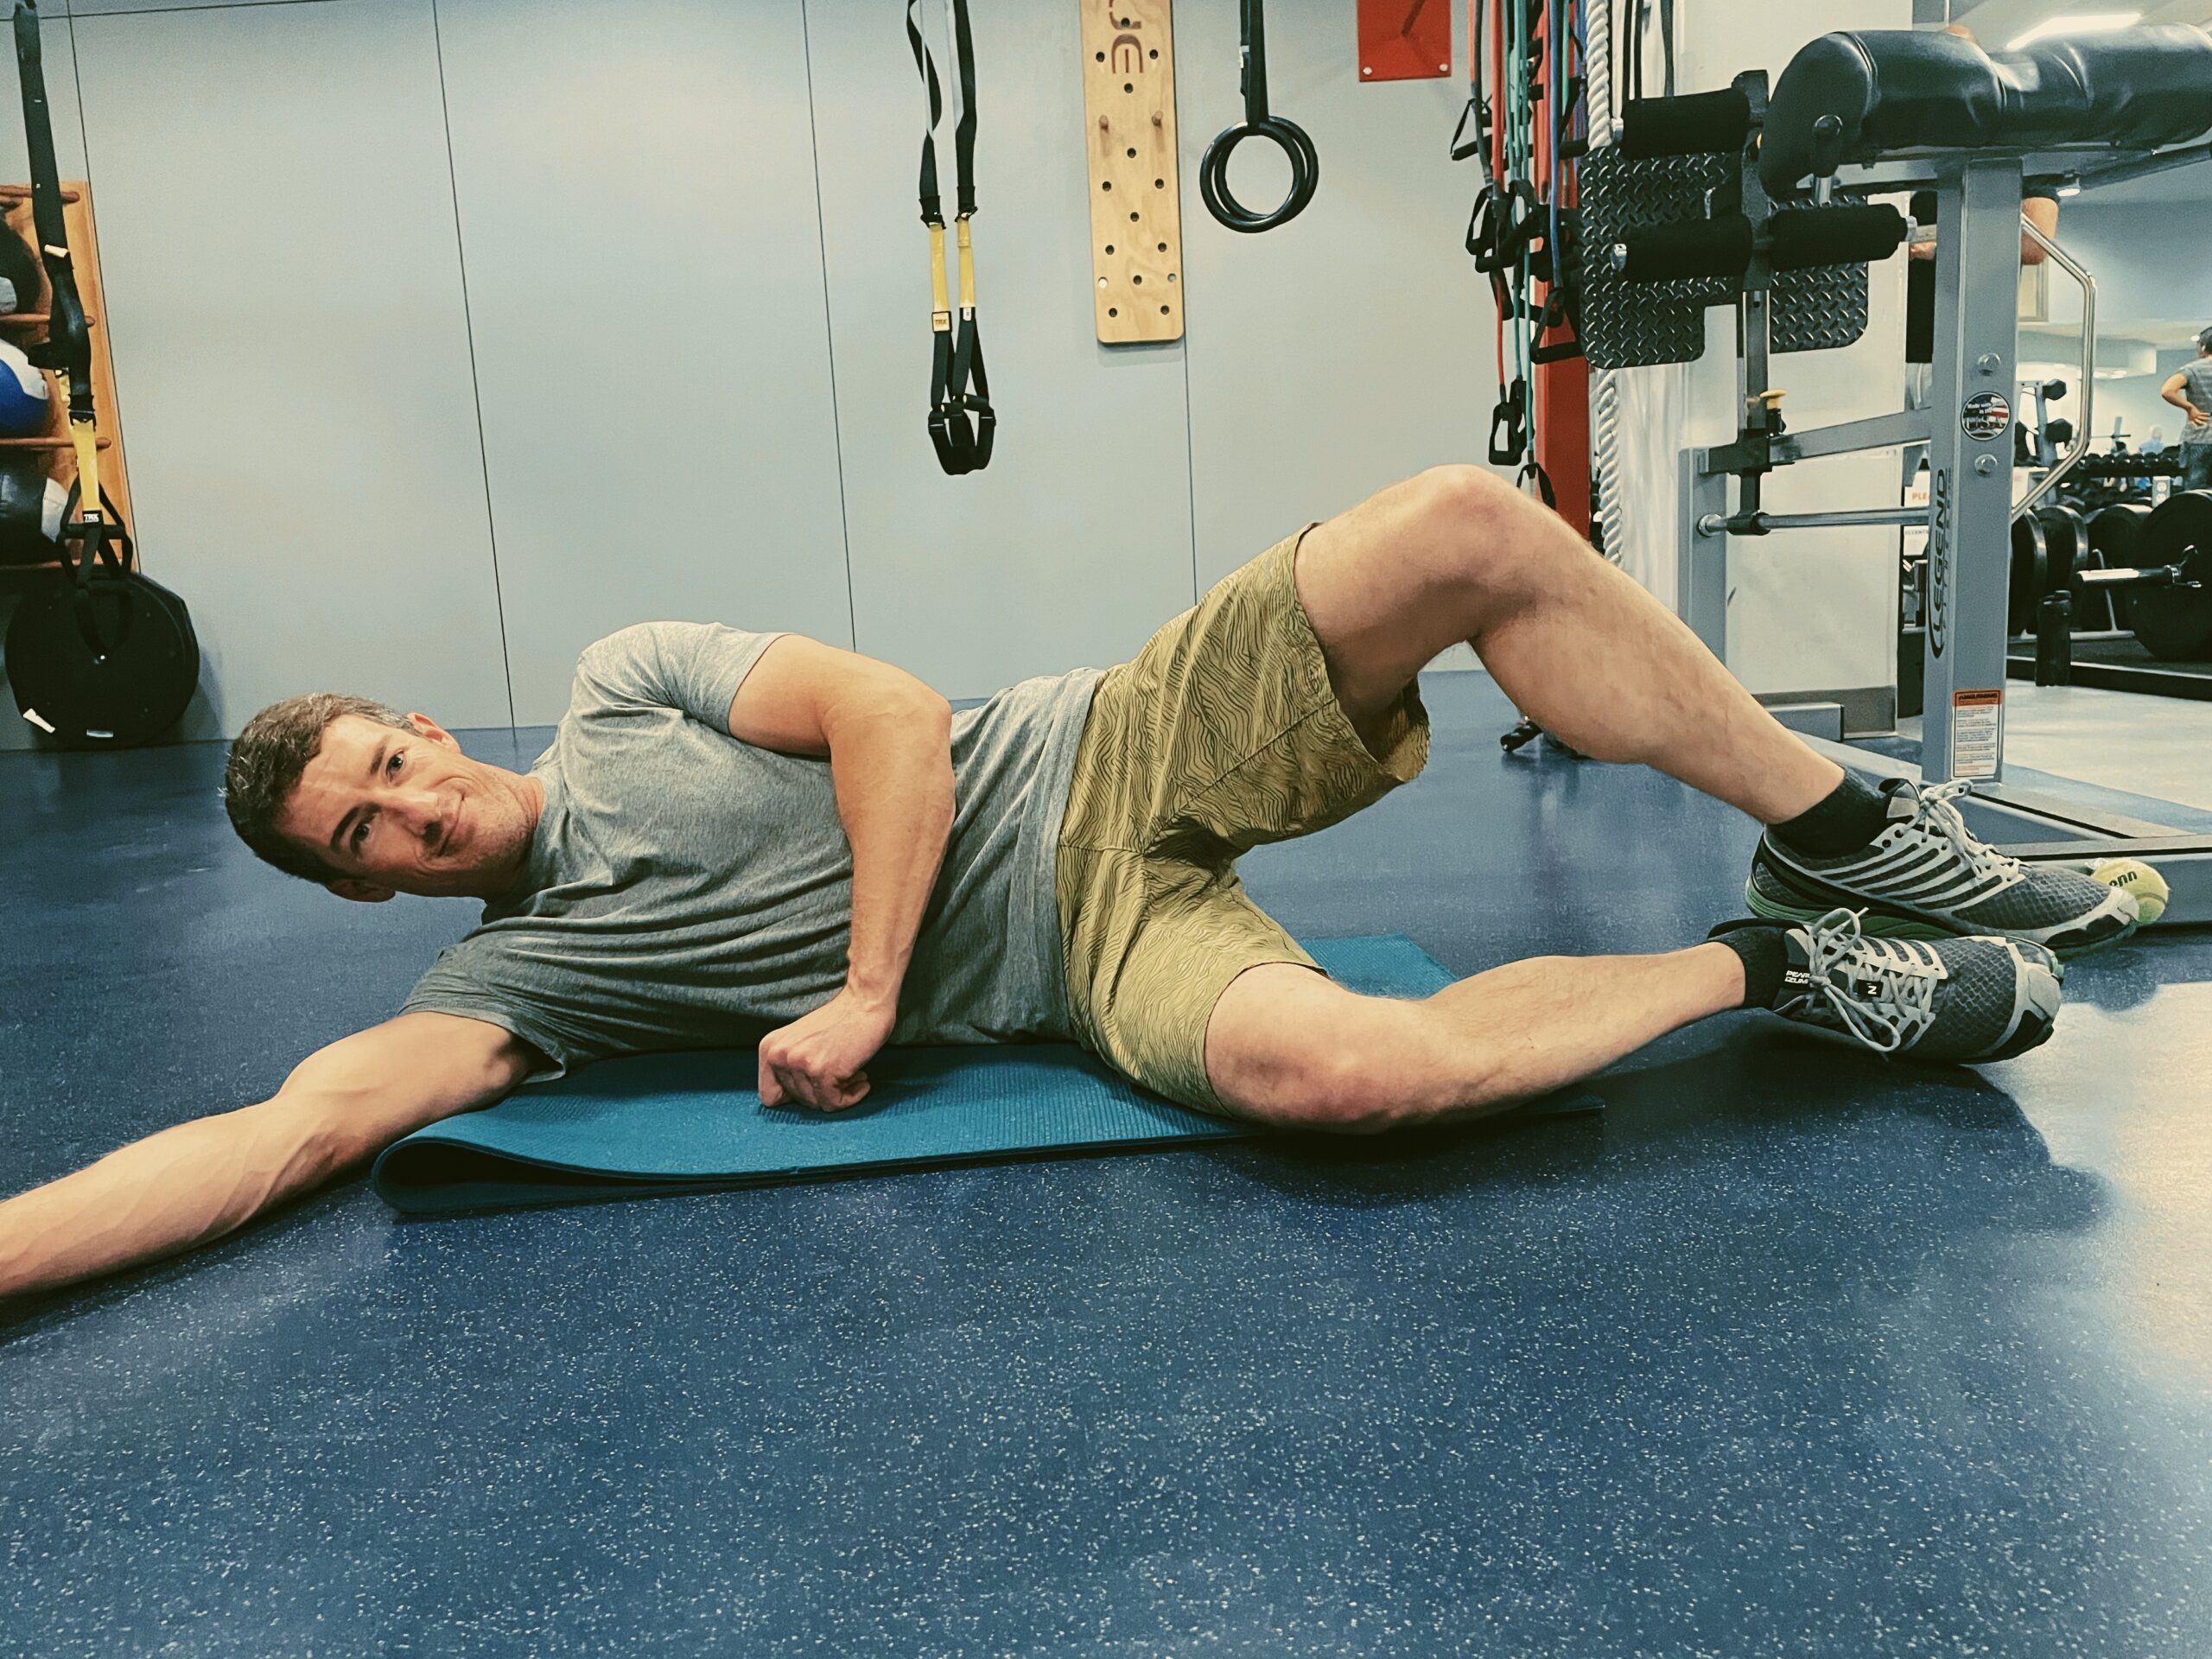
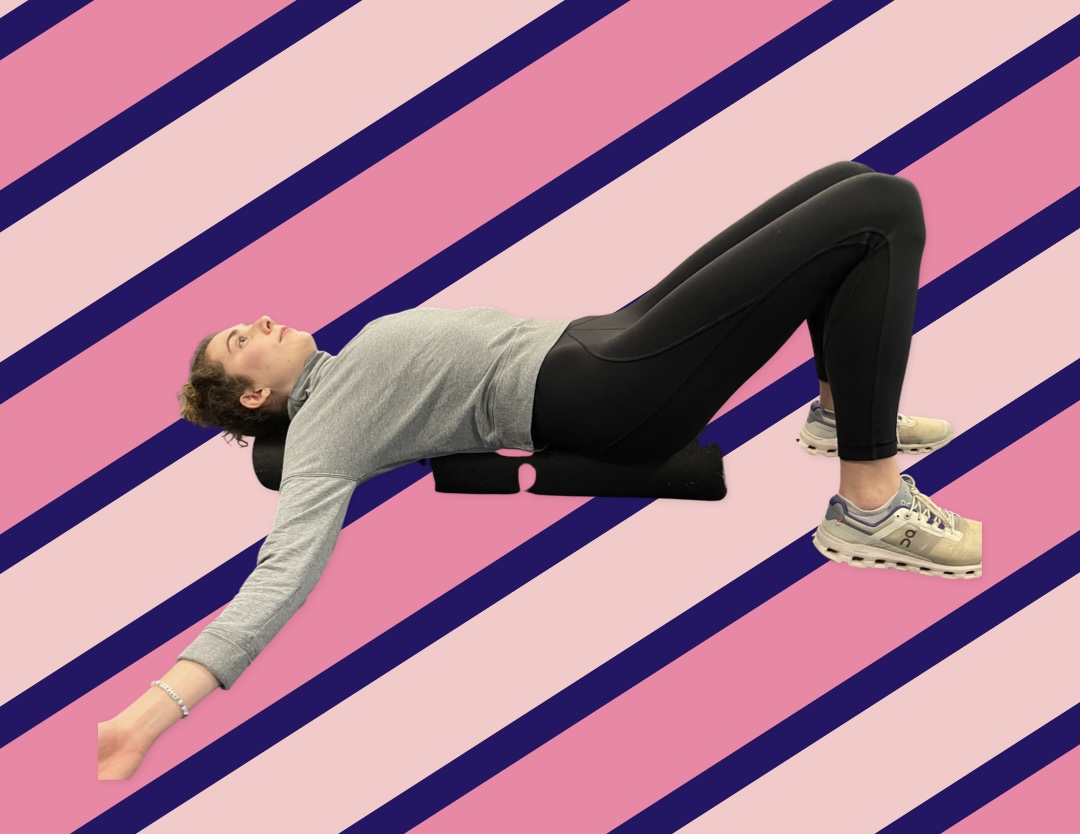
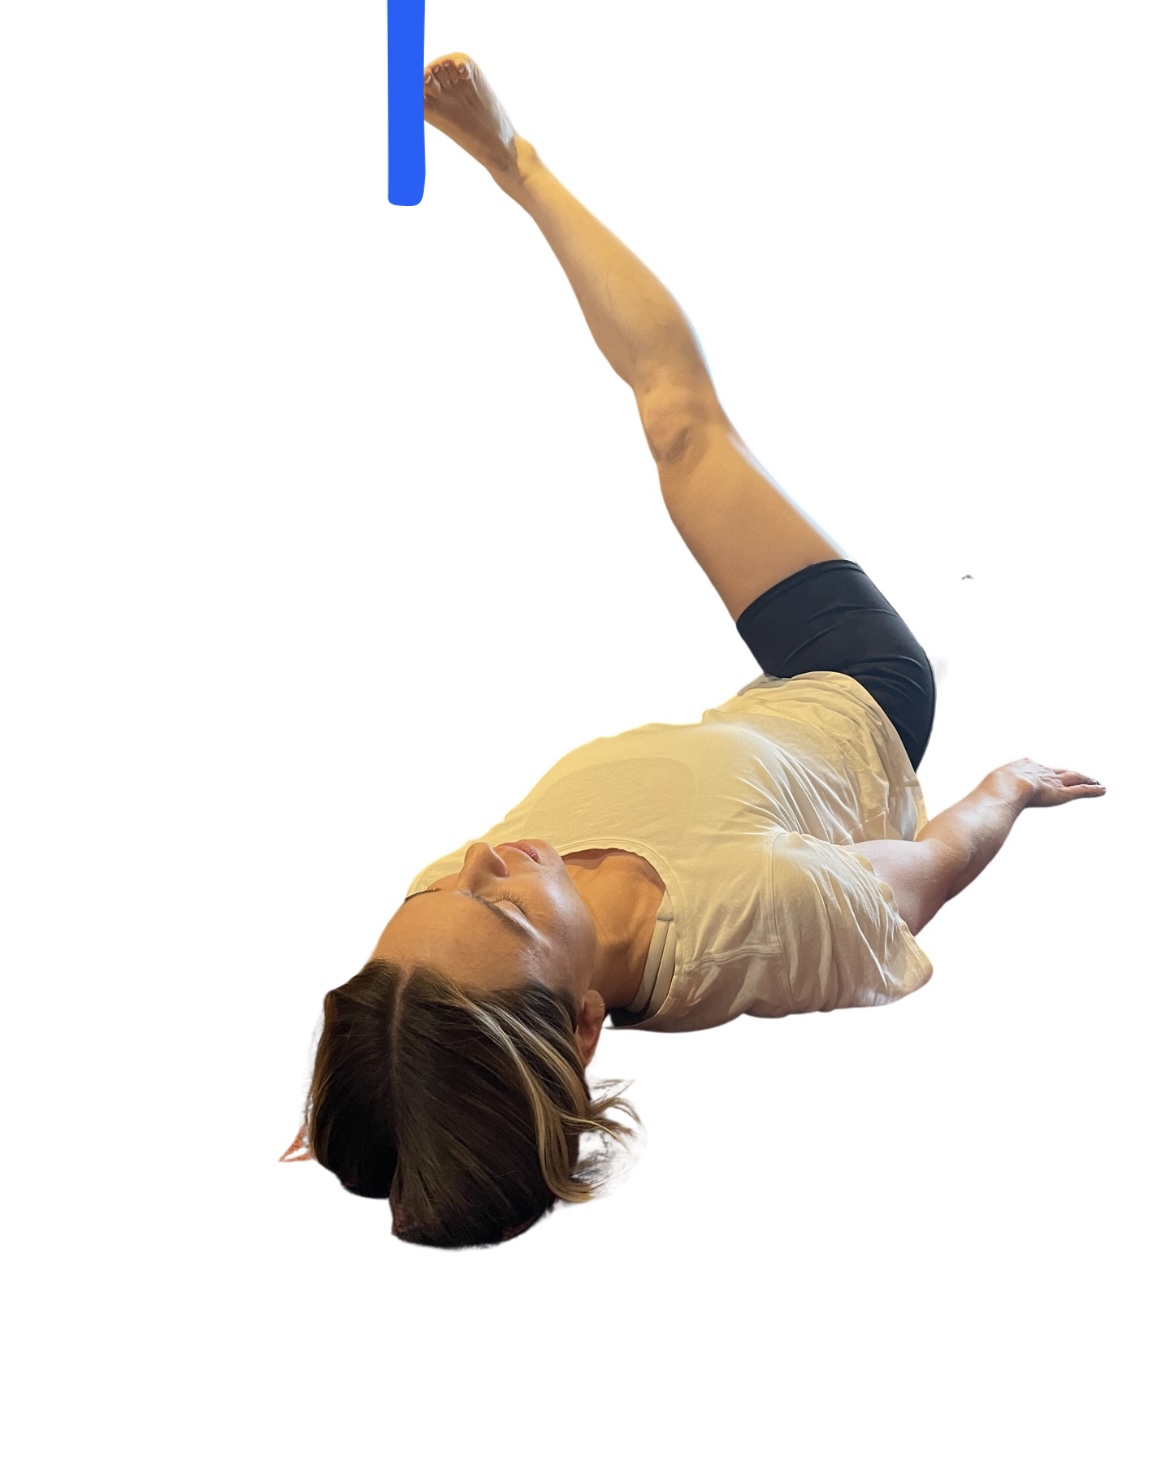
1. Figure 4 stretch using the wall

Figure 4 is an excellent stretch for the external and internal hip rotators, including the piriformis and glutes.

Tip: The piriformis is one of the six external rotators of the hip. (The sciatic nerve runs over, under or through the piriformis muscle and can be responsible for sciatica pain.)

Lie on the floor, place your left foot on a wall, and place your right ankle over your left knee.

Let the right side of your pelvis drop away from your right shoulder until your pelvis becomes level.

Hold the stretch to release your hip rotators.

Stretch each side for 20-30 seconds, at least once a day.

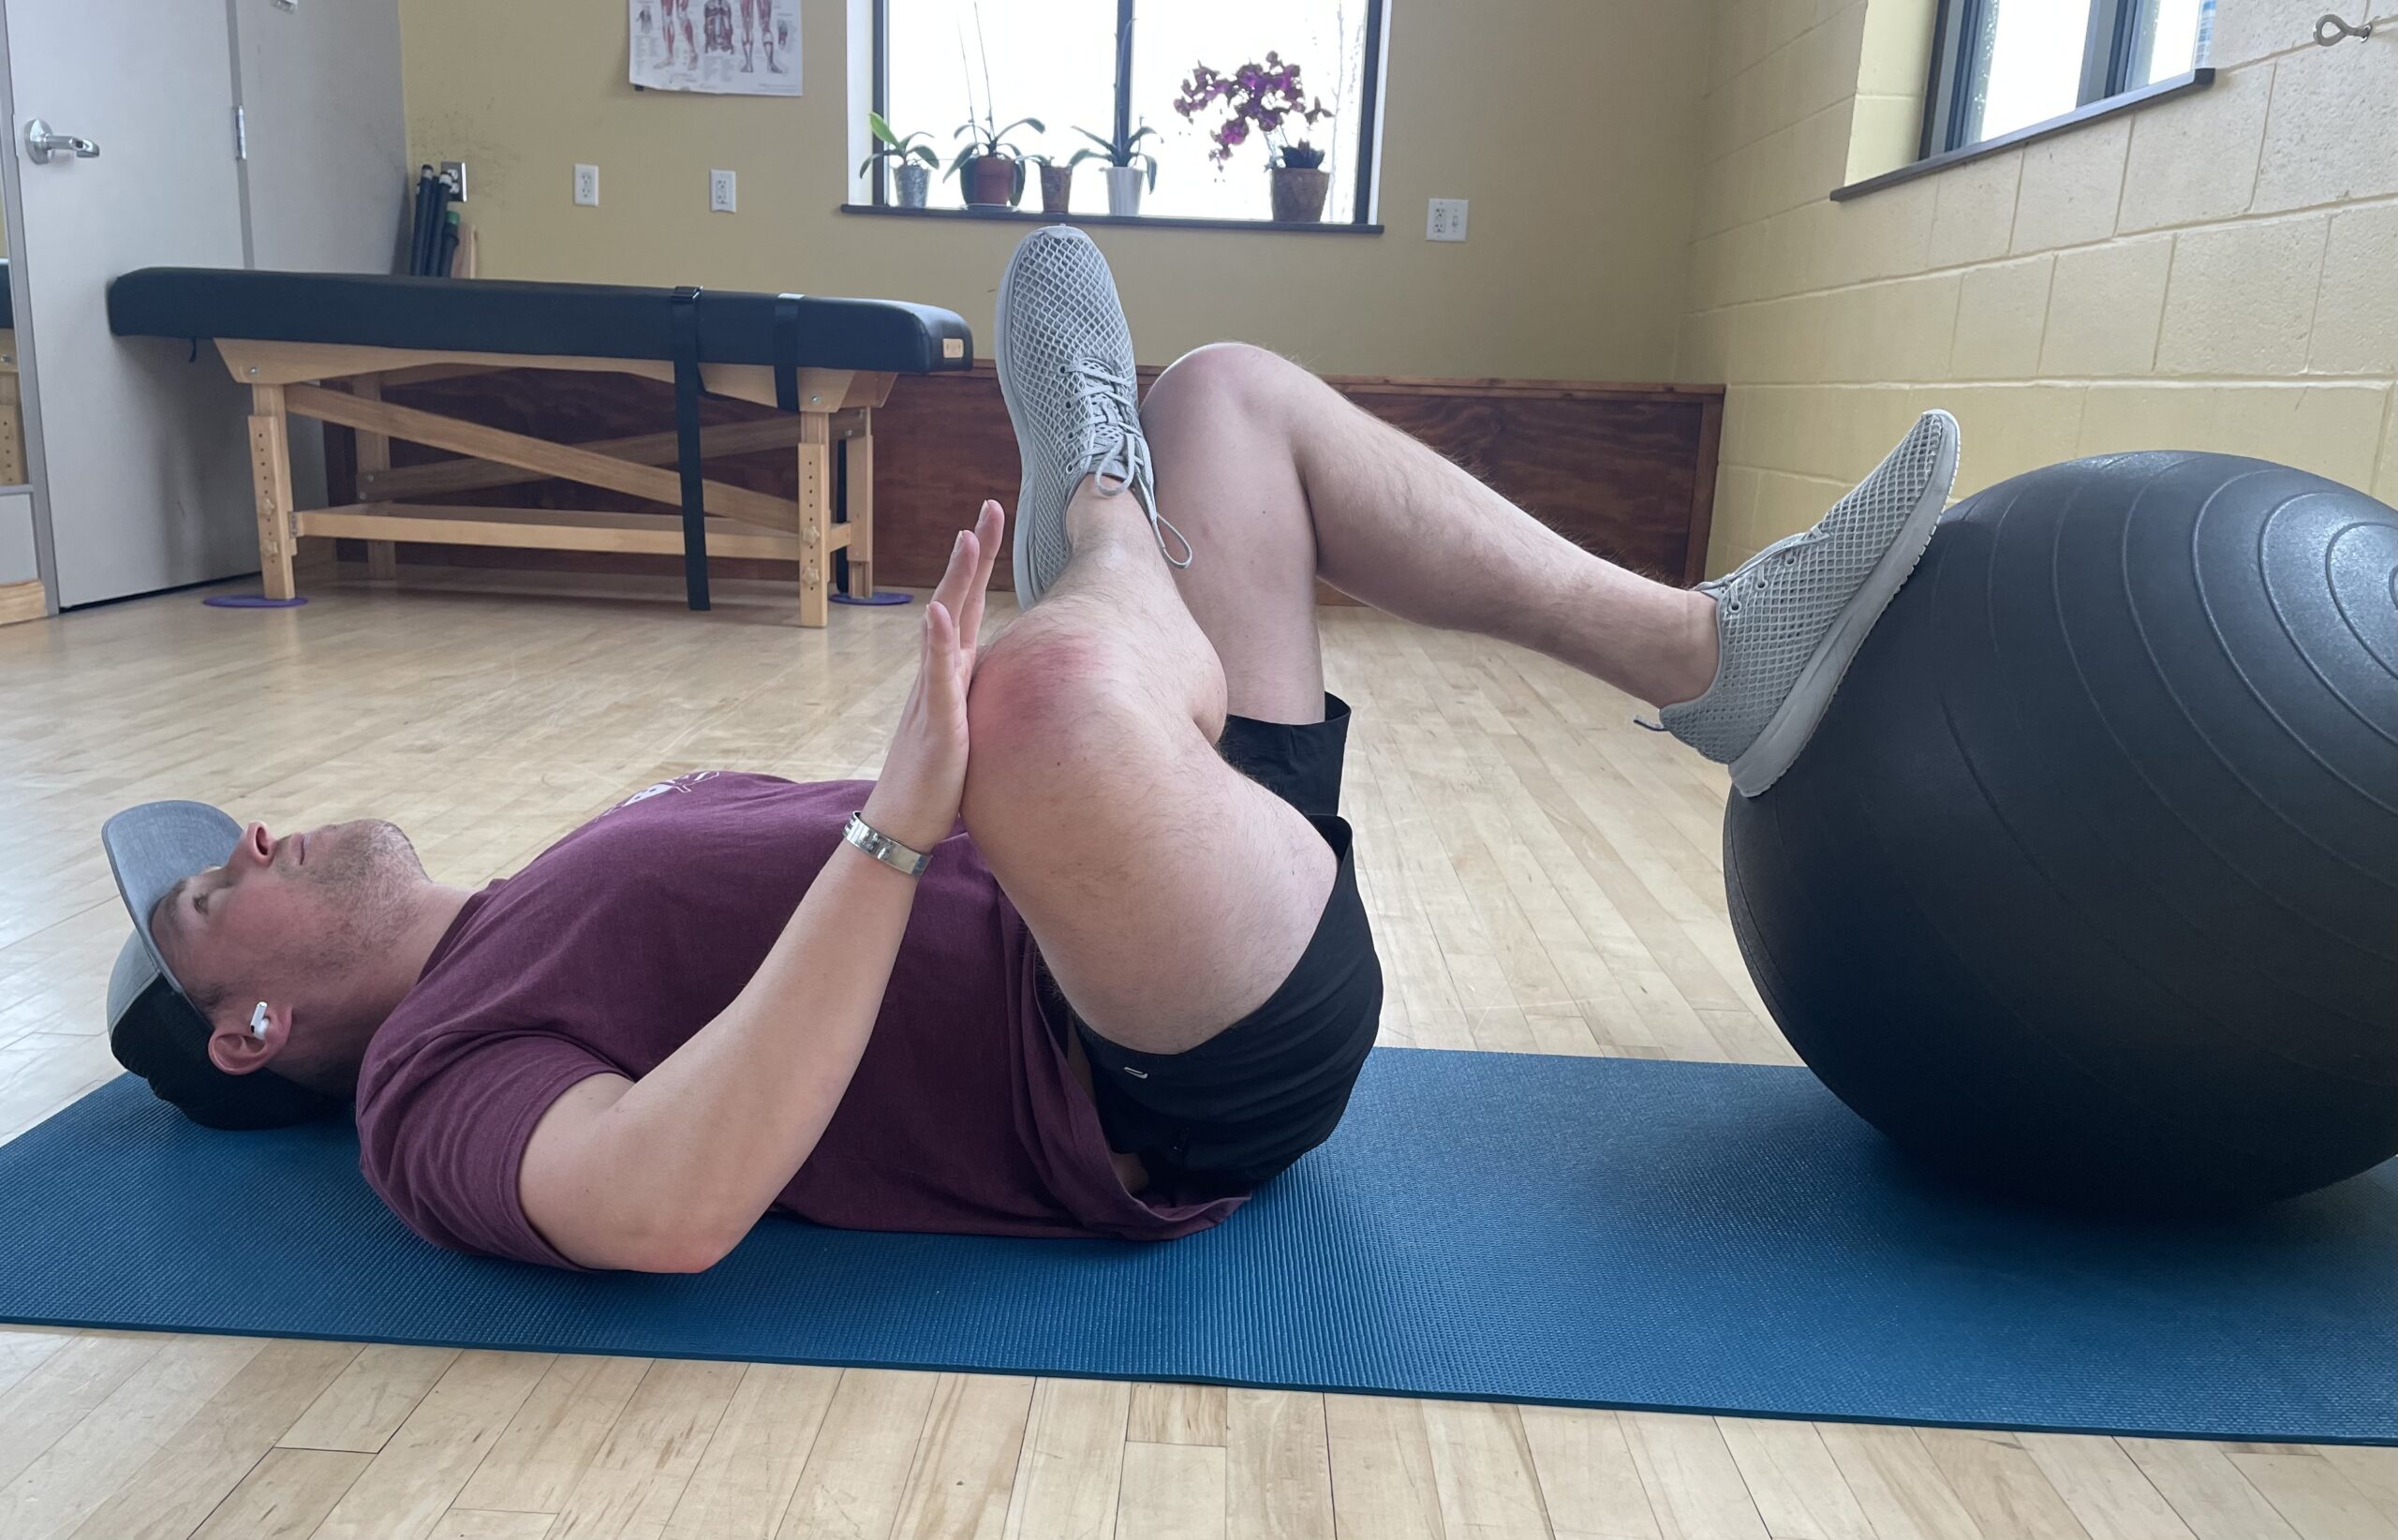
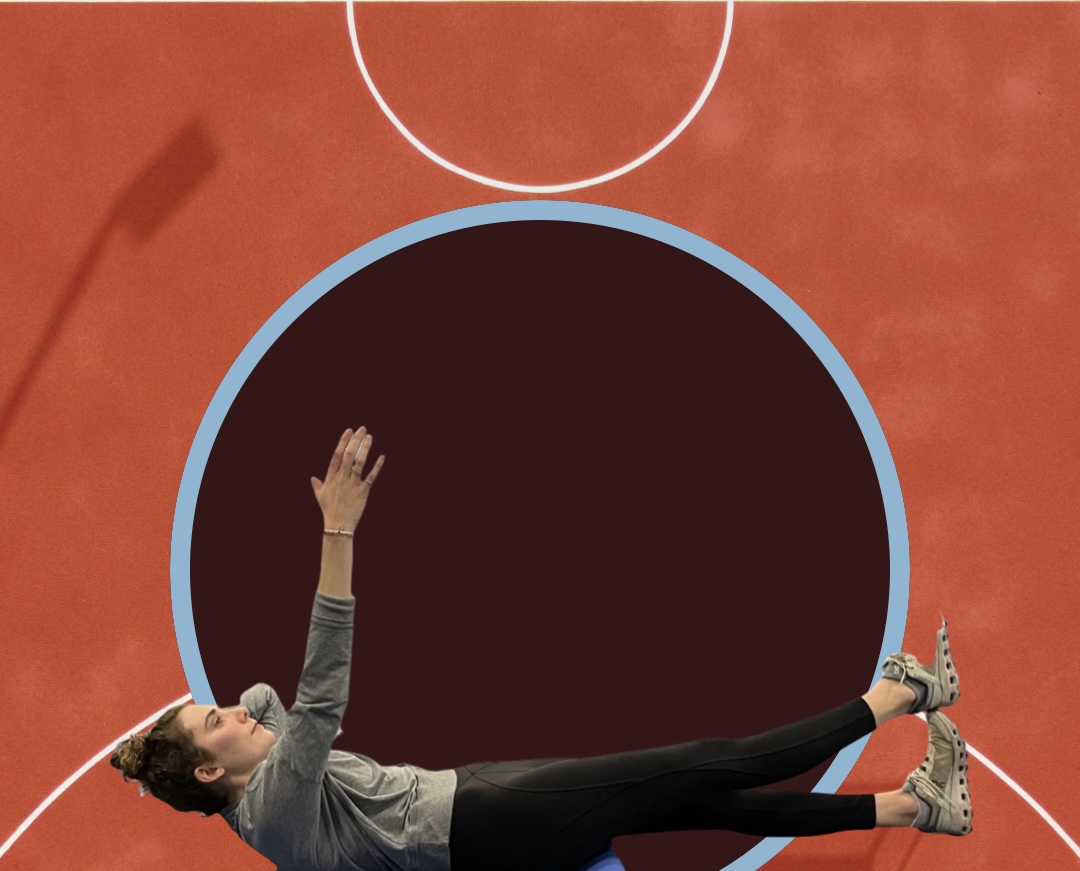
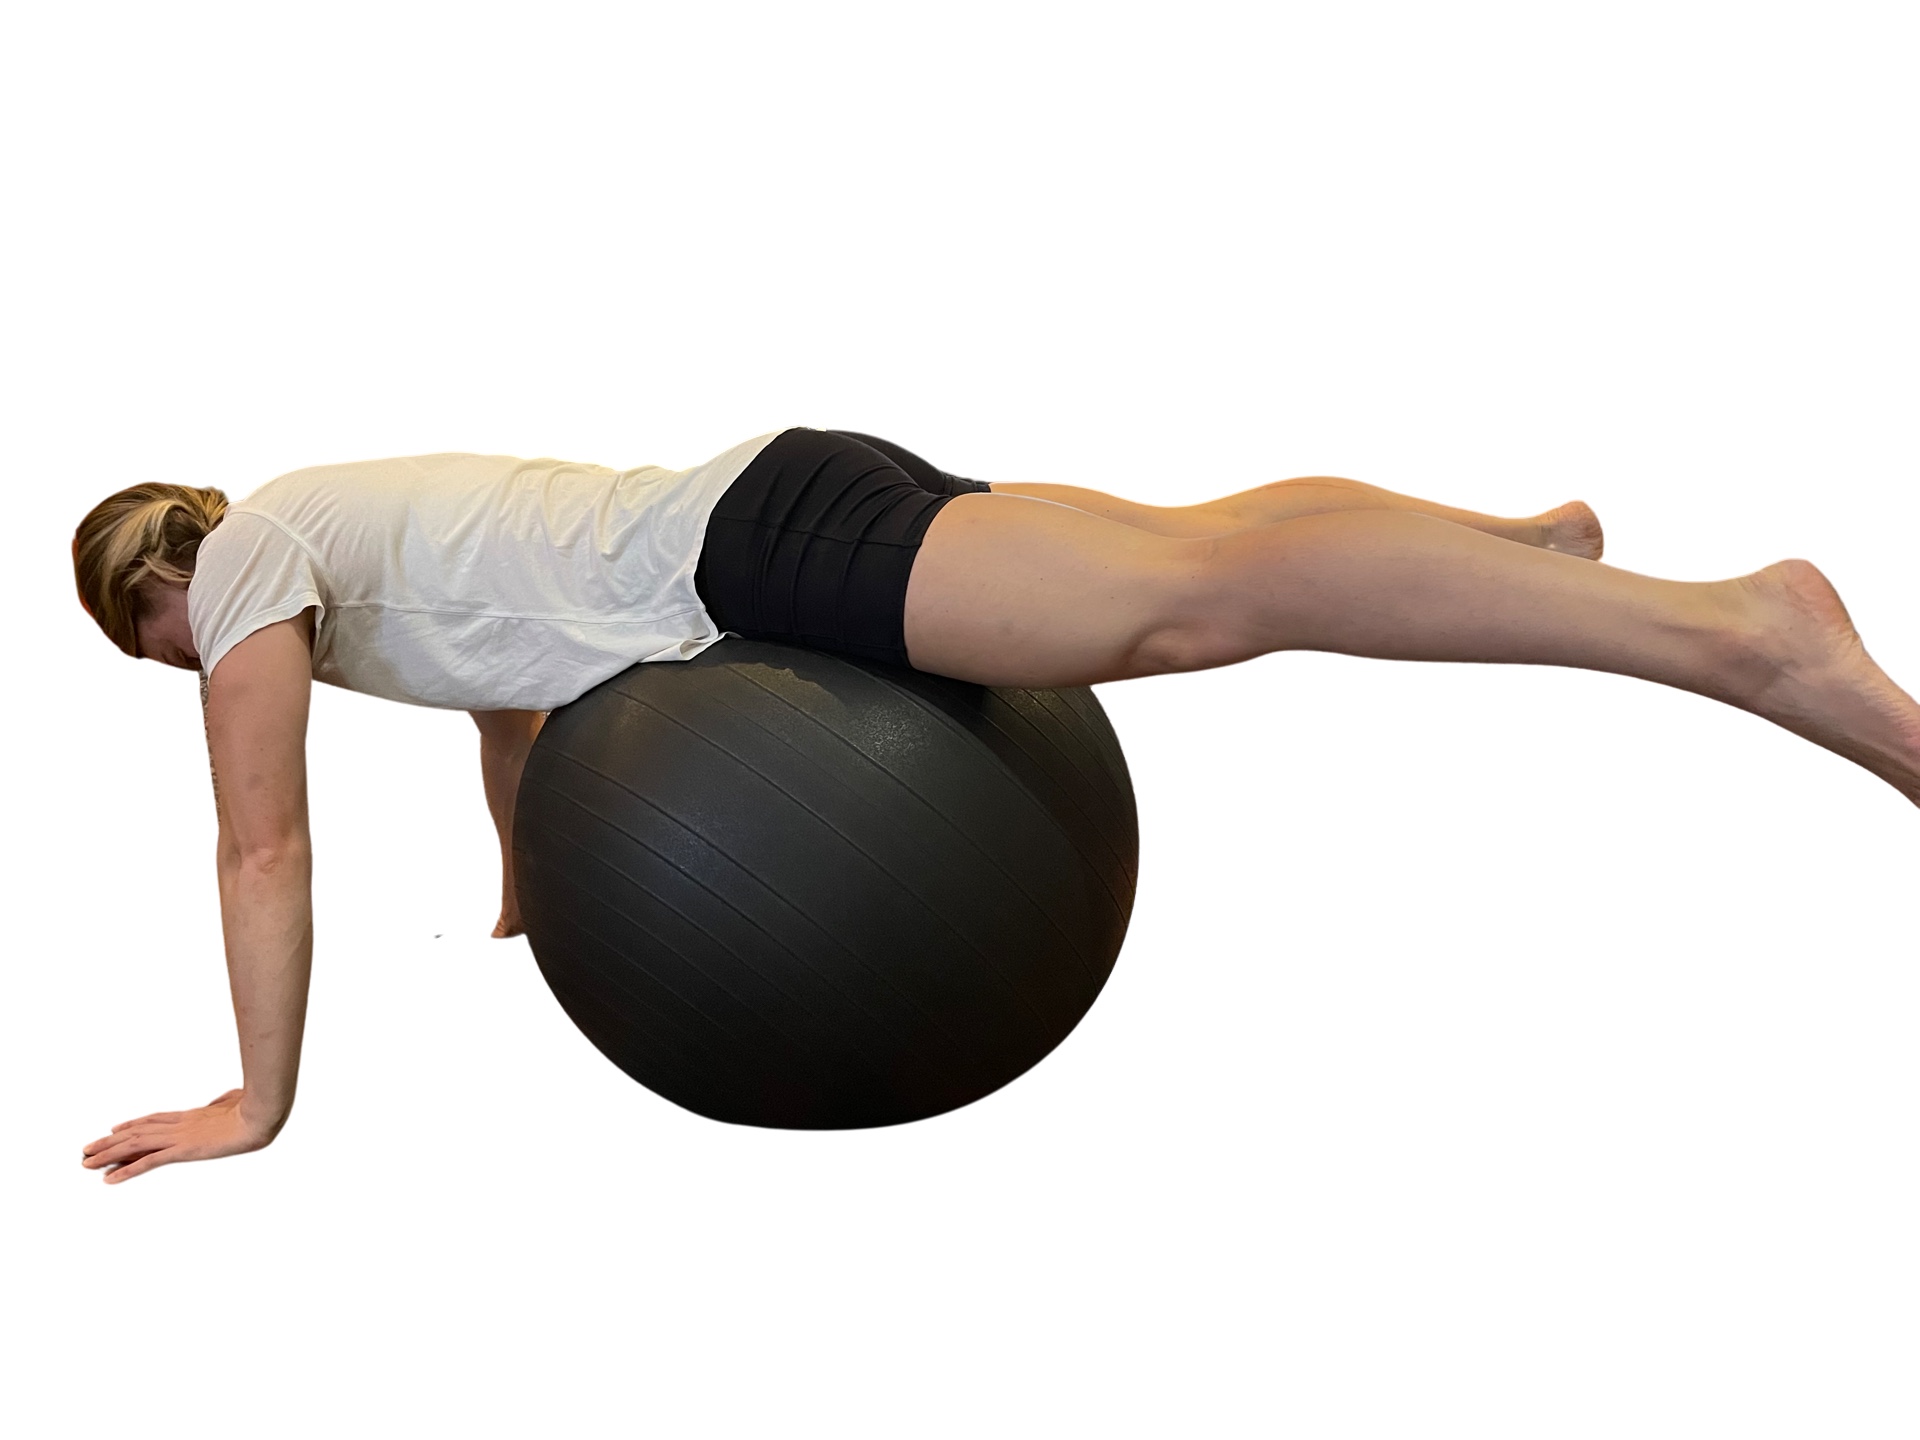
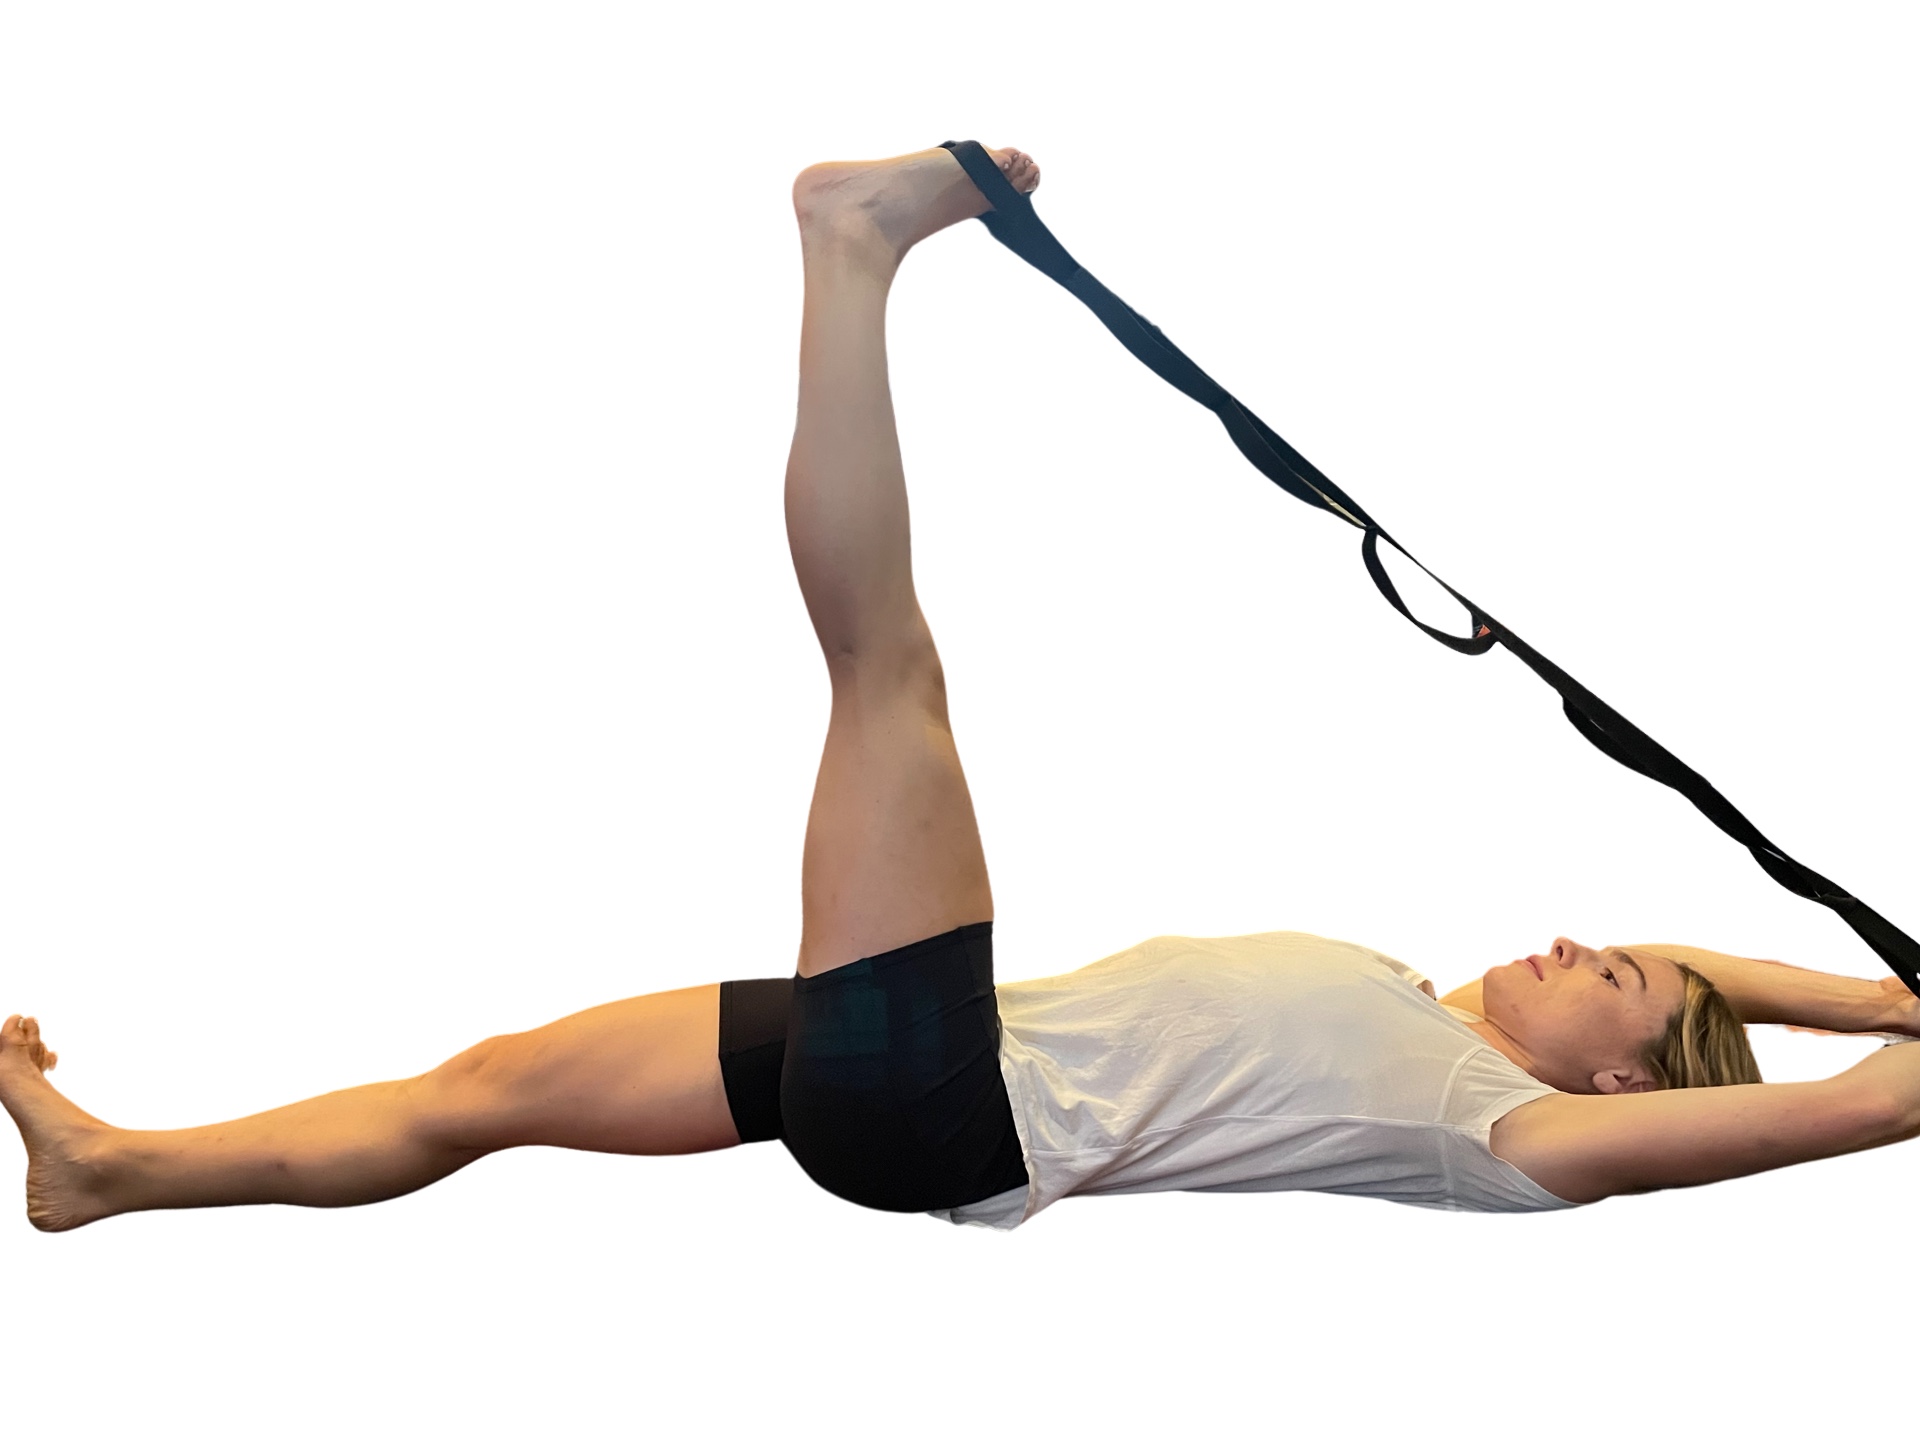
2. Figure 4 stretch using a physio ball

  • all photos by Connie Aronson

Instructions are the same as the above stretch, ( stretch 1 ) except that you place one foot on a physio ball.

Using a physio ball allows you to create a deeper stretch by gently rolling the ball toward you with the foot that is placed on the ball.

As seen in The Idaho Mountain Express March 24, 2024

https://www.mtexpress.com/wood_river_journal/features/do-it-right-how-to-stretch-the-external-rotators-of-the-hip/article_96d925c4-dc97-11ee-9afc-cb569b10a505.html

Save a fall with strength and balance

We take our balance for granted—until we have an embarrassing fall.

For youngsters, they typically shake off a fall. A young person has no problem slipping a sock on standing up. That’s a demonstration of balance and strength. Those past a certain age, however, usually sit down to pull on socks or sneakers. The fear of falling is a real concern. One of three older adults suffer a fall each year. Falls claimed 60,000 lives in 2012 and 2013. Falls are a serious health concern for older adults, alongside the cascade of other debilitating factors and a loss of independence.

Balance training is the mainstay of a fall prevention program, as well as strength and coordination. Lower body weakness increases the odds of falling fourfold. Unfortunately, there are other risk factors that contribute to falls. This includes foot problems, improper footwear like sneakers or slippers without traction and tight ankles. A limited range of motion in your ankles can affect balance and the simple ability to step up. Vision and environmental hazards in the house, like loose rugs or clutter, can contribute to falls as well.

One of the best things you can do as an adult is to make sure your gluteal medius and gluteal maximus muscles are strong. These posterior muscles are prime movers and important for stability. Making sure your glutes are working well, in conjunction with ankle mobility and stability, will help you move around with grace and confidence, and not fall.

Try to the following exercises every day.

Heel rise rocker

• Rise upward onto your toes and immediately rock back onto your heels as you lift your toes up towards your shins. Aim for 10-15 reps daily. Use a wall for support if needed.

Alphabet

• Stand on your right leg with your opposite foot off the ground close to your right foot.

• Push your hips back slightly, into a quarter squat. Keep your torso engaged, and the weight balanced on the whole foot.

• With your foot in the air, write the letters of the alphabet with your foot using small movements.

• Repeat on the left leg.

Bridging—single leg

• Lie face-up with your arms by your side, knees bent and feet flat on the ground.

• Squeeze your glutes and lift your hips off the ground until your knees, hips and shoulders are in a straight line.

• Extend one leg, foot flexed, and keep it extended.

• Lower and lift your hips 12 times. Repeat on the other side.

Clam Shell

• In a side-lying position, hips slightly flexed and the knees bent, raise your top knee off the bottom knee by contracting the hip muscles. This exercise mimics the opening of a clamshell.

• Avoid rolling or rotating your torso as you lift your knee.

Tree Pose

Tree pose develops balance, stability  and poise. It strengthens the muscles of the supporting leg and foot.

• Stand firm on the right leg. Use a wall for support if needed.

• Bend the left leg out to the side, hold the foot and press the sole of your right foot into the top of your right inner thigh.

• Straighten the right knee and press the left knee back, in line with the left hip.

• Try to balance for 20 seconds before repeating on the left leg.


Published in the Idaho Mountain Express June 16, 2023

https://www.mtexpress.com/wood_river_journal/features/fitness-guru-save-a-fall-with-balance-and-strength/article_dfa2b6ea-0afa-11ee-a111-974c9f3b63a9.html

Five everyday movements you need

Featured

Good habits contribute to optimum health. When it comes to your health, preventing injuries in any sport or activity you enjoy is crucial. No one likes being injured. With a New Year fast approaching, here are five injury-preventing moves to help you get fit without getting hurt. Whether you are a seasoned athlete, or just want to stay in shape, incorporate these moves into your day.

Activate the Core

Include daily core exercises! The core muscles help stabilize the spine and support movement. The following 2 core exercises activate the core in different ways to help initiate all movement, and contribute to strength capacity.

Side Lying Hip Lift

Side Lying Hip Lift -The core muscles help stabilize the spine and support movement.

• Lying on your right side with knees bent (or straight for advanced variation), place right elbow under right shoulder. Push shoulder away from ear to engage shoulder girdle ) .

• Avoid letting rib cage slump toward floor; maintain natural curve of spine.

• Exhale and lift right hip off of floor, and hold for 3 counts.

• Slowly lower to start. 10-12 reps. Switch sides

Heel-on-Toe Crunch

• Begin with your legs straight, left heel on top of right foot.

• Bring left hand behind your head for support, and lift right arm straight up from shoulder.

• Curl up, raising head, neck and shoulders blades off mat, tightening abdominals.

• Slowly return to start position. 10 reps. Switch sides.

Stretch tight hamstrings

Stretch tight hamstrings -Photo by Connie Aronson

Tightness in the back of your legs may be a sign of instability in your core, causing the leg muscles to overwork and shorten. As well, hamstrings are an important muscle to stretch if you have back pain, as they attach to the pelvis, which attaches to the back. An excellent move to ease the tension and strengthen your torso is the inverted hamstring stretch. This move engages your core muscles to help keep you balanced.

• Stand on your left leg with your arms extended to the sides.

• Extend your right leg behind you while hinging your torso forward, keeping your back straight, and slowly return to standing.

• Do 5 reps each side

Foam Roller Alignment

Foam Roller Alignment- Photo by Connie Aronson

We’re all guilty of bending forward while scrolling on our phones, resulting in a “forward head.” For every inch that your head is forward there’s 10 more pounds of pressure on the neck. Reset your alignment by lying on a foam roller.  Lengthening the lumbar erector spinal muscles helps encourage neutral alignment.

• With your knees bent, lie on a roller, head supported and neck in a neutral position.

• Tighten the abdominals.

• Gently roll side to side for 20-30 seconds

The Sock Test

Losing your balance as you get older is no joke. Research has shown that the ability to stand on one foot drastically decreases after the age of 60, along with a rapid increase of falls and injury. The ability to stand on one leg is imperative for gait and function.

The sock test takes the move a step further, and is a fun challenge to build strength capacity and balance.

• Holding a sock, stand on one leg, knee slightly bent.

• Bring your leg up towards you as you put your sock on

• Lower the leg to the floor and repeat with your left foot.

Include these movements, everyday, if you can, to stay fit and supple. Happy healthy New Year!

https://www.mtexpress.com/wood_river_journal/features/fitness-guru-five-everyday-movements-you-need/article_35aaaaf4-86d3-11ed-83e5-6b842192aaff.html

Why you need to stretch your hamstrings

Tight hamstrings are all too common, as is forgetting to stretch

Does it feel awful when you bend over to touch your toes? Many of us also become acutely aware of tight hamstrings when they cramp, hurt or when we experience back pain. Tight hamstrings are all too common, as is forgetting to stretch. Even if you are devoted to daily hamstring stretching, you still feel as if you’ve made little progress. Quite often the culprit can be attributed to weak gluteals, or “gluteal amnesia.” Gluteal amnesia is when your glutes aren’t firing, and the hamstrings have to work overtime, causing further cramps or strains. Any weakness in the gluteus max can contribute to common dysfunctions such as lower back pain along with knee pain.

Use a two-part plan in stretching your hamstrings. First, strengthen your glutes, followed by stretching your hamstrings. The hamstring group (semimembranosus, semitendinosus, and the biceps femoris) starts at the butt bone and runs down the outside and inside of the leg and attach to the lower leg. These muscles have two important real life functions. First, they help side-to-side alignment of the knee, as these muscles are like a guyline from the base of your pelvis, down the back of the leg, and knee. When you touch your toes, the hamstrings stretch, but more specifically, the lengthening under tension controls the inward or outward rolling of the knee. The hamstrings also act as a big crane to slow down your trunk as you lean forward to touch your toes, thus sparing compression forces on your lower back.

Incorporating both glute strengthening exercises, and isolated hamstring stretching into your routine can help make the way down to touching your toes feel good, as well as combating pain and cramping issues. Here is a daily sequence to incorporate:

Butt lift over ball- a great gluteal strengthener
Standing hamstring stretch. Place your right leg up on a chair or bench, keeping your leg straight and both feet aligned straight. Pull the right side of your pelvis back and away from the right foot. Flex your foot. Rotate the torso to the right by reaching the left hand over the right knee, and vice versa when stretching the left leg. Tip: Actively contract the quadriceps throughout this stretch to release the hamstrings. Hold for 20-30 seconds. Repeat 3-4 times.
Doorway stretch. This is a great home stretch, as you perform it lying on the back, even as you watch TV. Place your foot up on the corner of a wall or on a door- frame. While in this stretch aim to keep the leg straight.
This is a great home stretch for your hamstrings
PNF stretch with strap. Lying on your back, place a yoga strap or stretch strap around your leg. Straighten your leg up toward the ceiling. While in this position contract the hamstring by attempting to lower the leg back toward the ground as the strap resists the motion. Then relax the hamstrings and apply a 10-second stretch by using the strap to pull the leg closer toward the chest. Repeat three times and end with a 30-second static stretch. Tip: Ideally, your leg should go vertically upwards without pain for good flexibility.
PNF hamstring stretch with strap

Published in The Idaho Mountain Express 9/9/2022

https://www.mtexpress.com/wood_river_journal/features/fitness-guru-why-you-need-to-stretch-your-hamstrings/article_9bee2960-2f05-11ed-8cc5-3729101fea72.html

Fitness Guru: The best way to get rid of neck pain

The ability to turn your head, or easily look up should be a movement you take for granted. Yet as we age, neck pain is common. Like the rest of the body, bones in the neck change, as surfaces of them become rougher, and discs that cushion the cervical spine deflate.

Your neck may feel stiff and sore as a result of arthritis and stiffness. A pair of facet joints run down the back of your cervical spine, each lined with cartilage, and surrounded by a capsule filled with synovial fluid. However, as cartilage thins and wears away, there is less fluid. The result is bone-on-bone friction occurring in your facet joints. As well, the discs that cushion the bones of the neck and head lose their plumpness and the muscles, tendons, ligaments, and other soft tissues are compromised.

The multiple muscles of the neck make for a very mobile structure, yet neck pain limits functional range of motion. The neck pain you feel is all too common, being that the neck muscles are hyper-alert to the many pain receptors in this area of the body. Take care of your neck with the following 5 stretches that you can do just about anywhere. 

 Child’s Pose with extended arms 

Child’s Pose -This move stretches the neck extensors and upper back

Kneeling, stretch your hands as far away from you as possible. Slowly lift your head to look up towards your hands. Hold for 20 seconds, 2-3 times. This move stretches the neck extensors located on the back of the neck and upper back: semispinalis capitis, semispinalis cervicis, and splenius capitis. Interestingly, the later muscle acts as a glue that holds the head firmly to the neck. The name comes from the Latin words spleniummeaning “plaster” and capitis meaning “ of the head.”

Neck Extensors Stretch   ( no photo, but don’t miss this one ! )

This stretch helps release tightness in the neck extensors. Place your hands on the crown of your head, keeping the elbows together.  Pull your shoulders down. Gently pull your chin to your chest to feel the stretch in the back of the neck and shoulders. Hold for 15-20 seconds; 2-3 cycles at least once a day.

Trapezius Stretch 


Trapezius stretch

1.Using a chair: Sit tall on a chair and firmly grip the seat. Slowly bend your neck away from your hand grasping the chair. Engage your lower traps and rhomboids (middle back ) to help pull the shoulder into correct alignment. 

Trapezius stretch using a band

2. Standing, drape a band across the top the shoulder, keeping tension on the band. Slowly bend your neck away from the banded shoulder, Hold for 15-20 seconds at least 1x day, preferably 2-3 a day.

Neck Turn 


Neck turn- this will help maintain neck rotation

Place your first 2 fingers horizontally along your jaw. Using your hand to assist, turn your head to one side. Hold 15-20 seconds. Repeat 2-3 cycles. Repeat the stretch going the opposite direction. 

Check out my column in Idaho Mountain Express !

https://www.mtexpress.com/wood_river_journal/features/fitness-guru-the-best-way-to-get-rid-of-neck-pain/article_467c245a-ed2e-11ec-ae97-b3b068199910.html

Power breathing

When you breathe deeply, you refresh your mind and improve your lung function.

Think of a time when you felt anxious and stressed. Stress is impossible to avoid; bills, job demands or challenging relationships all contribute to taxing your nervous system. But the easiest and quickest way to calm your mind is to simply breathe in and out.

When you breathe deeply, you refresh your mind and improve your lung function. The simple act of inhaling and exhaling decreases the sympathetic nervous system response and leaves you feeling more relaxed.

Worry and stressful situations can trigger a cascade of stress hormones that make the heart pound and muscles tense, known as “fight or flight.” The National Cancer Institute describes it as a group of changes that occur in the body to help a person fight or take flight in stressful or dangerous situations. This is the body’s way of helping to protect itself from possible harm. During fight or flight, certain hormones, such as adrenaline and cortisol, are released into the blood. This causes an increase in blood pressure, heart rate, and breathing. Other changes include an increase in blood sugar, alertness, muscle tension and sweating.

Fight or flight served us well on the savannah, but on a daily basis we can’t be continually running from tigers. The simple act of breathing with focused intent can help you relax and feel better.

At rest we only use about 20% of our lung capacity and barely utilize the muscles of our breathe. The American Lung Association indicates that when the diaphragm is not working at full capacity, the body starts to use other muscles in the back, neck and chest for breathing. This means that there is less reserve for exercise and activity, and lower available oxygen levels.

So, how do you take a deep breath?

Although many people feel a deep breath comes solely from expansion of the chest, chest breathing (in of itself) is not the best way to take a deep breath. To get a full deep breath, learn how to breathe from the diaphragm while simultaneously expanding the chest.

Yoga teaches that by breathing this way: a vertical extension, a horizontal expansion and a circumferential extension of the rib cage, chest and lungs shows that the lungs are being filed to their maximum capacity.

Breath is life. Yoga teaches that breathing is a prayer of gratitude we offer to life itself. B.K.S Iyengar, one of the most influential yoga teachers in America, compares leaves moving in the wind to how our mind moves with our breath. When your breath is regulated, there is a neutralizing effect on the mind. Activating the deep breath will decrease your parasympathetic nervous system and leave you feeling more relaxed and in control of your emotions.

It’s not only yogis who know the benefits of remaining calm and focused by practicing breathing. Navy SEALS use controlled breathing techniques in their military training programs as a valuable tool for their soldiers. Facing crisis, high pressure and uncertain circumstances, one of techniques the SEALS use is easy to learn and powerful, called box breathing.

Box Breathing

Sometimes referred to as square breathing, box breathing is a practical technique to start with. You can practice it anywhere and at any time; however, it’s best to sit in a comfortable chair with your feet on the floor, or lying down, to learn. Try to tune out extraneous sounds, as you close your eyes and listen to your breath. Notice the natural rhythm of your breathing for a few cycles. Now you are ready to begin your box breathing.

  1. Breathe out slowly, releasing all the air from your lungs.
  2. Breathe in through your nose as you slowly count to four in your head. Be conscious of how the air fills your lungs and stomach.
  3. Hold your breath for a count of four.
  4. Exhale for another count of four.
  5. Repeat steps 1 to 4 for three to four rounds.

For visualization, while you are box breathing, imagine as though the box is being traced by a colored crayon or imaginary marker. For each of the four lines you draw, switch colors of the box’s outline. For meditation, you can add an affirmation, such as “I am relaxed,” as you breath by syncing it with your breath, rather than counting.

Continue practicing your breathing technique whenever you think of it. Your breath is always with you, as is life itself. 

https://www.mtexpress.com/wood_river_journal/features/fitness-guru-power-breathing/article_936765b2-d77c-11ec-bc26-ff6932a5d3ee.html

Stretch to stay on top of your summer game

We all want to enjoy summer to the max, and that means more time outside, doing the activities and sports that warm sunshine offers. But each sport has specific demands on your body. A stretch routine after a ride, golf game or hike can make a difference in staying up to the task, especially as you age. Flexibility can decrease as much as 50 percent in some joint areas. The good news is that this loss of motion can be minimized with a regular stretching and range-of-motion routine.

For decades, coaches have thought that pre-exercise stretching was important for their athletes, and would prevent injury or muscle soreness. However, copious research on the topic of flexibility challenges that old belief. It is thought that due to an alteration in joint connective-tissue compliance, stretching before workouts may lead to greater joint instability.

What the research shows is that stretching will help you achieve positive long-term performance outcomes when done at times other than before performance. A warmup that increases blood flow, like arm circles, or leg swings, to get a mild sweat beforehand, is a better injury prevention component.

Your post-game stretches have to be specific to target the muscles that have been stressed or overused or have a reduced range of motion. Here are some tips to ensure that you end a great day outside energized, happy and loose.

Cycling: Stretch after you get off the bike

The quads and hips are big players in cycling, used powerfully and repetitively, and stretching afterward helps combat tightness. Cycling is different from other sports in that force is primarily produced as the muscles are shortening. In cycling, the pedal stroke doesn’t use the full range of motion of the hip, knee or ankle. Running, on the other hand, bends your knees as you raise your thigh, but straightens and extends your leg to push off the ground.

Cyclists also spend a lot of time bent over in the riding position, which puts the hip flexors in a shortened position. Short, tight hip flexors add to achy hips and backs. Tight hip flexors, particularly the deep-seated psoas, can pull forward and down on the lumbar spine. When that happens, you lose an important lower back curve. No wonder your back can hurt after a long ride. Aim for post-ride hip, low-back and chest stretches. You can view those at vimeo.com/343122017.

Golfing: Get loose

Flexibility is imperative to improving your golf swing. Without flexibility, you won’t have the range of motion to unlock any of the power you already have, or are working on. Picture a golfer, at the final moment of follow-through from a fairway shot. That person is, for the most part, opened and stretched in a fluid spiral line of energy. That takes optimal range of motion in joints or groups of joints.

In just one round of golf, you end up swinging a golf club up to 300 times, including practice swings, and at speeds upward of 90 mph. That’s a lot of stress on your muscles, tendons and joints! A pre-game 5- to 10-minute warmup provides essential preparation for your game. Walking around a practice tee, leg swings or arm circles are ways to loosen up for your game. A good warm-up increases blood flow to working tissue as well as velocity of nerve impulses to muscles. It should be relatively easy, inducing a mild sweat. Stretching is recommended after your game. Click on this link for a golf-specific flexibility routine: vimeo.com/343122336.


Connie Aronson is an ACSM-certified exercise physiologist at the YMCA in Ketchum. Learn more at www.conniearonson.com.https://www.mtexpress.com/wood_river_journal/features/fitness-guru/article_6eacb7c8-9377-11e9-9a99-5301d856d0cc.html

3 Top Hip and Back Stretches- You don’t have to be sore after a workout

These 3 moves will help you recover and realign after a big day on a bike, 1/2 marathon, or strenuous hikeAll target the hips, to help extend the body upwards and undo much of the tightness of not only the hips, as well as the back, shoulders and calf muscles.

Foam rolling, or self-myofascial release can help with athletic recovery

Foam rolling, or self-myofascial release can help with athletic recovery

1.Foam Roll Quads
 
Foam Rolling is a self-myofascial release stretching technique that regenerates and rejuvenates muscles and other soft tissue affected by an overzealous day on a bike, or on the trails.There are 4 quad muscles in the upper leg, and the outer most one, the rectus femoris, when tight, pulls the spine towards the top of the leg, causing hip or back pain, or  hyper-extention of the spine in an effort to stand up straight.Place the roller perpendicular to your thigh and lie over it. Find any sore spot and hold your body weight there for a few seconds until the tissue releases. Roll each leg for one minute. ( If rolling hurts your shoulder, lie on the floor with a tennis ball )
 
A "do-anywhere" great hip, upper back and calf stretch
2. Step Back with Arm Reach
 
This integrated exercise helps realign the entire body by combining a calf and hip flexor stretch, while strengthening the muscles of the upper back and shoulders. Stand with you feet hip-width apart and take a big step back with your right leg. Simultaneously reach the right arm upward.Keep the back leg straight, heel down. Push your hip forward without arching the lower back. Instead, extend from the upper back. Hold for 2-3 seconds. 6-10 reps on both sides.
 
3. Spine Extension The majority of the muscles in the hips originate at the lumbar spine, cross the pelvis, and attach to the top of the femur. This exercise stretches the whole front body,, and spine extensors, undoing much of the forward bending of many activities, plus feels great. Place your hands, fingers pointed down, firmly on your lower back. Inhale, and extend the spine as you lift your chest. Exhale, as you return to neutral posture. Repeat 6-8 times. 
 

Stretch your low back with this standing stretch.

Stretch your low back with this standing stretch.

 
Photos by Hallie MacPherson
 

Why Yoga Works – The Top Reasons to Try It

malasana

Yoga is good for the mind, body and soul.

Yoga might be the only time in your busy day that is truly yours; a time when all of your attention is directed to exactly what you are doing. Today over 15 million people in the US know the value of doing just that-relaxing with yoga. The yoga that we practice today rises out of an ancient meditation heritage dating back at least 4,000 years. Fast forward to today’s crazy hectic pace, especially with the approach of the holiday season, the benefits to your physical, mental and emotional health are top reasons why yoga still works.

1. Stress relief. Yoga reduces stress by encouraging relaxation and lowering the levels of the stress hormone cortisol. Yoga teaches you how to breathe more fully by taking slower, deeper breaths. Known as  pranayama, breathing more fully helps improve lung function and trigger the body’s relaxation response. By changing our pattern of breathing, we can significantly affect our body’s experience and response to stress. Other benefits include reduced blood pressure, cholesterol and heart rate,  improved immune system as well as reduced anxiety, depression, fatigue, insomnia, and easier pregnancies.
2. Pain relief. Next time you have a headache, neck, back, or other chronic painful conditions, yoga can help. In the largest US study to date, published in the Archives of Internal Medicine, yoga or stretching classes were linked to diminished symptoms from chronic low back pain, more so than a self-care book. Both the yoga and stretching class emphasized the torso and legs. Researchers found that the type of yoga, called viniyoga, which adapts and modifies poses for each student, along with breathing exercises, works because the stretching and strengthening of muscles benefit back function and symptoms. Many people with chronic pain shy away from yoga’s misleading reputation for requiring supple joints for fear of getting hurt. But the same goes for approaching any new activity with too much gusto, writes Kelly McGonigal, Ph.D., in Yoga For Pain Relief . Instead of pushing yourself to your limit, think of staying in a 50-60% effort zone.

3. Better Posture & Better Bones. Yoga helps to maintain your muscularity and that helps with maintaining your posture. It also helps with stretching all the muscle groups that support better body alignment. For women, increasing research is showing that exercise is a means of preventing the risk of various cancers, particularly breast cancer. The reasons are twofold, in that both the physical effects and indirect effect of adding yoga as a form of exercise prevents weight gain.

4. Befriending Your Body. For anyone who feels ashamed or self-conscious about their body, yoga can help you become an alley with yourself instead of an adversary. Our obsession with thinness equates the physical practice as a good way to sweat/ get /thin/quick; all about the outer body. Yet yoga primarily evolved for a subtle and more powerful connection of the inner world: the mind, senses and emotions. Today 90% of all women and junior and senior high school girls, respectively, dislike their bodies and are on a diet. ( 15% of these girls are actually overweight.) It doesn’t help that classes might be packed with thin fit people. While yoga does teach you to use and discipline your body to be strong and flexible, the emphasis is on your body as a whole entity: living, changing, accepting and alive in the moment.

This article was originally published in the Idaho Mountain Express. November 16, 2012.

Connie Aronson is an American College of Sports Medicine Health & Fitness Specialist. Visit her at: www.conniearonson.com

Restorative Napping

Restorative Yoga- we could all use a little nap

We could all use a little nap. It seems that many of us just keep going until too much stress upsets our normal balance.

According to the American Psychological Association, a third of us are living with extreme stress that can lead to high blood pressure, insomnia, anxiety, heart disease and a host of other health problems. We worry, plan, over-schedule and maybe not pay enough attention to what’s going on inside ourselves. Maybe we are simply exhausted. Restorative yoga is a way to help you relax deeply for a few minutes a day. And no, it’s not an infomercial.

Here is where modern science and the ancient practice of yoga merge. B.K.S. Iyengar, author of the classic book “Light on Yoga,” first introduced props and blankets to his students who had difficulty holding specific yoga poses. He then discovered that he could help them recover from their illnesses and injuries with supported gentle yoga poses that not only stretched the spine in healthy ways but also enabled students to rest deeply in the poses.

Iyengar taught that to relax is to cut tension, and as you practice restorative poses you feel harmonious and balanced. This works by returning the nervous system to its natural state, a state in which the body has the ability to heal itself. The goal when doing the poses is to be aware and passive, not falling asleep. (The sleep state is different from the state of deep relaxation).

The Wake Forest University Baptist Medical Center studied restorative yoga and looked at its positive impact on emotional wellness in ovarian cancer patients. Imaging studies show significant increases in left-sided brain activity when one relaxes or meditates, which is associated with healing positive emotional states.

In her book “Relax and Renew,” renowned yoga teacher Judith Lasater suggested thinking of restorative poses as taking a short holiday right in your home that it adds to one’s energy rather than subtracting from it. It’s particularly helpful when you feel tired or weak, during big life-changing events, or recovering from an illness.
Race To The Top

“Twenty minutes of restorative yoga is the equivalent to a one-hour nap,” Lasater wrote.

And that’s just the energy benefits. The healing benefits abound.

Here are two simple poses to try: one at home, and the other at the office. The first one is Legs–Up-the-Wall–Pose. It refreshes your legs, especially swollen jet-lagged legs, enhances the health of your circulatory system by the mild inversion and gently calms the nervous system. (Don’t do this pose if you’re pregnant or if you have sciatica.) From a seated position on the floor, swing your legs up onto a wall, so that your tailbone and butt are not lifting off the floor. Your back should be completely supported by floor. If your chin is lifted towards the ceiling put a small pillow under your head to support your neck. Your chin should be slightly lower than your forehead, not strained. Keep your legs straight and relaxed with your arms comfortably out to the sides, palms turned up. Relax and take several long, slow breaths. Feel like your back is completely supported by the floor and your chest is open and free. Stay here for five to 10 minutes, and take your time when you come out of the pose.

The second nap is Desk Forward Bend, nice for a break at the office, at your desk. Lasater likens it to school days when she would simply lean forward and rest her head on her desk. Place your chair near your desk so you can lean forward, feet flat on the floor, and then lean forward and place your folded arms on the desk. Let the desk support your arms, head and worries, and relax completely for three to five minutes. When you’re ready to come up, inhale, and use your arms to sit up. Sit for one more long breath before carrying on with your day, refreshed.

Connie Aronson is an American College of Sports Medicine-certified, ACE Gold Level status-certified, and an IDEA Elite Level-certified personal trainer. She works at High Altitude Fitness and the YMCA in Ketchum.

Originally published in the Idaho Mountain Express – Friday, February 15, 2008