If your neck and shoulders are chronically tight, not only does it feel bad, but neck and shoulder limitations affect the biomechanics of your body.
Conversely, when you have balance and alignment in everyday life, you establish a great starting point for exercise. Rolling on balls has become an increasingly popular way to target areas of your body that are restricted and tight. Ball exercises can target areas in the neck and upper back that are otherwise not easily accessible. Using a ball specifically for these troublesome areas allows you to hit tender points and virtually melt them out of your body.
If you consider that your head weighs anywhere between 9 and 12 pounds, a forward position of the head can wreck havoc on your neck and shoulders. Consider that the weight of the head effectively doubles for every inch forward of its optimal alignment. Not only does this create neck and shoulder tension, but the position of the head and neck affects the alignment of the whole body.
Furthermore, internally-rotated arms, caused by rounded posture—a result of looking at a computer screen throughout the day—or elevated shoulders, increase the likelihood of upper back discomfort. Rolling a tennis ball along the neck and shoulders penetrates deep into the musculature, helps pull your head back into neutral and gives you gentle extension in your upper back.
Another benefit of ball rolling on your upper back is that you are creating a ball bearing between your body and the floor. This allows more extensive movement on the floor, so that your upper back will feel more spread out and relaxed.
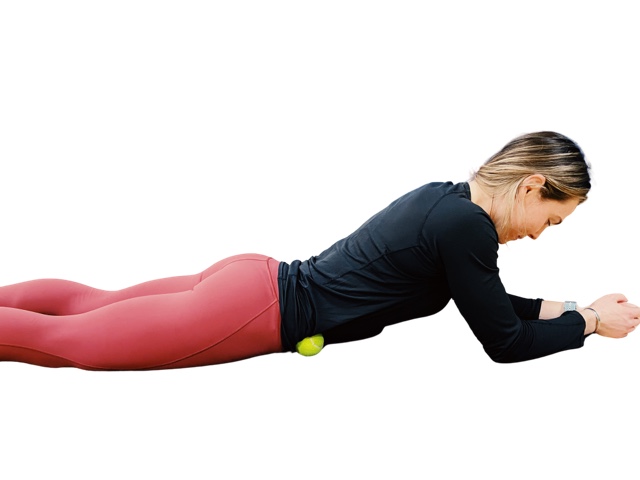
Tennis ball on the shoulder blade
Rejuvenate and mobilize the upper back and shoulder blades with tennis ball rolling. This exercise targets the muscles in the upper back that have become chronically lengthened by internally-rotated arms: the infraspinatus and teres minor and the trapezius muscles.
Lie on your back and place a tennis ball on top of your shoulder blade. Use a pillow under your neck for proper head alignment.
Hug the opposite shoulder in order to increase pressure on the ball.
Push with your feet to move the ball, finding a tender spot. Try to relax while breathing normally. Hold for 20-30 seconds.
Gently move your body up, down and sideways to find additional sore spots.
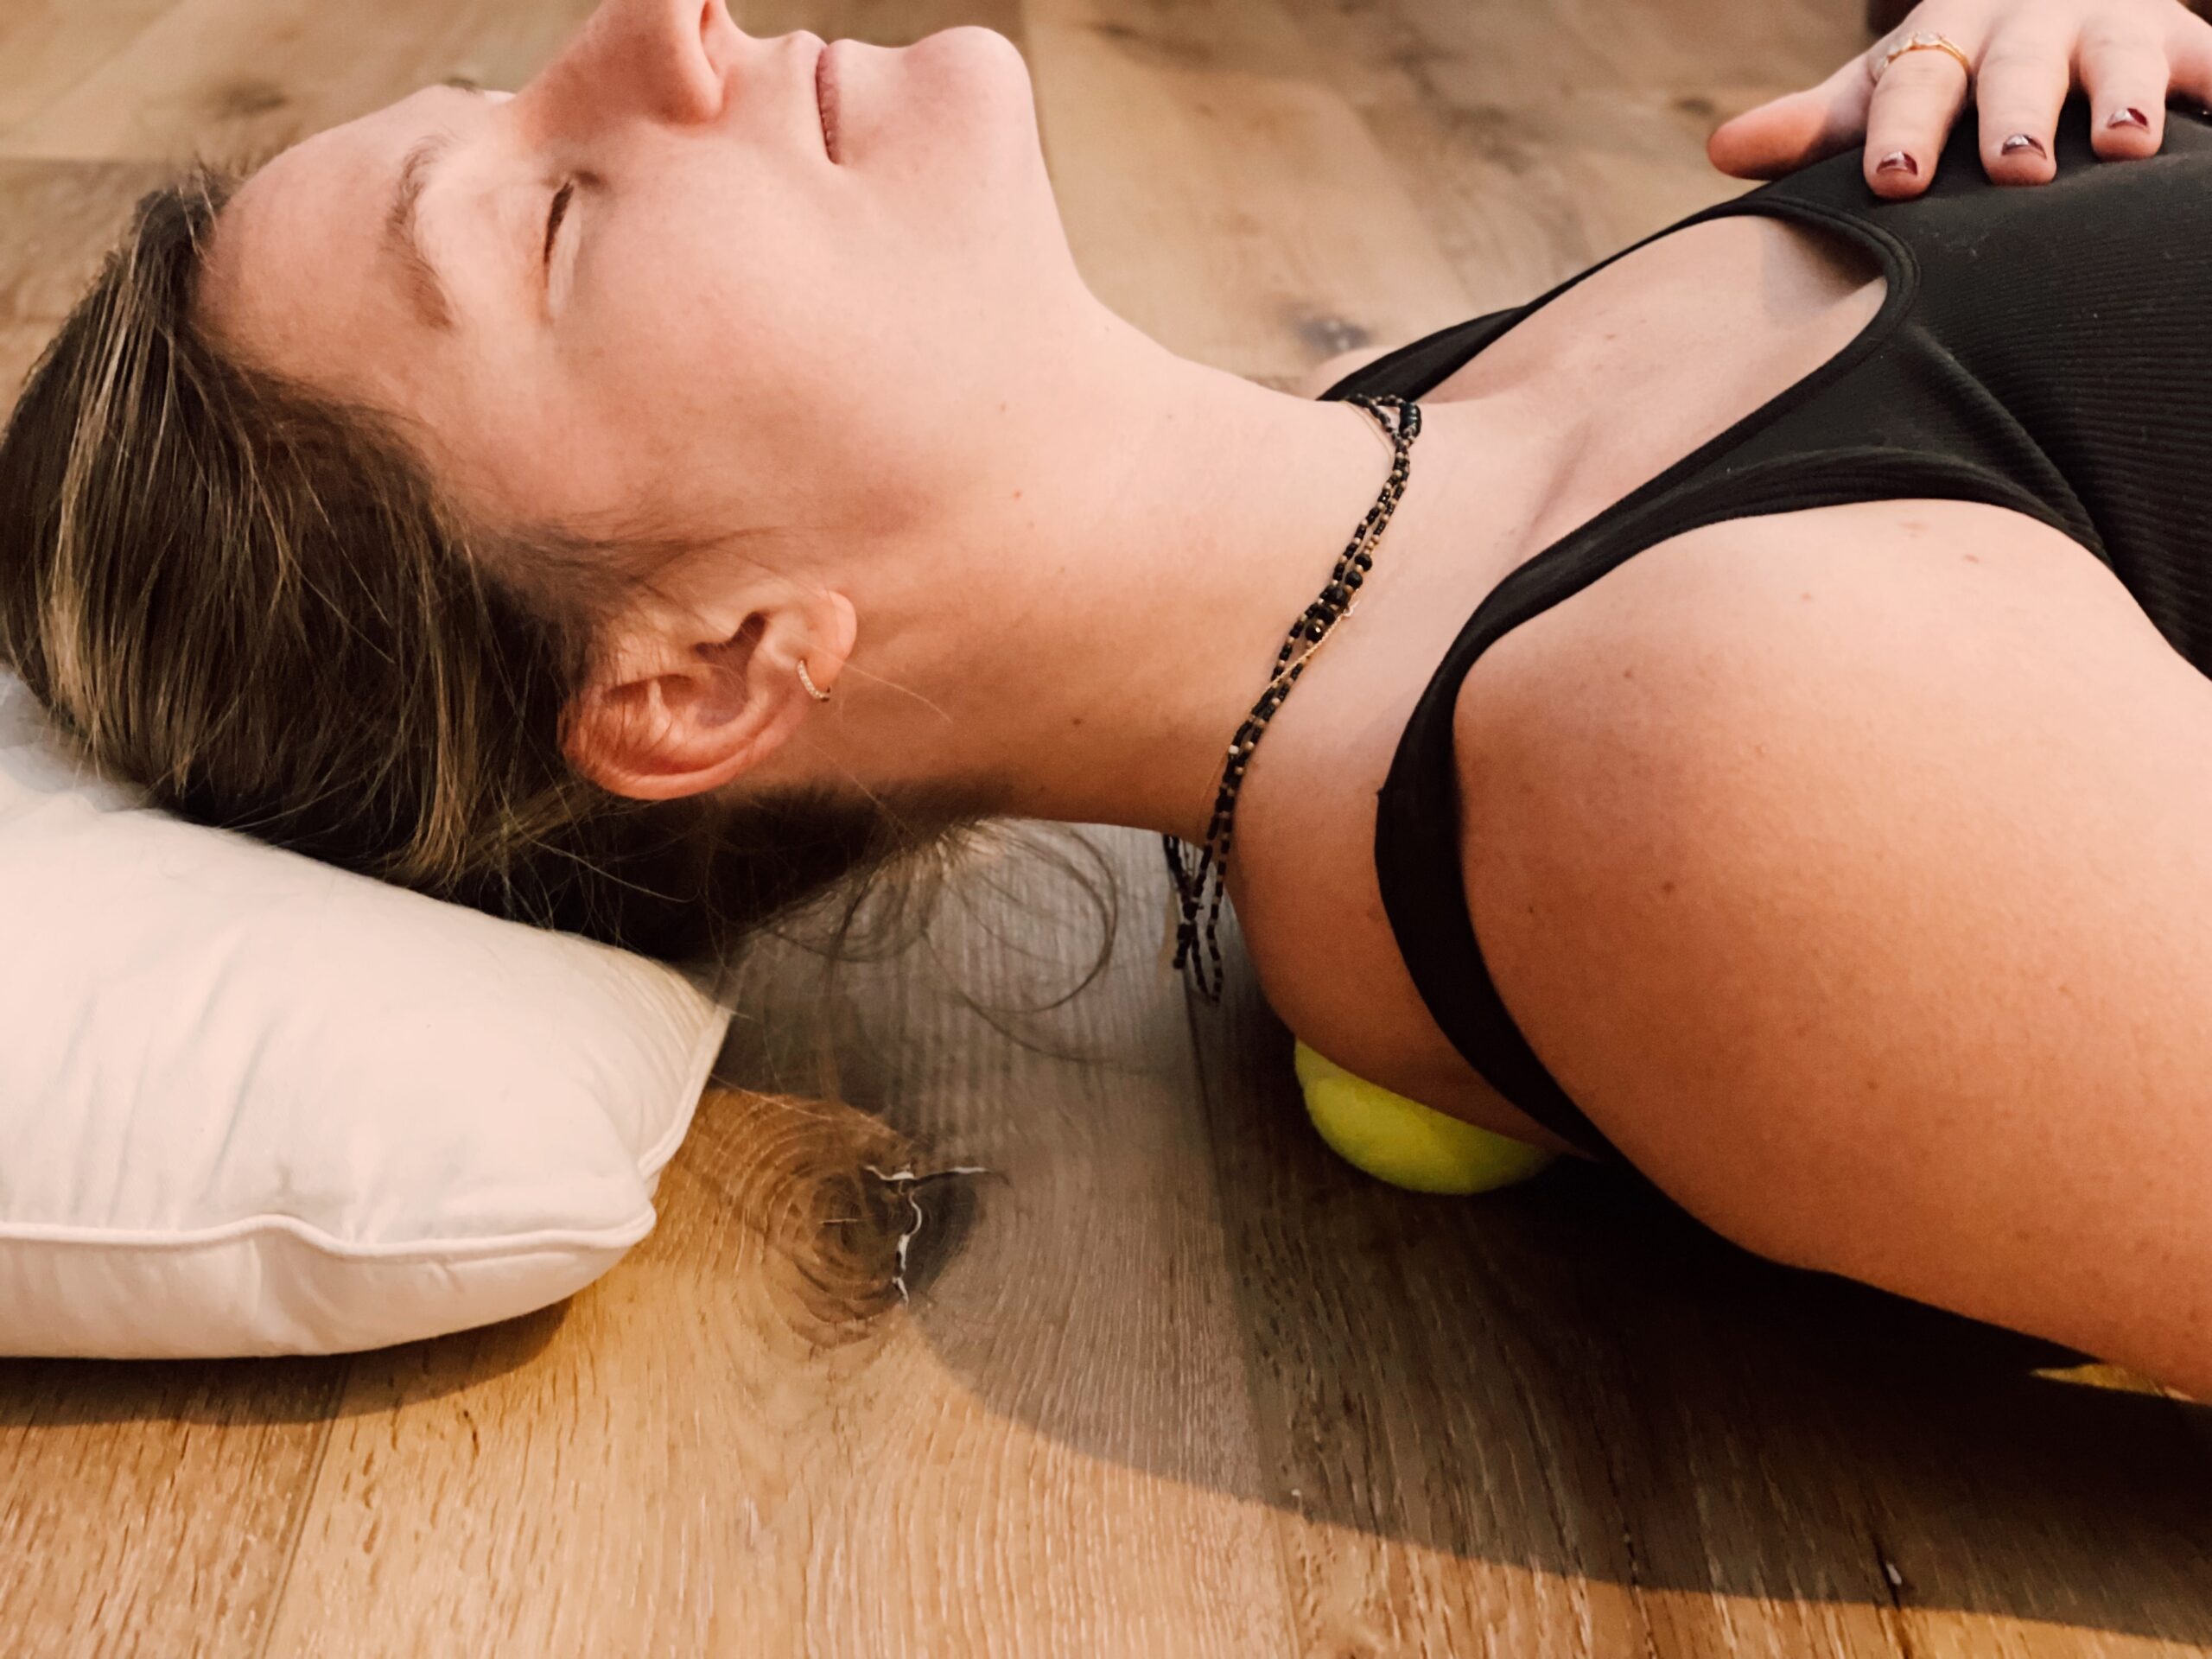
Tennis ball on the back of the neck

This exercise helps regenerate the tissues of the neck—so that the neck can flex more easily—and allows the head to move back into better alignment.
Lie on your back and place a tennis ball under your neck. Use a pillow or towels to support your head.
Apply pressure for 20-30 seconds at each sore spot, for a total of 2-3 minutes.
Next, perform the following stretch:
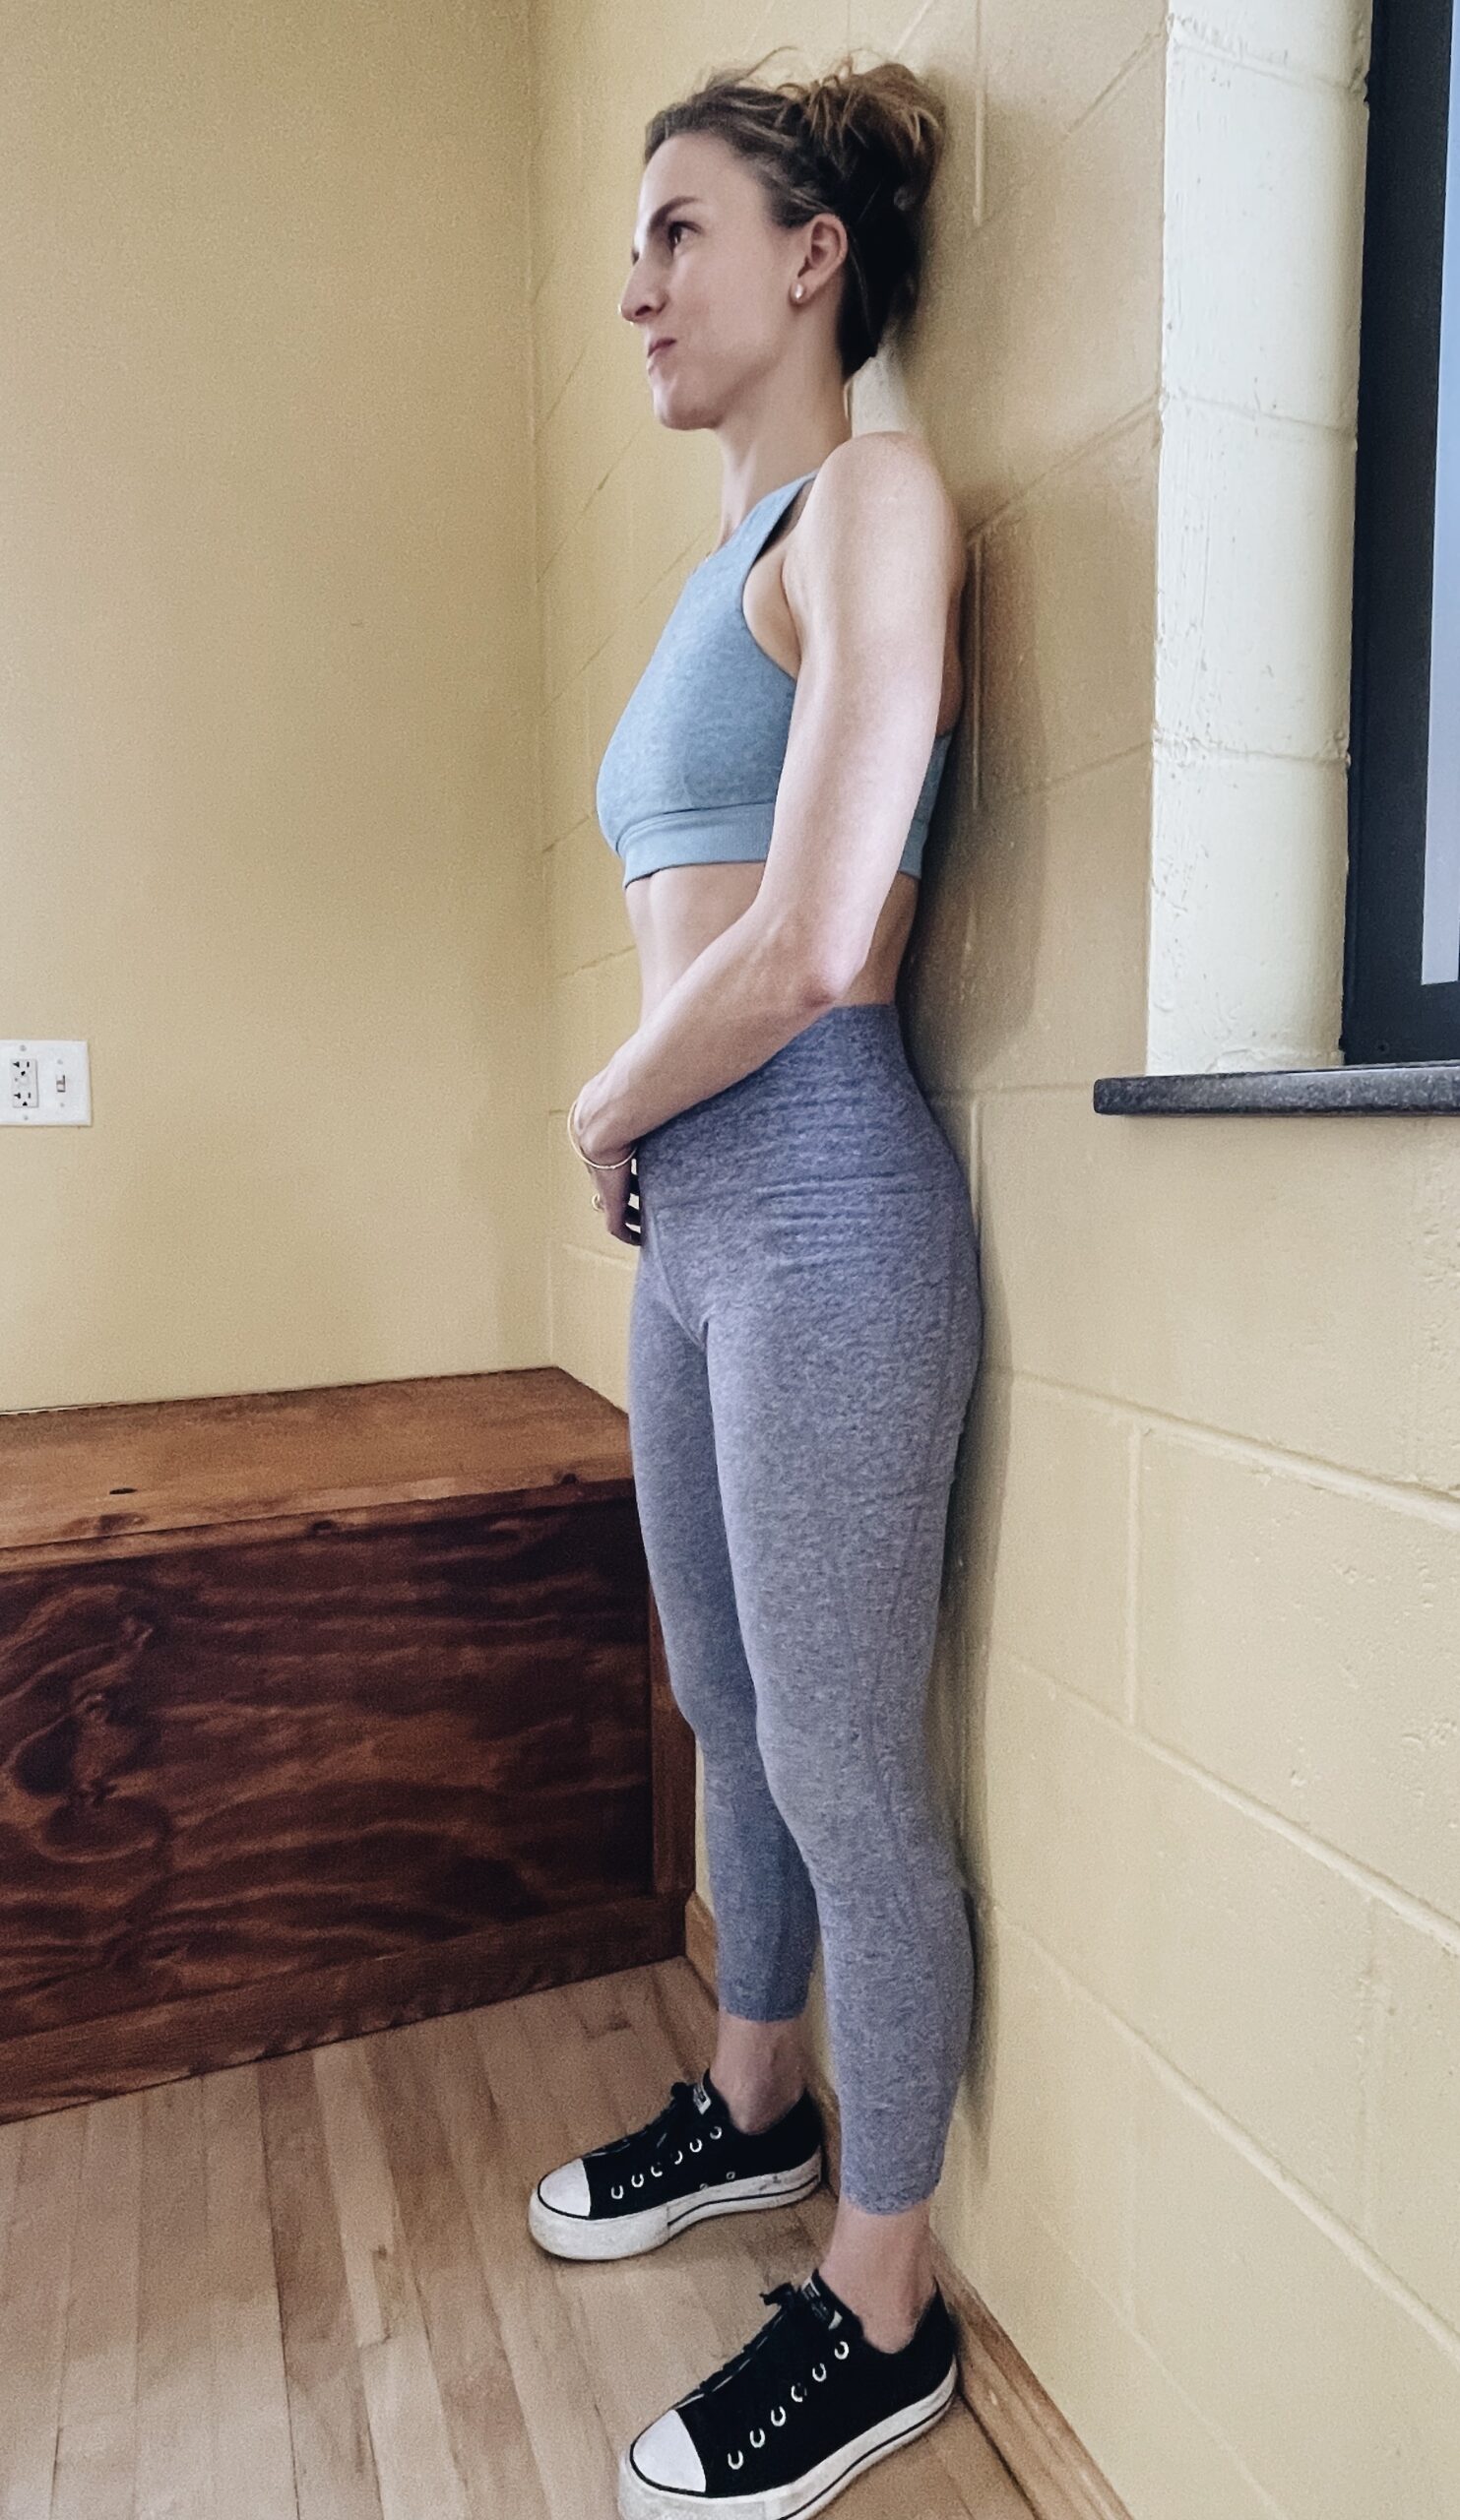
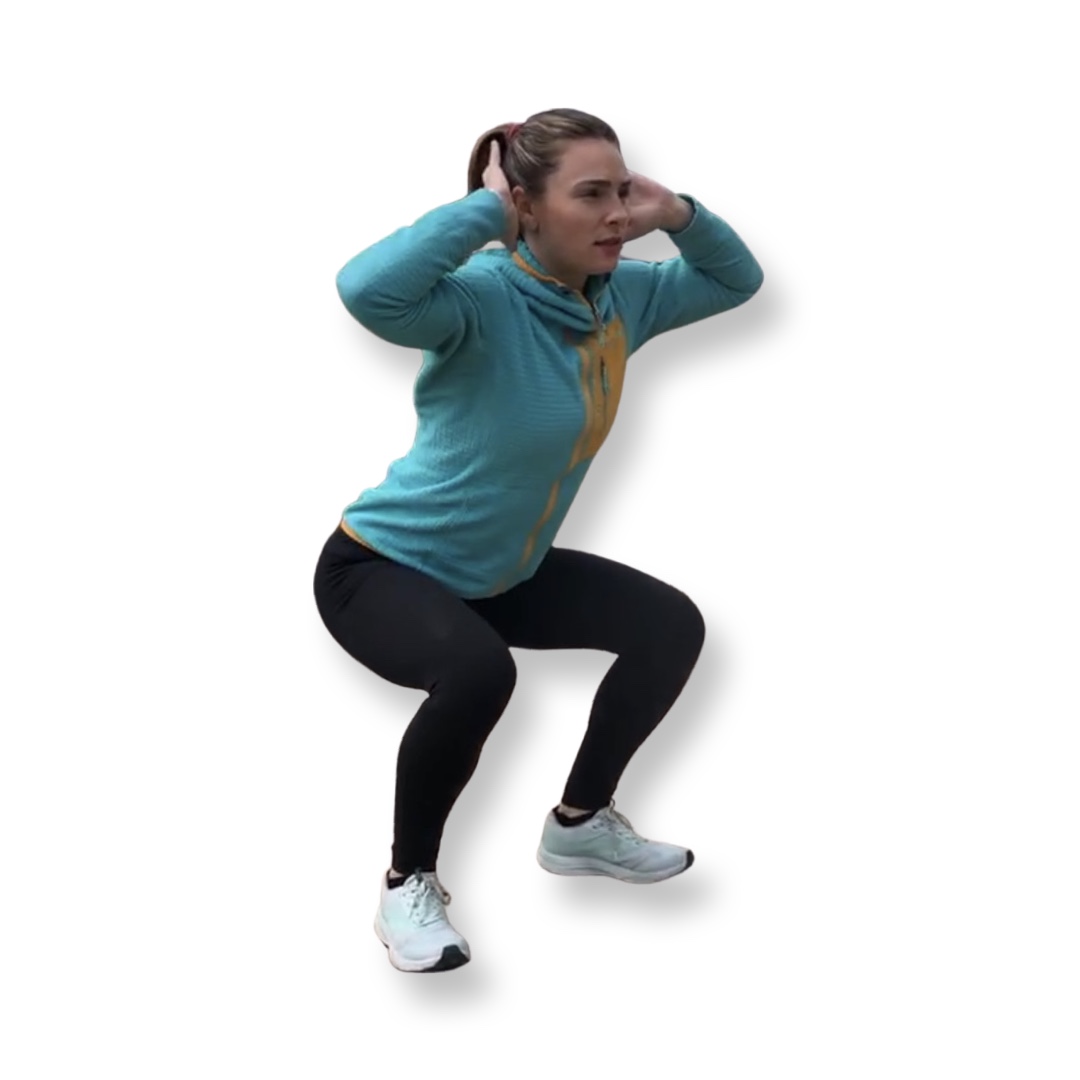
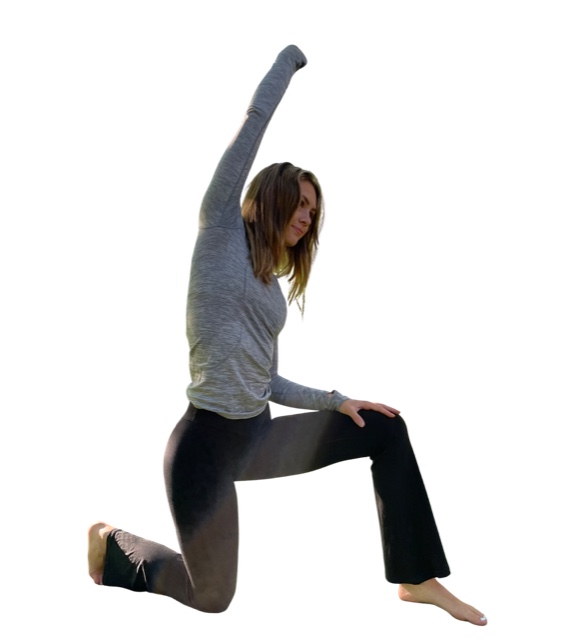
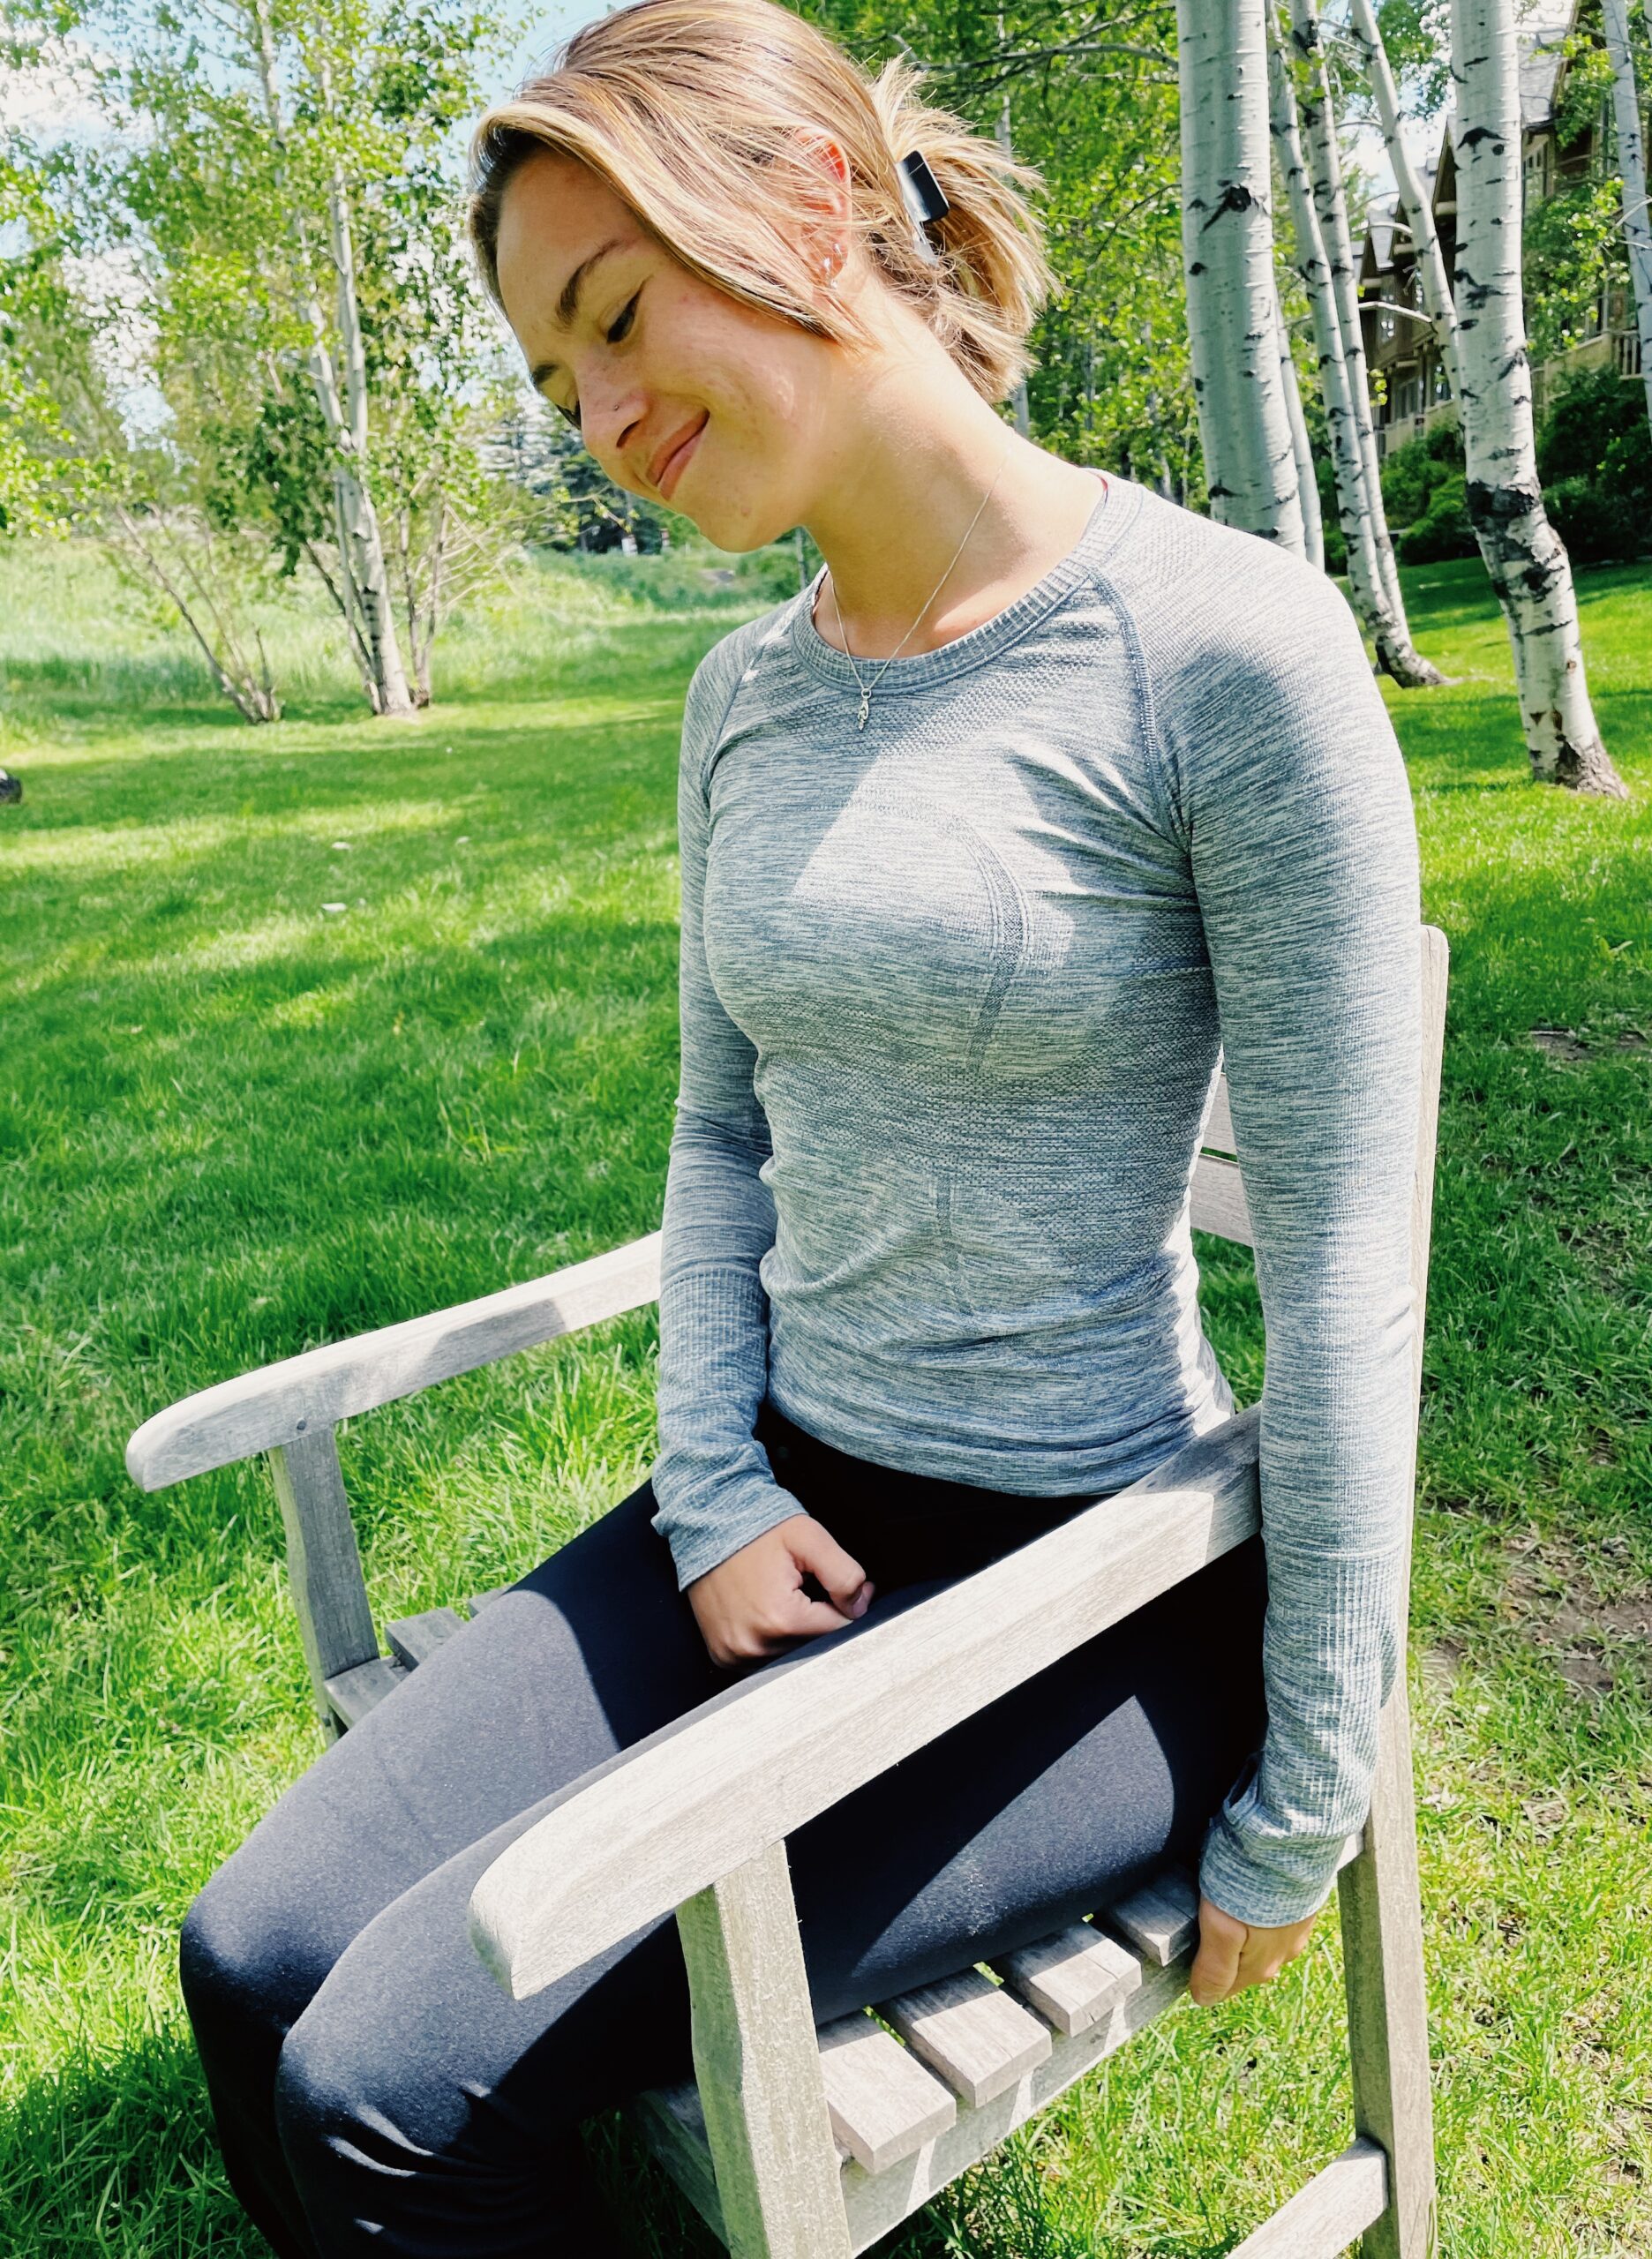
Back of neck stretch

The muscles of the neck have a natural curve to help maintain stability and maintain alignment over the body. When this curve is overstretched or exaggerated in any way, it can become quite uncomfortable. This stretch helps release tightness in the neck.
Place your hands on top of your head, keep your elbows together, and pull your shoulders down using your mid-back muscles.
Pull your chin to your chest to feel the stretch in the back of your neck and shoulders.
Hold for 20 seconds, and repeat the cycle three times.
Published in the Idaho Mountain Express Jan.5, 2024.